Administrator Setup
continued
Network Setup — IP Address Determination
(continued)
7
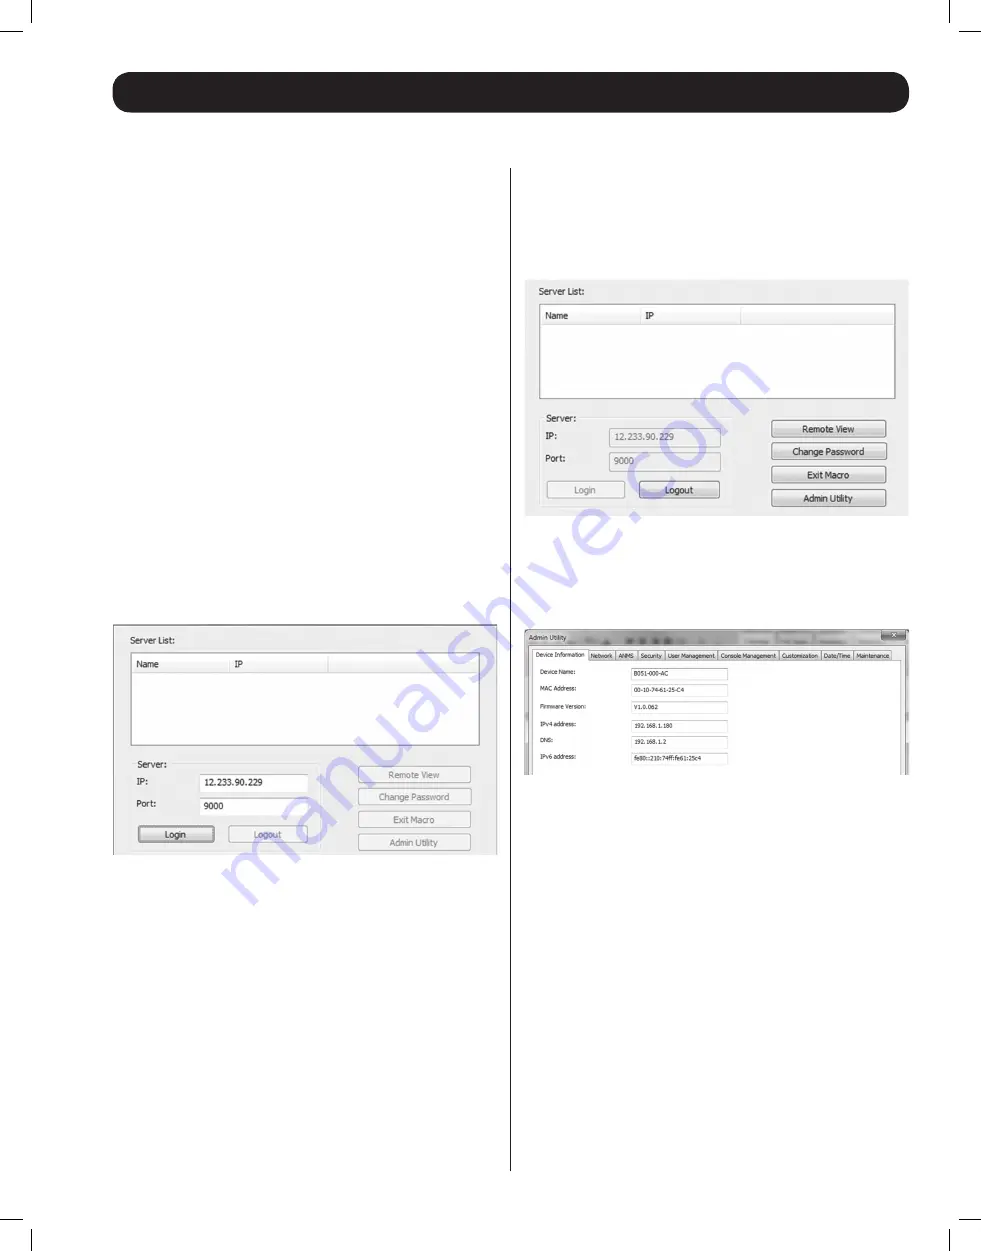
Non-Browser Client
The CD that comes with the product includes Windows and Java
Client applications that allow you to remotely access the B051-
000-AC and its Admin Utility without using a web browser. The
applications function the same, but the Windows Client is designed
for Windows computers, whereas the Java client is designed for
either Windows or non-Windows computers. When accessed from
a computer that is on the same network as the IP remote access
unit, the client will search the network for the device and display
it in a device list for you to access. If accessed from a computer
that is not on the same network as the IP remote access unit, you
must obtain the IP address from your network administrator and
manually enter it into the client. (See
Web Browser
section above
for information on obtaining the IP address.) To use the Windows
or Java client to assign a fixed IP address, follow the steps below.
1. Save the Windows or Java client from the CD to a desired location
on your computer. Double-click the file to open it.
2. When accessing the Windows Client for the first time, it will need
to be installed on your computer. Follow the installation prompts
that appear. Once installed, a Windows Client icon will appear on
your desktop.
3. When accessing either the Windows or the Java client for the first
time, you will be prompted to enter the product serial number,
which can be found on the CD that came with the unit. Once
entered, you will not be prompted for it again. The non-browser
client connection screen appears.
4. If you are on the same network as the B051-000-AC, the client
will locate it and display it in the
Device List
. In this case, highlight
the unit in the device list and click the
Login
button. If you are
not on the same network as the unit, it will not be displayed in
the list. You must manually enter the IP address in the
IP Address
field, and then click the
Login
button.
5. Upon clicking the
Login
button, you will be prompted to enter
in a Username and Password. Enter the default User Name
(
administrator
), and the default Password (
password
). The four
buttons on the right of the non-browser client main page will be
activated.
6. Click the
Admin Utility
button to open the non-browser client
Admin Utility. The non-browser Admin Utility contains most of
the features that are contained in the browser version, but it is
presented in a different format. (See the
Admin Utility
section in
the Owner’s Manual for details on the difference between the
browser and non-browser versions.)
7. Click on the Network tab at the top of the screen. From here, a
fixed IP address can be assigned in the same way as when using a
web browser. (See steps 4 through 8 in the
Web Browser
section.)
12-176 93-3159_RevC.indd 7
8/27/2012 2:48:18 PM


