6
Chapter 2 Connecting Your System
2.1 Cabling Your System
1.
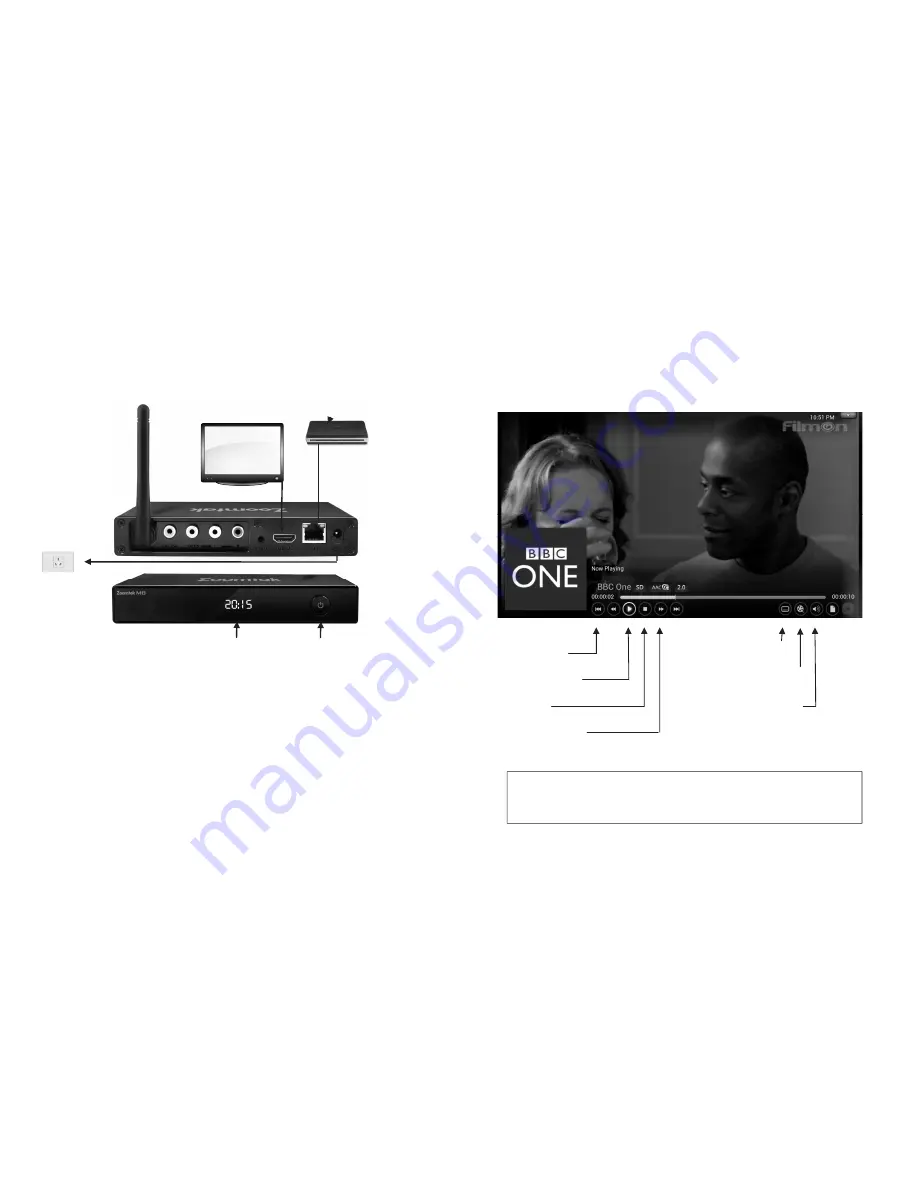
Connect the HDMI cable supplied into the interface marked HDMI on
your media unit and the other end into a HDMI socket on your TV.
2.
Connect your Ethernet cable from the media to a free port on your
router/modem.*
3.
It is highly recommended that you plug the power supply into the unit
last of all.
It is
strongly recommended
that you use an Ethernet connection rather than a
wireless connection to your router. If the cable will not reach the location of your
router, then a longer cable can be purchased, or a powerline Ethernet adapter
that will use your household electrical wiring to establish the connection can be
purchased via our website www.triotechgroup.com.
If you do decide to use a wireless connection, configuration details are given in section
2.4.
Time Display
On/Off Button
Rear View
Power
Adapter
The ports on your unit may differ in terms of location/order on the unit.
Wi-fi
Antenna
Ethernet
Network Cable
HDMI TV Connection
Router/
Modem
11
3.1 Main Playback Screen
The main video playback screen is the same regardless of which addon you are
using. This can be accessed by pressing the
MENU
button on your remote.
Here you can adjust settings such as audio offset, aspect ratio and subtitles.
Note: This is not available whilst using the FTV TV Guide.
FFWD/REWIND*
VIDEO OPTIONS
Aspect Ratio, Filters
AUDIO OPTIONS
Audio Offset, Boost
SUBTITLES
FFWD/REWIND are currently not supported for streaming
. Instead, use the
RIGHT
arrow on your remote to skip forward 10 sec, and the
UP
arrow to skip
forward 10 Mins.
This is not supported with live TV streams.
PLAY/PAUSE
STOP
SKIP TO
END/START


