14
July, 2018
GSM communicator G16T_3xxx
1.
Receive event notifications. All events will saved in the Event Log;
2.
See the current status of the alarm system and change it;
3.
On/Off G16T_3xxx OUT when „Remote Control“ is set;
4.
Invite other Users to supervise and manage the system with the desired rights.
5.
IMPORTANT: In Protegus app one PGM output can be assigned to control one Area (1 PGM - 1 Area; 2 PGM - 2 Areas)
regardless of how many areas are controlled by same keyswitch zone in panel.
6.
Set which Area will be controlled by Protegus in system "Settings". There select the checkbox "Arm/Disarm with PGM",
and the number of Area, which you want to control.
7.
In Protegus "Areas" window, you will see all areas available in the system, with controllable areas highlighted.
Additional settings for ARM/DISARM the system via keyswitch zone.
IMPORTANT:
Control panels area, to which
G16T_3xxx
output OUT is connected, must be set as keyswitch zone.
Follow the instructions below if the control panel is not directly managed, but with a G16T_3xxx PGM output switching keyswitch
zone
1.
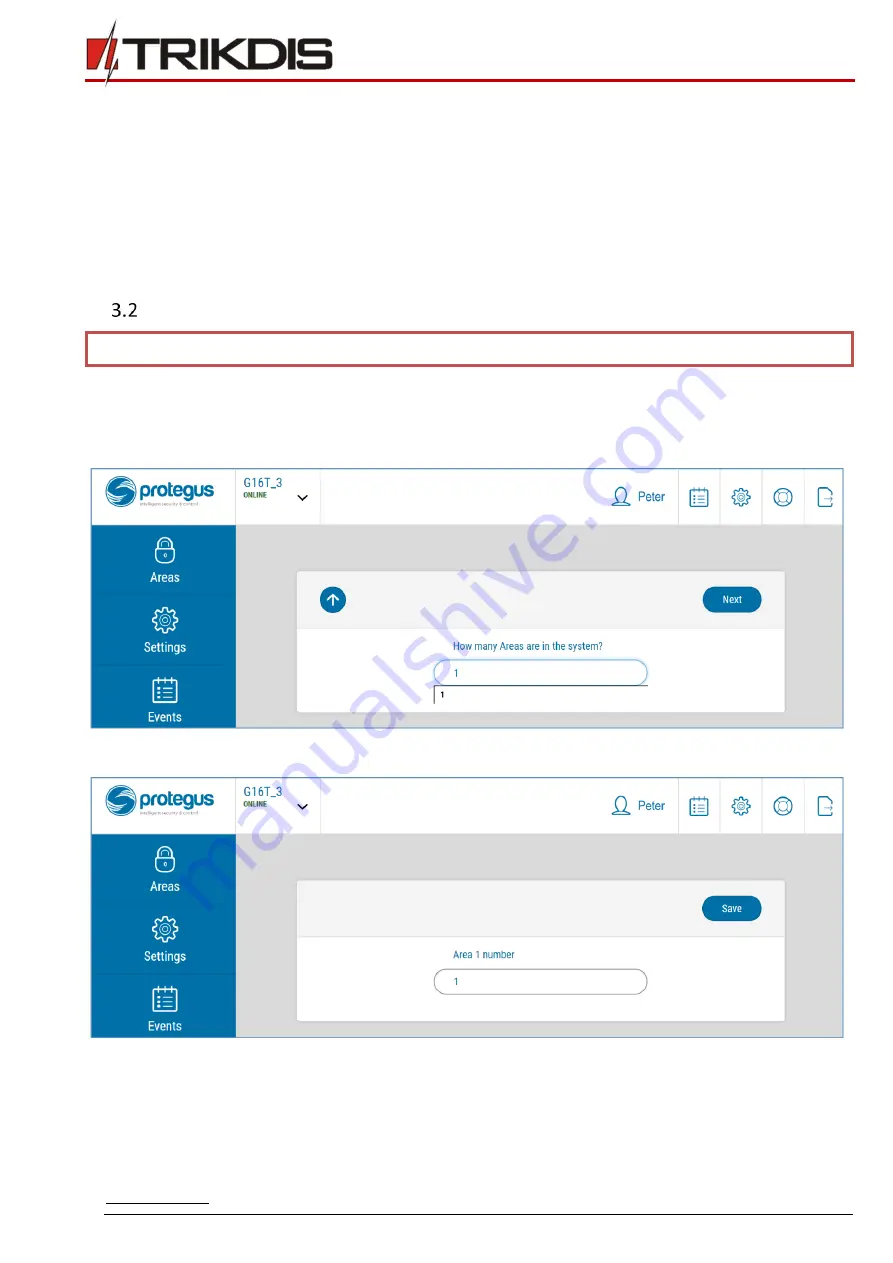
After entering the IMEI/Unique ID number, click Next. In the new window, click on the Areas in the side menu. In the
window that appears, specify how many areas (1 or 2) are in the system and press Next.
2.
In the new window, specify the number of each area in the system and click on Save.
3.
In the side menu, press Settings and in the opened window, press Settings. Check the box ARM/DISARM with PGM1 and
specify which area will be controlled with output. One PGM output can control one area (PGM 1 - Area 1, PGM 2 – Area 2).


