


The tires on your S-Maxx must be glued to the rims using CA
tire glue to prevent the rims from spinning inside the tires. You
can glue the tires without removing the wheels from the truck.
For clarity, these instructions show the process with the wheels
removed.
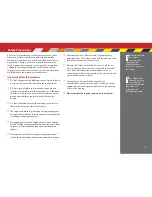
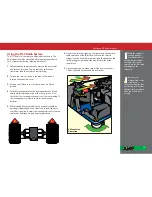
1.
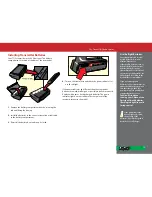
Remove a wheel from the
S-Maxx using the larger
(8mm) end of the glow plug
(universal) wrench.
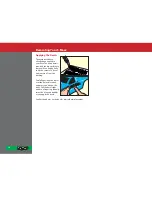
2.
Use your thumb to push the
side of the tire away from the
rim. Place one or two drops of
CA glue into the opening and
release the tire. Capillary
action will draw the glue
around the bead of the tire.
3.
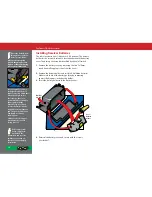
Repeat step two at four or five points around the rim, until the
tire is completely secured to the rim. Turn the rim over and
repeat the process for the inside of the rim/tire. Repeat for the
other 3 wheels.
4.
Reinstall the wheels, making
sure none of the axle pins
have fallen out from behind
the hex hubs.
Always wear safety
glasses to prevent glue
from splattering into
your eyes.
The acetone in
fingernail polish
remover will
remove excess glue from
your fingers.
For best results while
gluing, clean the bead
of the tires and the
grooves of the wheels with
denatured alcohol before
applying glue. This removes
any mold release agent
residue from the tires and
wheels, providing a better
bond.
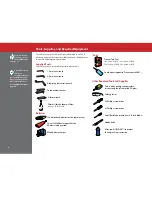
Gluing The Tires
9
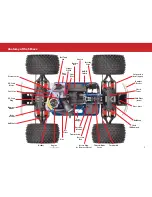
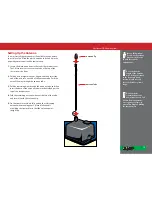
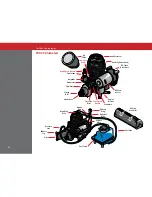
Hub
Axle Pin
Содержание S-Maxx
Страница 1: ...MODEL 5109 OWNER S MANUAL...
Страница 48: ...1 100 Klein Road Plano Texas 75074 1 888 TRAXXAS...


