

Maintaining and Storing Your S-Maxx
After-run Procedure
You must perform after-run maintenance on your Traxxas
engine whenever the model will be stored for longer than a few
hours. Taking the time to prepare your engine for storage will
reward you with longer engine life, easier starting, and better
performance.
When a nitro engine is shut off, some excess unburned fuel
remains in the engine. The methanol in model engine fuel is
hygroscopic, which means it easily attracts and absorbs
moisture. This moisture can cause rust and corrosion on the
steel engine parts (crankshaft, bearings, wrist pin and starter
shaft) if the fuel is not removed from the engine. There are after
run oil products available from your hobby dealer or you can
use WD-40
™
, a common household lubricant. To ensure your TRX
2.5 Racing Engine is protected from internal corrosion, use the
following procedure:
1.
Whenever possible, shut off the engine by pinching the fuel
line closed. This allows most of the excess fuel to be
consumed by the engine. Be sure the throttle is in the idle
position. You may have to pinch the fuel line closed for
several seconds before the engine stops.
2.
Completely empty the fuel tank. Use your fuel-dispensing
bottle to suck out the old fuel. Do not mix the old fuel with
your fresh fuel supply. If you leave fuel in the tank,
transporting or handling your S-Maxx may cause fuel to run
into the engine.
3.
With the fuel tank empty and the throttle at the idle
position, try to start the engine. The engine will most likely
start and run for a few seconds as it uses up any fuel
remaining in the engine and fuel lines.
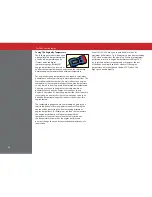
4.
Once the engine stops, clean the outside of the engine with
compressed air or spray motor cleaner. Once the engine is
clean and dry, remove the glow plug power wire, glow plug,
and air filter.
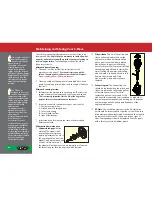
5.
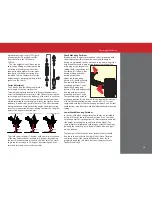
Open the throttle fully and spray a one-second burst of
WD-40 into the carburetor and into the glow plug hole
(Caution! Wear safety glasses to prevent spray from getting
into your eyes).
6.
Place a rag or paper towel over the engine to catch any
WD-40 that may come out the carburetor or glow plug hole.
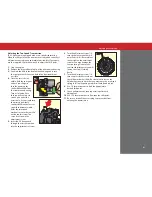
7.
Connect the EZ-Start controller to the model and spin the
engine for 10 seconds.
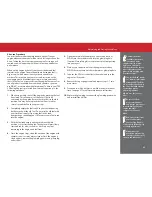
8.
Remove the rag or paper towel and repeat steps 5–7 two
more times.
9.
Clean and re-oil the air filter so it will be ready for use next
time. See page 27 for air filter maintenance instructions.
10.
Replace the glow plug, reconnect the glow plug power wire,
and reinstall the air filter.
Denatured alcohol
(available from home
centers and paint
supply stores) in a spray
bottle is an extremely
effective cleaner. Be sure to
wear safety glasses and
gloves when working with
denatured alcohol.
Fun fact: WD-40
™
stands
for “water displacement
attempt #40.” The WD-
40
™
product used today was
the successful 40th attempt
at creating a water-
displacing lubricant.
WD-40
™
was the lab test
label.
Be sure to follow
proper maintenance
and storage procedures
to avoid damage to your
engine and other
components of your S-
Maxx.
Don’t put the fuel from
your tank back into
your fuel jug. Dispose
of it properly, following city
or county regulations.
Always wear eye
protection when using
compressed air or spray
cleaners and lubricants.
45
Содержание S-Maxx
Страница 1: ...MODEL 5109 OWNER S MANUAL...
Страница 48: ...1 100 Klein Road Plano Texas 75074 1 888 TRAXXAS...


