


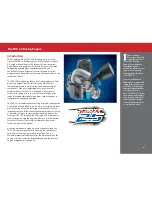


The TRX 2.5 Racing Engine
Terms to Know
You’ll find these Nitro R/C engine terms throughout this
section of the manual.
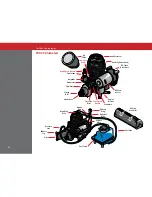
.15
- .15 or “15” refers to the size of the engine. The TRX 2.5 is .15
cubic inches or 2.5 cubic centimeters (cc). The name “TRX 2.5”
is derived from the cc measurement.
ABC
- Abbreviation for aluminum, brass, and chrome. Refers to
engine construction that consists of an aluminum piston that
slides in a chrome-plated brass sleeve. The TRX 2.5 uses ABC
construction.
Air filter
- The air filter sits atop the carburetor and prevents
harmful dust and dirt from entering the engine. Dirt ingestion
is the number one cause of premature engine failure so the
engine should never be run without the air filter in place.
Big Block .15
- A .15 (2.5) engine that uses a larger crankcase
size and longer stroke than typical .15 engines. Generally only
used for specific racing classes.
Break-in
- Break-in is the procedure for running a brand new
engine according to specific instructions. This correctly
prepares the engine for normal running. The break-in
procedure can be different for different makes of engines.
Follow the Traxxas directions for break-in exactly.
Carb
- Abbreviation for carburetor.
Carburetor
- The carburetor atomizes (mixes) the fuel with the
air so that the engine can burn it. There are two types of
carburetors, slide carbs and barrel carbs. The TRX 2.5 uses the
superior slide carburetor design.
Clean-out
- Cleaning-out is a condition that occurs when the
engine is accelerating and the fuel mixture becomes
sufficiently lean to allow the engine to continue into its upper
RPM power band. Usually characterized by a noticeable
decrease in blue exhaust smoke and a dramatic increase in
engine speed.
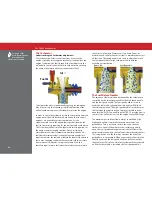
Combustion chamber
- The combustion chamber is machined
into the bottom of the cylinder head. This is where the glow
plug ignites the fuel. The shape of the combustion chamber is
designed to promote more efficient burning of the fuel.
Connecting rod
- The connecting rod transfers the piston
motion to the crankshaft. The TRX 2.5 Racing Engine uses a
“knife-edged” connecting rod. The aerodynamic, sharpened
edges allow it to “slice” through the pressurized air/fuel
mixture inside the crankcase.
Cooling fins
- The cooling fins are molded into the cylinder
head and crankcase and cause heat to be drawn away from
the engine. Heat is removed when it dissipates into the air
passing across the cooling fins. It is important to keep the fins
clean of dirt and debris for maximum cooling efficiency.
Crankcase
- The engine “body” that contains all of the running
mechanical components.
Crankshaft
- The main shaft of the engine that contains the
rotating assembly.
Cylinder head (head)
- The finned aluminum part on top of the
engine that is responsible for dissipating most of the engine’s
heat. The combustion chamber is machined into the bottom of
the head.
Dyno
- Abbreviation for dynamometer. A precise piece of
testing equipment that accurately measures engine power
and torque output over the engines entire RPM range.
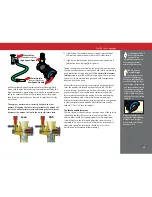
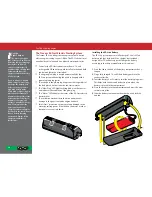
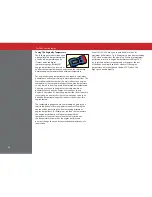
EZ-Start
- Second generation Traxxas on-board electric starting
system. The system consists of a hand held starter control unit
and an on-board gearbox with an electric motor to spin the
engine. The new EZ-Start contains many performance and
reliability improvements over the first generation EZ-Start.
Filter foam
- The oiled foam element inside the air filter
housing. The filter foam in the TRX 2.5 must be thoroughly
cleaned and re-oiled after every hour of run time.
Fit
- Usually refers to the fit of the piston and sleeve. If the fit is
tight, then the piston will feel very tight at top of the sleeve
and the engine will have good sealing and compression. If the
fit is loose, then compression will be low and the piston and
sleeve should be replaced.
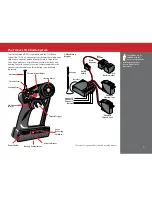
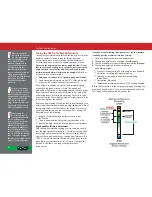
Learn terms related
to the TQ-3 Radio
System on page 12.
23
Содержание S-Maxx
Страница 1: ...MODEL 5109 OWNER S MANUAL...
Страница 48: ...1 100 Klein Road Plano Texas 75074 1 888 TRAXXAS...


