22
Finalizing the Installation
© Travis Industries
4140811
100-01340
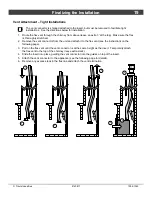
7. Slide the insert into position. Reach up through the exhaust opening to guide the connector into
place. Make sure the gasket remains in place.
8. Slide the vent connector into place, making sure it fits underneath the tab on top of the insert (see
step 3 above for additional photos). Continue to pull down on the connector until it is fully seated.
9. Re-attach the nuts removed in step 2 to secure the vent connector.
10. Replace the exhaust restrictor. Make sure it is in the correct position (see “Exhaust Restrictor” on
page 15 for details).


