Installation (for qualified installers only)
7
© Travis Industries
4140811
100-01340
Installation Warnings
Failure to follow all of the requirements may result in property damage, bodily injury, or even death.
This heater must be installed by a qualified installer who has gone through a training program
for the installation of direct vent gas appliances.
The installation must conform with local codes or, in the absence of local codes, the National
Fuel Gas Code, ANSI Z223.1/NFPA 54, or the National Gas and Propane Installation Code, CSA
B149.1.
In Manufactured or Mobile Homes must conform with Manufactured Home Construction and
Safety Standard, Title 24 CFR, Part 3280, or, when such a standard is not applicable, the
Standard for Manufactured Home Installations, ANSI/NCSBCS A225.1. This appliance may be
installed in Manufactured Housing only after the home is site located.
The heater is designed to operate on natural gas, or propane (LP).
All exhaust gases must be vented outside the structure of the living-area. Combustion air is
drawn from outside the living-area structure.
Notify your insurance company before hooking up this heater.
The requirements listed below are divided into sections. All requirements must be met
simultaneously. The order of installation is not rigid – the qualified installer should follow the
procedure best suited for the installation.
Packing List
Propane (LP) Conversion Kit
Remote
Control
"Fireplace Altered" tag (attach to the fireplace)
46” Flex Line with Adapter and Shutoff Valve
Additional Items Required
Faceplate
3" Diameter Gas Liner with Termination (Kit – sku 96200330)
Gas Line Equipment (shutoff valve, pipe, etc.)
Panel
Kit
Fireback
Kit
Media
If using LP (propane) a conversion kit is required (sku 94400999 – GSR Stepper Motor Kit).
Order of Installation
1. Run gas line to the fireplace.
2. Remove the glass frame.
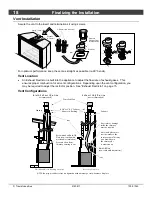
3. Run vent through fireplace chimney. On larger fireplaces, the vent connector may be left in place. For
smaller fireplaces, remove the vent connector. See “Vent Connector Removal and Installation” for details.
INSTALLATION WARNING
: If using a tall vent (over 25’) – you must open the diffuser before
attaching the vent. See “Diffuser Adjustment” for details.
INSTALL THE LIGHT SHIELD (ALL FACES EXCEPT SHADOWBOX).
The light shield (shipped
with the face) prevents light from exiting the upper grill area. Install this prior to placing the insert.
4. Place insert into position and attach the gas line and vent.
5. Remove
the
burner.
NOTE
: If using propane (LP), convert the appliance at this time.
6. Install the firebacks.
7. Replace the burner.
8. Install the media (logs, stones - see instructions included with the media).
9. Install the surround panel (see instructions included with surround panel).
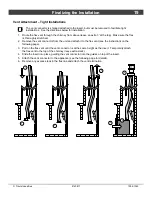
10. Follow the instructions under “Finalizing the Installation.”


