background image

TOYOTA TUNDRA  2016 

-  

TONNEAU COVER 

Procedure 


Page 6 of 11 pages 

Issue: C  04/18/2017 

DIO


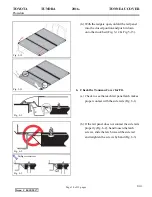
(k)


Reinstall the plugs and route the drain tubes 

through the drilled holes (Fig. 2-11). 

(l)


Skip to Step 3. 


(m)


If the vehicle has a Toyota bed liner, route 

the drain tube through the provided hole (Fig. 

2-12). 


3.


Reinstall the Factory Bed Rails onto the 
Clamp Brackets (if equipped). 

(a)


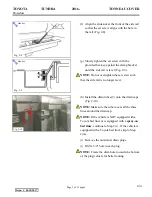
Use the factory bed rail hardware to install 

the bed rails onto the bottom holes of the 

clamp brackets (Fig. 3-1). 

(b)


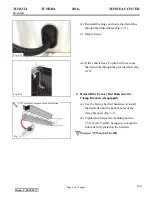
Tighten and torque the mounting bolts to 

7.5N-m (66.5 in-lbf), being sure to keep the 

side rails fully seated on the bed rails. 

Torque: 7.5 N-m (66.5 in-lbf) 


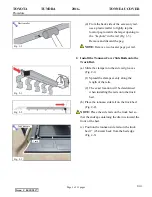
Fig. 2-11 

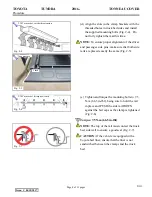
Fig. 2-12 

Fig. 3-1 

T-30 Torx socket, torque wrench & extension 

Содержание PK3B1-34H5H

Страница 1: ...lication Item Accessory 1 Bed Liner 2 Tonneau Cover 3 Accessory Rails Mandatory Recommended Tools Personal Vehicle Protection Notes Safety Glasses Wrist Belt Buckle Protection Special Tools Notes Installation Tools Notes Torx Socket T 30 Hardened 3 8 Drive Torque Wrench 200 N m 150 in lbf 3 8 Drive Ratchet 3 8 Drive Ratchet Extension Short 3 8 Drive Drill Drill Bit 3 4 dia Tape Measure Scissors Sc...

Страница 2: ... Reassembly battery disconnection connector removal etc Please see your Toyota dealer for a copy of this document 1 Prepare for the Installation a Before working on the vehicle protect the truck bed with covers b Remove the Tonneau Cover Side Rails Drain Tubes and Hardware Bag from the packaging Identify the parts and check the contents for any damage Fig 1 1 c Remove the attached user manual from...

Страница 3: ...ls onto the Truck Bed a Slide the clamps into the side rail grooves Fig 2 1 1 Spread the clamps evenly along the length of the rails 2 The exact location will be determined when installing the rails onto the truck bed b Place the tonneau side rail on the truck bed Fig 2 2 NOTE Place the side rails on the truck bed so that the endcap containing the drain is toward the front of the bed c Position th...

Страница 4: ...y the same Fig 2 5 e Tighten and torque the mounting bolts to 7 5 N m 66 5 in lbf being sure to hold the rail in place and PUSH the side rail DOWN against the bed caps as the clamp is tightened Fig 2 6 Torque 7 5 N m 66 5 in lbf NOTE The top of the rail must contact the truck bed side wall to ensure a good seal Fig 2 7 CAUTION If the vehicle is equipped with a Toyota bed liner ensure that the line...

Страница 5: ...ew such that the side rail is no longer level h Install the drain tubes 2 onto the drain caps Fig 2 10 NOTE Make sure the tube covers all the three lines around the drain cap NOTE If the vehicle is NOT equipped with a Toyota bed liner or is equipped with a spray on bed liner continue to Step 2 i If the vehicle is equipped with a Toyota bed liner skip to Step 2 m i Remove the outermost drain plugs ...

Страница 6: ...tube through the provided hole Fig 2 12 3 Reinstall the Factory Bed Rails onto the Clamp Brackets if equipped a Use the factory bed rail hardware to install the bed rails onto the bottom holes of the clamp brackets Fig 3 1 b Tighten and torque the mounting bolts to 7 5N m 66 5 in lbf being sure to keep the side rails fully seated on the bed rails Torque 7 5 N m 66 5 in lbf Fig 2 11 Fig 2 12 Fig 3 ...

Страница 7: ...d affix the seal to the bed c Use scissors to cut the foam seal at an angle to minimize the gap with the side rail cap Fig 4 2 5 Install the Tonneau Cover into the Side Rails a Unlock the latches and then lift the folded tonneau onto the side rails Fig 5 1 driver side shown NOTE Visually make sure the edge of the cover is centered between the outer and inner edges of the accessory rail on each sid...

Страница 8: ...g pins on both side rails Fig 5 3 d Attach the safety cables to the underbody rails on both the driver and passenger sides Fig 5 4 NOTE Ensure the safety cables are securely attached by checking that the spring clip is under the pin flange Fig 5 5 Repeat for the other side e Unclip the retention straps from the cab panel and carefully fold the panel forward Fig 5 6 Fig 5 3 Fig 5 4 Fig 5 5 Fig 5 6 ...

Страница 9: ...uses damage Slight misalignment can be fixed by making sure the mounting hooks in the center panel are fully seated against the retaining pins in the side rails g Press down on the cab panel to lock it in place Lift up on the panel to make sure the panel latched properly Fig 5 8 to Fig 5 10 NOTE If the front latches do not latch properly open the front panel check the alignments and try again Fig ...

Страница 10: ...ck bed Fig 5 12 Fig 5 13 6 Check the Tonneau Cover for Fit a Check to see that each tail panel latch makes proper contact with the side rails Fig 6 1 b If the tail panel does not contact the side rails properly Fig 6 2 hand loosen the latch screws slide the latch toward the side rail and retighten the screws by hand Fig 6 3 Fig 5 12 Fig 5 13 Fig 6 1 Fig 6 2 Fig 6 3 Phillips screwdriver ...

Страница 11: ...e Function Checks Tailgate latches Gap or folded lip seal to bed surfaces Rail position flat level not pitched upward or downward Proper full double latching Tonneau latches are fully engaged and aligned to side rail pins Clamp too low pulling side rail down Full engagement of rear latch wedges Both safety cables are connected Both safety cables are securely attached Liner is not sandwiched betwee...

Отзывы: