


LC2MM_OM60T13E_(GE-EE)
20.03.24 14:47
128
1. Basic operation
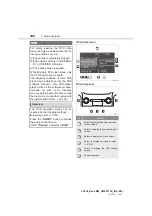
■
Control screen
■
Control panel
Quick reference
Operations such as selecting a preset
station and adjusting the sound bal-
ance are carried out on the screen.
Press the
“AUDIO”
button to display
the audio/visual screen.
*: If equipped
Function
Page
Using the radio
135
Playing an audio CD or MP3/WMA/
AAC disc
139
Playing a DVD
142
Playing a USB memory
145
Playing an iPod
150
Playing a Bluetooth
®
device
153
Using the AUX port
157
Playing the VTR
158
Using the rear seat entertainment
system*
160
Using the steering wheel audio
switches
183
Audio system settings
185
INFORMATION
●
The illustration is for left-hand drive vehi-
cles.
●
The button positions and shapes will dif-
fer for right-hand drive vehicles.
●
Also, the display and button positions
will differ depending on the type of the
system.
Содержание Land Cruiser Station Wagon 2020
Страница 1: ......
Страница 2: ......
Страница 4: ...ii LC200_Navi MM_OM60T13E_ GE 20 02 10 17 28 ...
Страница 21: ...Quick guide 1 LC200_Navi MM_OM60T13E_ GE 20 04 16 09 32 17 2 Quick reference XType 1 For Latin America XType 2 ...
Страница 34: ...LC200_Navi MM_OM60T13E_ GE 20 04 16 09 32 30 4 Function index ...
Страница 82: ...LC200_Navi MM_OM60T13E_ GE 20 04 16 09 32 78 3 Other settings ...
Страница 303: ...LC200_Navi MM_OM60T13E_ GE 20 04 16 09 33 299 1 Speech command system operation Type 2 Speech command system 5 ...
Страница 372: ...LC200_Navi MM_OM60T13E_ GE 20 04 16 09 33 368 3 What to do if Type 2 ...
Страница 384: ...LC200_Navi MM_OM60T13E_ GE 20 04 16 09 33 380 3 Setup Type 2 ...
Страница 385: ...LC200_Navi MM_OM60T13E_ GE 20 02 10 17 28 381 Index ...
Страница 397: ...LC200_Navi MM_OM60T13E_ GE 20 02 10 17 42 393 Map database information and updates ...
Страница 398: ...LC200_Navi MM_OM60T13E_ GE 20 02 10 17 42 394 Map database information and updates ...
Страница 399: ...LC200_Navi MM_OM60T13E_ GE 20 02 10 17 42 395 Certification XFor vehicles sold in St Martin Certification ...
Страница 400: ...LC200_Navi MM_OM60T13E_ GE 20 02 10 17 42 396 Certification ...
Страница 401: ...LC200_Navi MM_OM60T13E_ GE 20 02 10 17 42 397 Certification XFor vehicles sold in Dominican Republic and Bolivia ...
Страница 402: ...LC200_Navi MM_OM60T13E_ GE 20 02 10 17 42 398 Certification XFor vehicles sold in Jamaica ...
Страница 403: ...LC200_Navi MM_OM60T13E_ GE 20 02 10 17 42 399 Certification XFor vehicles sold in Paraguay ...
Страница 404: ...LC200_Navi MM_OM60T13E_ GE 20 02 10 17 42 400 Certification XFor vehicles sold in St Martin ...
Страница 405: ...LC200_Navi MM_OM60T13E_ GE 20 02 10 17 42 401 Certification XFor vehicles sold in Micronesia ...
Страница 406: ...LC200_Navi MM_OM60T13E_ GE 20 02 10 17 42 ...
Страница 428: ...LC200_Navi MM_OM60T13E_ GE EE 20 03 24 14 47 22 4 Function index ...
Страница 531: ...LC200_Navi MM_OM60T13E_ GE EE 20 03 24 14 47 125 6 Tips for the navigation system Navigation system 3 ...
Страница 620: ...LC200_Navi MM_OM60T13E_ GE EE 20 03 24 14 47 214 1 Speech command system operation ...
Страница 658: ...LC200_Navi MM_OM60T13E_ GE EE 20 03 24 14 47 252 3 What to do if ...
Страница 677: ...LC200_Navi MM_OM60T13E_ GE EE 20 03 24 14 47 271 Index ...
Страница 688: ...LC200_Navi MM_OM60T13E_ GE EE 20 03 24 14 47 282 Certification ...
Страница 689: ...LC200_Navi MM_OM60T13E_ GE EE 20 03 24 14 47 283 Certification ...
Страница 690: ......


