8
ASSEMBL
Y
/MOUNTING
MM491G
Securing Sander Base Assembly
to Workbench
Belt and disc sander must be fastened securely
to a firm supporting surface such as a wo-
rkbench.
1. Place sander in operational position on
workbench.
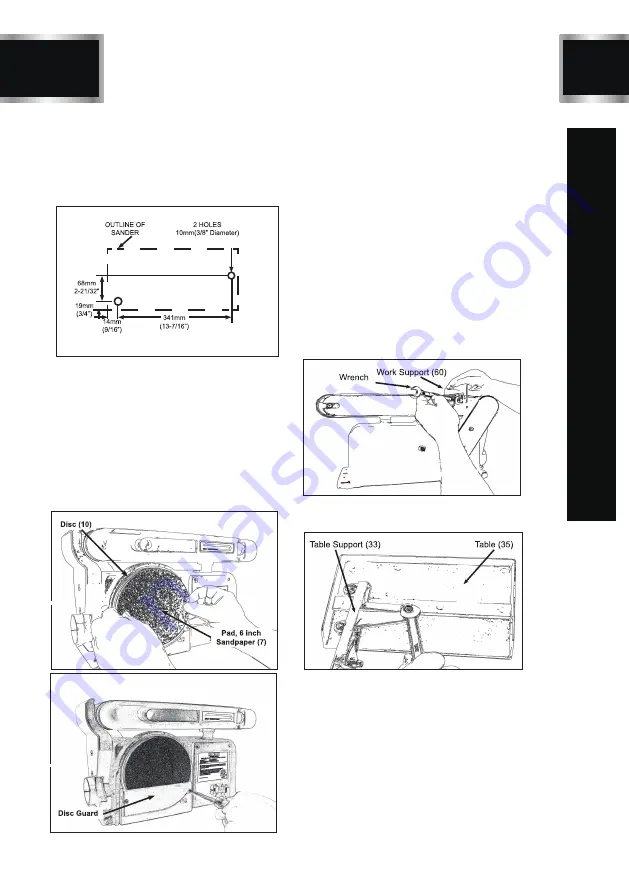
2. Place a pencil through the holes in the sander
base (42) and mark drill holes in workbench.
3. Remove sander and drill two 10mm (3/8”) dia.
holes through the workbench.
4. Align sander base over holes and secure using
two 5/16” screws and hex. nuts
Figure E
Mounting Sanding Disc and Guard
1. Locate sanding disc (7) and peel backing off
disc.
2. Align perimeter of sanding disc over plate.
When aligned, press sandpaper disc firmly
onto backing disc.
3. Position disc guard (6) onto lower portion of
sanding disc so that the mounting holes align.
4. Using a Phillips screwdriver, fasten two pan
head screws (found in parts bag) over disc
guard.
Installing Work support
1. Place work support (60) over sanding belt as
shown in following illustration.
2. Place the hex. screw (91) through the flat
washer (90)and secure. Do not over tighten.
Table Support Assembly
1. Locate the table support (33) and hex. screws
(31) and washers (32).
2. Stand table (35) on its side, aligning holes as
shown in below illustration.
3. Fasten table support to table. Do not over
tighten screws.
4. Position table support (33) in corresponding
holes on side of base as shown in below
illustration.
Содержание MM491G
Страница 2: ......
Страница 12: ...BD4603 11 MM491G OPERATIONS...
Страница 15: ...14 EXPLODED VIEW MM491G...
Страница 20: ......


