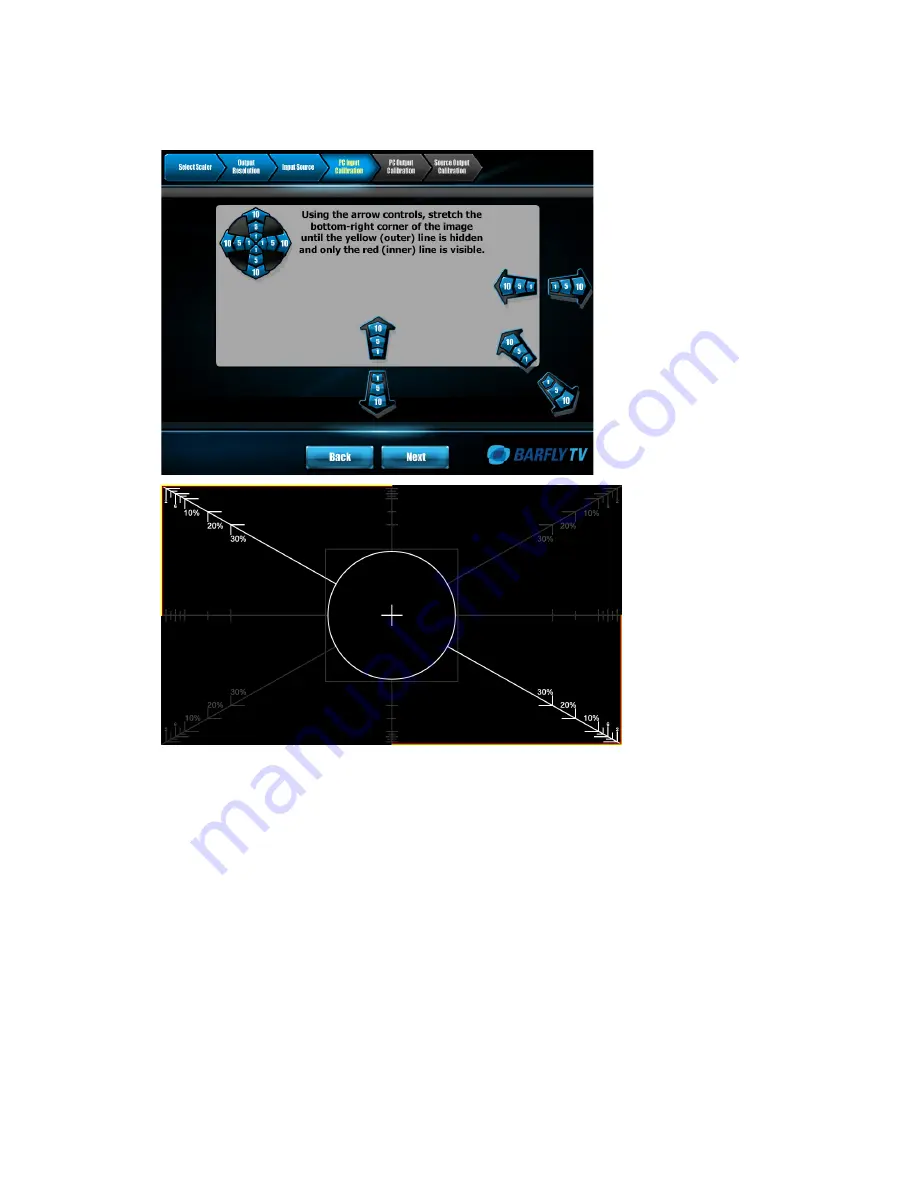
Using the Calibration Wizard
37
2. Using the arrow controls, stretch the bottom right corner of the image in such a way that
the yellow (outer) line is hidden and only the red (inner) line is visible.
Input Calibration Step 2
Note:
There is a subtle difference between the arrow buttons of the wizard. The top left
arrows, placed around a circle, actually move the whole window. This differs from the
bottom right arrows, placed along the edges of the window, which are used to scale the
viewing area.
It is normal for the colored lines to appear much smaller than your actual display
surface. This is to ensure that your calibration occurs inside of the scaling viewport, as
opposed to occurring outside of the TV’s bezel or display area.
3. Once you have completed your calibration settings, press
Next
to continue.
The Output Calibration screen displays.
Output Calibration
This step allows you to calibrate the output in such a way that the image displayed aligns
perfectly with the edges of the screen.
Содержание Barfly TV
Страница 1: ......
Страница 2: ......
Страница 4: ...ii ...
Страница 8: ...vi ...
Страница 64: ...52 ...
Страница 72: ...60 ...
Страница 82: ...70 Check connection here Computer may vary from illustration ...
Страница 83: ...General Troubleshooting 71 Check connection here 0 1 2 2 3 34 4 2 5 5 5 6 0 4 7 8 1 0 4 4 9 4 43 6 0 0 0 2 1 ...
Страница 84: ...72 9 1 2 2 9 8 5 2 0 0 5 A 2 0 8 2 2 0 0 0 B 2 C 9 2 C 0 D 2 C C 4 8 2 Computer may vary from illustration ...
Страница 85: ...General Troubleshooting 73 2 2 2 8 2 D 2 2 2 C 2 C 2 2 2 8 2 0 1 2 2 2 8 2 0 C 2 0 2 0 C ...
Страница 86: ...74 2 8 2 2 2 2 2 8 2 C 2 2 0 2 0 D E 2 ...
Страница 96: ......


