4-18
Toshiba
Disassembly and Reassembly
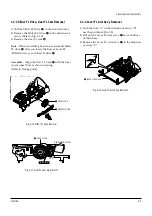
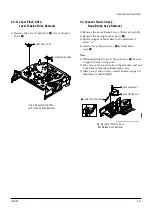
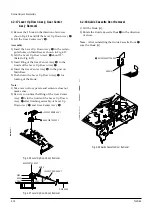
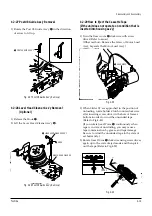
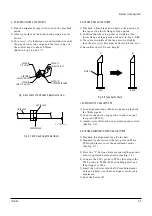
1-2-26 Damper Capstan, Motor Capstan Ass’y
Removal
1) Remove the Damper Capstan
Œ
in the direction
of arrow.
2) Remove the 3 Screws
´
.
3) Remove the Motor Capstan Ass’y
ˇ
.
Assembly
:
1) Match the 3 holes of Motor Capstan Ass’y
ˇ
to the
3 holes of Main Base. Be careful not to drop or
knock the Motor Capstan Ass'y
ˇ
.
2) Tighten the 3 Screws
´
in the direction of arrow
as shown detail drawing.
3) Assemble the Damper Capstan
Œ
.
Note
: After tightening screws, check if there is gap
between the head of screws and the top side of Main
Base. There should have no gap between the head of
screws and the top side of Main Base.
After reinstalling, adjusting the tape transport
system again.
B
C
A
´
3 SCREWS
ˇ
MOTOR CAPSTAN ASS'Y
Œ
DAMPER CAPSTAN
Fig. 4-36 Damper Capstan,Motor Capstan Ass’y Removal
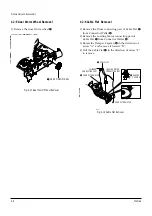
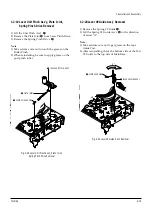
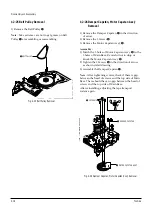
1-2-25 Belt Pulley Removal
1) Remove the Belt Pulley
Œ
.
Note
: Take extreme care not to get grease on Belt
Pulley
Œ
at assembling or reassembling.
Œ
BELT PULLEY
Fig. 4-35 Belt Pulley Removal

