background image

Operations

47

46

ON/S

TAND

BY

INPU

T

MEN

U

AUTO

SET

FAN

TEMP

LAM

P

ON

VOL.

+

VOL.

-

AUT

O

KEYS

TONE

W.BAL

ANCE

OVER

LAY

LOCK

STORE

IMAGE

ARM L

IGHT

CAME

RA

CAME

RA

GAIN

W.BALANCE

OVERLAY

LOCK

STORE
IMAGE

ARM LIGHT

CAMERA

CAMERA

GAIN

RGB picture

ON/S

TAND

BY

INPU

T

MEN

U

AUTO

SET

FAN

TEMP

LAM

P

ON

VOL.

+

VOL.

-

AUT

O

KEYS

TONE

W.BAL

ANCE

OVER

LAY

LOCK

STORE

IMAGE

ARM L

IGHT

CAME

RA

CAME

RA

GAIN

Using the document camera (Continued)

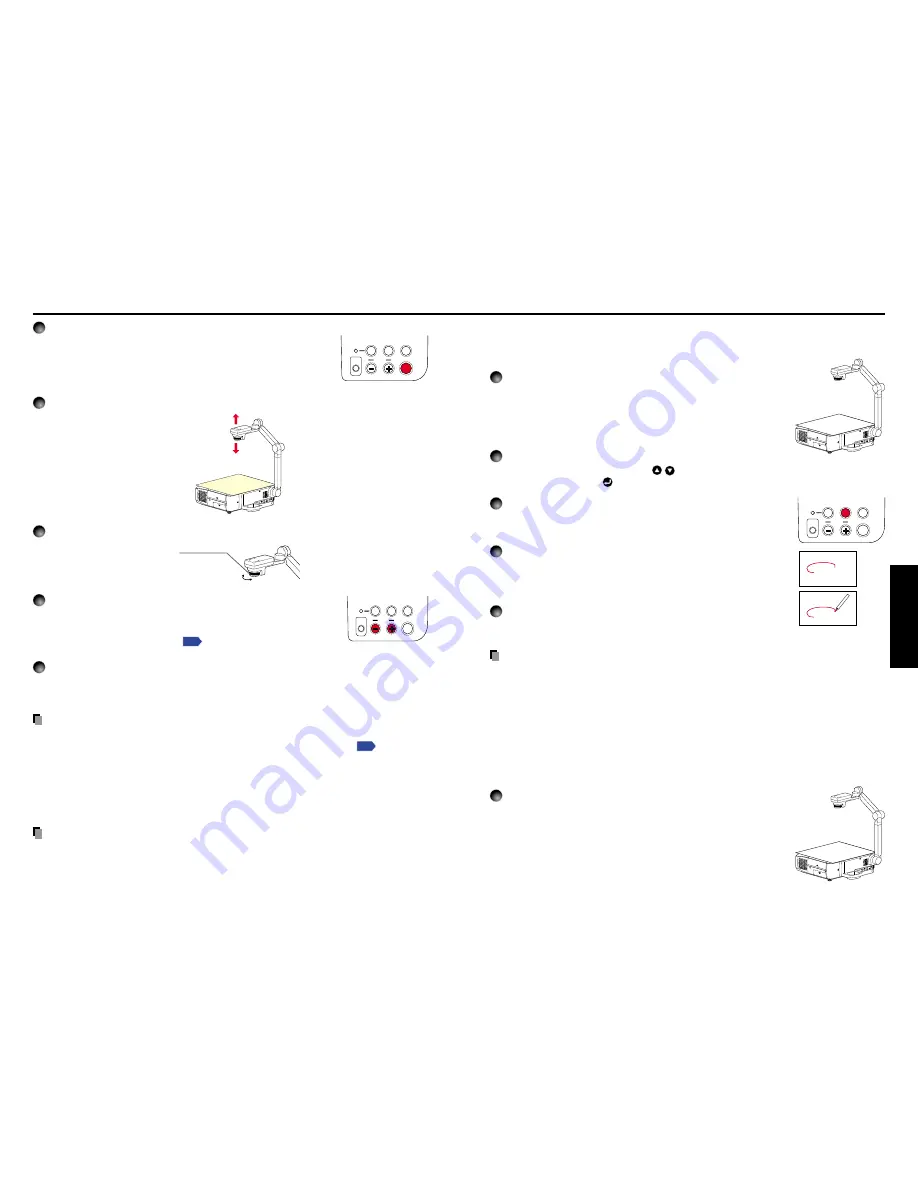
Using the overlay function

The overlay function  can be used to write over computer or video input images.
Have a piece of white paper, and a red or blue pen ready.

1

 Place the piece of white paper on a flat surface,

photograph it with the document camera, and

display it on the screen.

Adjust the camera head and arm so that the white paper fills
the screen.

2

Select the input that the overlay function is performed.

Press the INPUT button, use the 


 buttons to select an input other than 

Camera

input

, then press the 

 button.

3

Press the OVERLAY button.

The overlay function comes on.
(Press it again to turn off the function.)

4

Write on the paper with a red or blue pen.

Before writing, check the position of the pen tip on the screen.
The line written overlays the input source’s image on the
screen.

5

Use the CAMERA GAIN (+/–) button to adjust the lines

or text so that it is easiest to see.

Notes

• The writing will not be displayed properly if using colors other than blue or red.
• The writing may not be displayed properly if the pen is too fine.

Locking the white balance

Although the projector’s camera is constantly adjusting the color balance of the images
it photographs, the color balance may be disrupted, depending on the color layout of
the document, etc. If this happens, the white balance can be locked using the
procedure below.

1

Lay down a piece of white paper, and adjust so it fills

the screen.

Adjust the camera head and arm so that the white paper fills
the screen completely.

Screen

Paper

W.BALANCE

OVERLAY

LOCK

STORE
IMAGE

ARM LIGHT

CAMERA

CAMERA

GAIN

W.BALANCE

OVERLAY

LOCK

STORE
IMAGE

ARM LIGHT

CAMERA

CAMERA

GAIN

3

Press the CAMERA button, and select camera input.

• The input returns to the previous input when the CAMERA button

is pressed again.

• Camera input can also be selected by pressing the remote

control or camera’s INPUT button.

4

Move the camera head up and down to adjust the image size.

ON/S

TAND

BY

INPUT

MEN

U

AUTO

SET

FAN

TEMP

LAM

P

ON

VOL.

+

VOL.

-

AUT

O

KEYS

TONE

W.BAL

ANCE

OVER

LAY

LOCK

STORE

IMAGE

ARM L

IGHT

CAME

RA

CAME

RA

GAIN

123

5

Use the camera head’s focusing ring to adjust the focus.

6

If the screen is too dark or too bright, use the

CAMERA GAIN (+/–) buttons to make it easier to see.

The Sharpness of the camera image can also be adjusted using
the 

Image adjustment menu


p.54

.

7

After use, turn off the light, and fold up the document camera.

Fold up the camera using the opposite order from 

Preparation of the document

camera

.

PRECAUTION

• If the room’s fluorescent lighting causes the image to flicker, either turn off the

fluorescent light, or set the 

Shutter speed

 from the 

Auto setting menu


p.29

. Note that

changing the 

Shutter speed

 setting may not eliminate the flicker, depending on the

lighting, state of the document, or image adjustment.

• When arm light is used, document camera image of paper/object with reflective surface

may have bright spots. In this case, turn off the arm light and have an adequate lighting
from the room light.

Notes

• The camera light automatically goes off when the camera arm is collapsed.
• The camera will not output images when the camera arm is stowed.
• No audio is output when camera input is selected.

Closer: Larger image

Farther: Smaller image

Turn the focusing ring
to adjust the focus.

Содержание TLP-S220

Страница 1: ... PROJECTOR TLP T720 XGA High Brightness With PC Card Slot TLP T721 XGA High Brightness With PC Card Slot Document Camera TLP T620 XGA High Brightness TLP T621 XGA High Brightness With Document Camera TLP T520 XGA With PC Card Slot TLP T521 XGA With PC Card Slot Document Camera TLP T520E XGA With PC Card Slot TLP T521E XGA With PC Card Slot Document Camera TLP S220 SVGA TLP S221 SVGA With Document ...

Страница 2: ...B 003 du Canada WARNING This is a Class A product In a domestic environment this product may cause radio interference in which case the user may be required to take adequate measures CAUTION Laser beam is emitted when the laser button of the remote control is pressed Do not look from the front of the remote control Do not face toward a person or to a mirror CAUTION PLEASE READ AND OBSERVE ALL WARN...

Страница 3: ...RUCTIONS Continued 11 Object and Liquid Entry Never push objects of any kind into this product through openings as they may touch dangerous voltage points or short out parts that could result in a fire or electric shock Never spill liquid of any kind on the product 12 Do not place the product vertically Do not use the product in the upright position to project the pictures at the ceiling or any ot...

Страница 4: ...y Check Upon completion of any service or repairs to this product ask the service technician to perform safety checks to determine that the product is in proper operating condition 21 Do not leave thermal paper documents or easily deformed items on top of the unit or near the air exhaust for long periods of time The heat from the unit could erase the information on the thermal paper or cause defor...

Страница 5: ...u ever have to ship your LCD projector For maximum protection repack the set as it was originally packed at the factory Moisture Condensation Never operate this unit immediately after moving it from a cold location to a warm location When the unit is exposed to such a change in temperature moisture may condense on the crucial internal parts To prevent the unit from possible damage do not use the u...

Страница 6: ... before touching the PC card to rid your body of static electricity This PC card is a radio product Concerning the regulations applied in each country area please refer to Information to the user supplied LCD Panel The life of the LCD panel is limited Take care over the points below so as to use the panel for years To prolong the life of this panel never fail to turn the power off when the panel i...

Страница 7: ...ying a JPEG image saved on a computer via the projector 38 Operating the projector 39 Projecting images stored in a memory PC card 41 Memory PC cards 41 JPEG files 42 Projecting images stored in a memory PC card 42 CONTENTS Using the document camera 45 Preparation of the document camera 45 Image projection with the document camera 45 Using the overlay function 47 Locking the white balance 47 Corre...

Страница 8: ...es of each part on the main unit Notes 1 Included with models equipped with PC card slot except TLP T520E T521E 2 Included with models equipped with PC card slot 3 Included with models not equipped with PC card slot 4 The shape and number of power cords supplied vary depending on the product destination The Supplied CD ROM The supplied CD ROM contains an owner s manual including information omitte...

Страница 9: ...cator Lights when white balance locked p 48 5 STORE IMAGE button See note 1 Stores camera images onto a memory PC card p 51 6 CAMERA GAIN button Adjusts camera gain p 46 7 CAMERA button Switches between camera input and previous input p 46 Notes 1 Models equipped with PC card slot Names of each part on the PC card slot Models equipped with PC card slot Removing the PC card slot cover Press on the ...

Страница 10: ...nds of the batteries properly Two batteries LR03 SIZE AAA are used e Replace the battery cover 2 1 Operating the remote control Point the remote control toward the projector s infrared remote sensor and press a button on the remote control Operating the projector from the front Operating the projector from the rear Dry cell batteries Remove batteries from remote control when not using for extended...

Страница 11: ...de Functions as a down button Used to go forward on Microsoft PowerPoint slides etc PJ Mode Begins memory card slide display PC Mode Functions as an up button Used to go back on Microsoft PowerPoint slides etc PJ Mode Functions as a MENU ENTER button PC Mode Functions as the right mouse button R CLIK Pressing displays a laser pointer regardless of the mode Pressing one of these buttons automatical...

Страница 12: ...ection of the arrow Card slot cover w Insert the PC card After making sure of the card orientation press it in firmly until it stops PC Card e Replace the PC card slot cover Replace the PC card slot cover to keep dust from entering Removing a PC card q Look at CARD indicator If it is off proceed to step r UNMOUNT button CARD indicator w Press the UNMOUNT button Begins processing for PC card remova...

Страница 13: ...TO KEYSTONE MUTE AUTO SET FREEZE INPUT R CLICK PJ MODE LASER VOL VOL MENU ENTER RESIZE OFF ON STANDBY INPUT FAN TEMP LAMP ON VOL VOL AUTO KEYSTONE MENU AUTO SET Control panel Remote Control Please read this chapter if the model you purchased includes a PC card slot If you will use the wireless LAN PC card function p 33 install the application on the supplied CD ROM onto your computer System Requir...

Страница 14: ...s operation is no longer valid after the message disappears 2 Press the ON STANDBY button again The screen turns off but the internal cooling fan continues to operate for a short while Then the projector goes into standby mode When cooling lamp During internal cooling After cooling complete FAN TEMP LAMP ON FAN TEMP LAMP ON A FAN TEMP LAMP ON B C Green Green Orange Flashing Green Off Orange Off Of...

Страница 15: ...he placement angle and the height of the projected image can be adjusted by the foot adjuster q Lift up the front of the projector until it is at the desired angle then press the foot adjuster release button The foot adjuster extends Release the button to lock the position w Turn the foot adjuster to fine tune the angle e To adjust the horizontal angle use the tilt adjuster To stow the foot adjust...

Страница 16: ...garbled while the enlarged area is being moved Remote Control ON STANDBY AUTO KEYSTONE MUTE AUTO SET FREEZE INPUT R CLICK PJ MODE LASER VOL VOL MENU ENTER RESIZE OFF Remote Control q w r e ON STANDBY AUTO KEYSTONE MUTE AUTO SET FREEZE INPUT R CLICK PJ MODE LASER VOL VOL MENU ENTER RESIZE OFF ON STANDBY INPUT FAN TEMP LAMP ON VOL VOL AUTO KEYSTONE MENU AUTO SET ON STANDBY AUTO KEYSTONE MUTE AUTO SE...

Страница 17: ...yed dismisses the display Using handy features Continued Using the wireless LAN PC card Please read this chapter if the model you purchased includes a PC card slot Functions The following functions are available via wireless communications when the wireless LAN PC card and dedicated Wireless Utility software p 24 included with this projector are used Note A wireless LAN PC card except the supplied...

Страница 18: ...ommunication area it is possible that your projector name will not be displayed in the Wireless Utility projector list column In this case change the SSID to a completely different character string Channel A channel can be changed by your choice However it will be changed automatically to the other channel when the network group having the same SSID exists already in the possible communication are...

Страница 19: ...the transmitted image refresh rate depends on the performance of the computer you are using and the surrounding radio wave environment The projector screen may have a few differences from the computer screen It is not possible to transmit to a projector that is already receiving from another computer If you selected application window in step 4 if that application is not active in use the image ma...

Страница 20: ...ility s functions While it is possible to use this function merely to operate the projector closing the Wireless Utility also closes the Remote Control window Using the wireless LAN PC card Continued Displaying a JPEG image saved on a computer via the projector 1 Launch the Wireless Utility software application The Screen image transmission mode window appears on the computer s screen 2 Click on t...

Страница 21: ...rs FUJIFILM PC AD3B OLYMPUS MA 2 Compact Flash cards SanDisk SDCFB 64 505 64MB SDCFB 128 505 128MB Adapters SanDisk SDCF 31 SD memory cards Panasonic RP SD032 32MB Adapters Panasonic BN SDAAP3 The TOSHIBA IPC5019A SmartMedia PC card adapter is not ATA compliant and so cannot be used by this projector Backing up data Toshiba recommend that you back up the data on the memory PC card before use Toshi...

Страница 22: ...ould be tested before the actual presentation Projecting images stored in a memory PC card Continued Indicates that only folders are inside the folder Indicates that the JPEG or other file is not supported Indicates that there is no data to be displayed in the folder Indicates that an unsupported JPEG or other file is present Indicates a folder for files taken stored by the document camera p 51 JP...

Страница 23: ...amera and point the camera head at it Using the document camera 5 Rotate camera head Status before preparation When stowed 1 Set up arm 2 Extend arm 3 Rotate arm 4 Extend camera head 123 123 123 123 ON STANDBY INPUT MENU AUTO SET FAN TEMP LAMP ON VOL VOL AUTO KEYSTONE W BALANCE OVERLAY LOCK STORE IMAGE ARM LIGHT CAMERA CAMERA GAIN 123 Move the arm and camera head to place the document beside or be...

Страница 24: ...cedure below 1 Lay down a piece of white paper and adjust so it fills the screen Adjust the camera head and arm so that the white paper fills the screen completely Screen Paper W BALANCE OVERLAY LOCK STORE IMAGE ARM LIGHT CAMERA CAMERA GAIN W BALANCE OVERLAY LOCK STORE IMAGE ARM LIGHT CAMERA CAMERA GAIN 3 Press the CAMERA button and select camera input The input returns to the previous input when ...

Страница 25: ... W BALANCE OVERLAY LOCK STORE IMAGE ARM LIGHT CAMERA CAMERA GAIN 2 Press the W BALANCE button The LOCK indicator lights The white balance is locked The white balance returns to automatic adjustment when pressing the W BALANCE button again Then LOCK indicator goes out Notes When the white balance is locked the LOCK indicator is lit folding and extending the arm will automatically return to automati...

Страница 26: ... be reflected on a JPEG file saved on the memory PC card It is not possible to photograph resized or frozen images Saved files are saved with names in the range of pix001 jpg to pix999 jpg If there is already a file named pix999 jpg no more files can be saved The size of the file will vary depending on the image The number of files that can be saved depends on the size of the files and the capacit...

Страница 27: ... of the selected category INPUT R CLICK PJ MODE LASER VOL VOL MENU ENTER A computer can be operated using the projector s remote control This function is available on any computer with the Windows 98 98SE Windows Me Windows 2000 or Windows XP OS that is equipped with a USB port which can support USB1 1 The mouse remote control receiver is also supported on OS 9 or OS X for the Macintosh However pl...

Страница 28: ...e that cannot are marked with No Notes 1 Tint can only be adjusted when Video mode p 29 is NTSC or NTSC4 43 2 Up down shift can only be adjusted when Screen size p 55 is Wide The default setting menu This menu shows placement status and other settings Set projection mode in accordance with Placement Style Set the time to wait after signal input stops until turning off the power Off not turned off ...

Страница 29: ...cing it If the air filter is torn consult with your dealer about replacing it with a new one Continuing to use a ripped filter will allow dust and dirt to get inside the projector When the wireless LAN PC card is being used Manual Auto Switch to PC card input when the PC card is inserted Ad hoc Infrastructure See page 34 Enter setting mode Selection Apply Off 64bit 128bit Set the desired string 5 ...

Страница 30: ...ld break the lamp Used Lamps This projector s lamps contain trace amounts of environmentally harmful inorganic mercury Be careful not to break used lamps and dispose it in accordance with local regulations 2 1 Lamp cover 2 1 1 2 3 4 5 Lens cleaning Clean the lens with a commercially available blower and or lens cleaner The lens is easily scratched so do not rub it with hard objects or strike it Ma...

Страница 31: ...er From the File menu select Open and apply an existing settings file to the projector 5 Configure the projector Channel A channel can be changed by your choice However it will be changed automatically to the other channel when the network group having the same SSID exists already in the possible communication area Encryption Click on the button to select Off 64 bit or 128 bit Key This accepts inp...

Страница 32: ...hes a message appears informing you that a JPEG file has been created 7 b 7 b 6 b 6 c 6 a 3 b 3 b 3 a 4 1 2 5 7 a 1 2 5 7 a Converting files created with Microsoft PowerPoint This process provides presentations without using a computer by converting presentation files created with Microsoft PowerPoint into JPEG files storing them on a memory PC card and displaying them in a slide show To use this ...

Страница 33: ...the power cord and contact your dealer Lamp went out during use or won t come on Returns to standby after about 2 minutes If the projector fails to operate normally after turning the power back on either the lamp needs replacing or there is a problem with the projector If a lamp burns out replace it with a new one Unplug the power cord and contact your dealer Power went out during use or power won...

Страница 34: ...Picture not displayed correctly Picture blurred Part of picture out of focus Image is dark Colors too light Bad shading Remote control doesn t work Before calling service personnel Is the power cord plugged in Is it connected to the projector Is the lamp cover loose p 65 Is the ambient temperature high p 65 Is the air filter clogged p 65 Is the air intake or air exhaust blocked p 65 Is the project...

Страница 35: ...be lost or image quality may be affected Specifications List of general specifications Item Specification Consumption Power 265 W Weight TLP T720 T520 T520E 3 4 kg TLP T620 S220 3 3 kg TLP T721 T521 T521E 4 1 kg TLP T621 S221 4 0 kg Models without document imaging camera External Dimensions 298 97 249 mm W H D including protruding parts Models equipped with document imaging camera 298 97 313 mm W ...

Страница 36: ...R 1 input select IN2 Computer 2 input select IN3 Y PB PR 2 input select IN4 Video input select IN5 S video input select IN6 PC card input select IN7 Camera input select IN8 List of supported signals Y PB PR signals Signal format fh kHz fv Hz 480i 525i 60Hz 15 73 59 94 480p 525p 60Hz 31 47 59 94 576i 625i 50Hz 15 63 50 00 576p 625p 50Hz 31 25 50 00 720p 750p 60Hz 45 00 60 00 720p 750p 50Hz 37 50 50...

Страница 37: ......

Отзывы: