3
Macintosh OS X AirPort Settings
If you are using the AirPort wireless connection, first verify the PCX5000 wireless link is turned on.
Refer to the “
PCX5000
Wireless Configuration
” page in this manual.
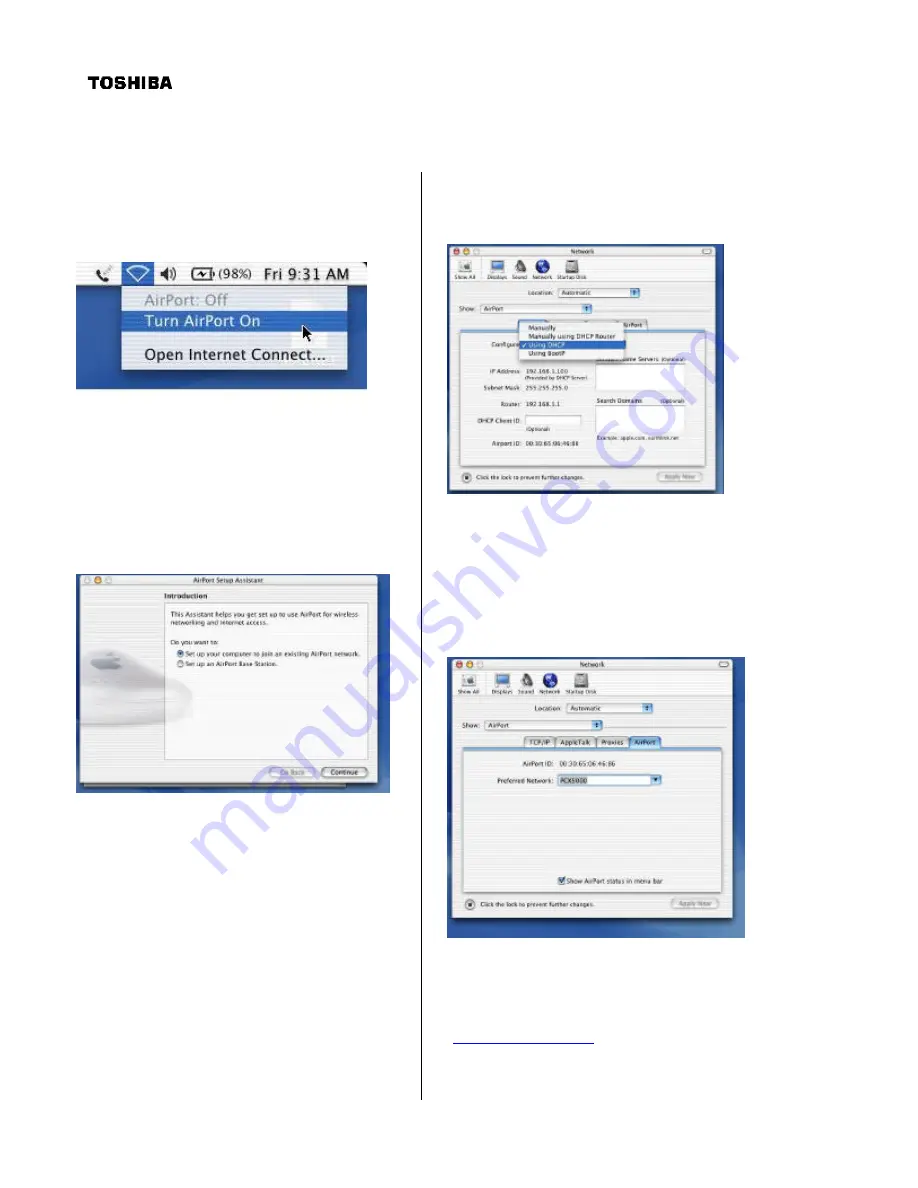
Step 1: In the Macintosh OS X toolbar (located
at the top of the desktop) select the AirPort
broadcast icon and choose “
Turn AirPort
On
”.
Step 2: At the Macintosh desktop, double click
on the “
Macintosh HD
” icon, and navigate to
the “
AirPort Setup Assistant
” icon located in
the “Applications/Utilities” folder. Launch the
“
AirPort Setup Assistant
” application by
double clicking the icon. Select “
Set up your
computer to join an existing AirPort
network
”. Press the “
Continue
” button.
The Setup Assistant will scan for nearby
802.11b wireless base stations. If the
PCX5000 is in range, it will respond with a
message announcing it has joined the
network.
If the AirPort Assistant cannot find a wireless
network, verify the Macintosh is in range of the
PCX5000 and that the PCX5000 has had the
wireless option turned on (see
PCX5000
Wireless Configuration
).
Step 3: At the Macintosh desktop, select the
Apple icon at the top right of the screen, click
on “
System Preferences
”, and select and
click on the “
Network
” icon at the top of the
panel. Then select “
AirPort
” in the
Show
choice box. Select the TCP/IP tab and select
“
Using DHCP
” in the
Configure
choice box.
Step 4: While in the Network Panel, select the
“
AirPort
” tab. Verify the Wireless Network
Name of the PCX5000 (default is “PCX5000”)
in the “
Preferred Network
:” text entry box.
The PCX5000 should be listed as one of the
available networks recognized by the AirPort
card.
Step 5: You should now be able to access the
Internet. You should immediately enable
wireless encryption. With a 10/100 Ethernet
connection, open location:
“
http://192.168.100.1
”. Proceed now to the
“
PCX5000 Wireless Configuration
” section
of this manual to set the wireless security
options.
Configuring the
PCX5000 Gateway


