Barracuda 4G USB MODEM M40/M41 - Quick Start Guide
Page 1
Thank you for purchasing the Barracuda 4G USB modem for Barracuda CloudGen Firewall that conveniently provides support for wireless broadband communication technologies. The modem supports bandwidths up to 150
Mbps downstream and 50 Mbps upstream to provide a cost effective alternative to xDSL and ISDN uplinks or failover lines.
Note:
SIM card is not included and has to be obtained independently through your internet service
provider.
Package Content:
• One USB Modem
• One USB Cable
• Two External Antennas
• Quick Start Guide
Please contact Barracuda Technical Support if any of these items is missing.
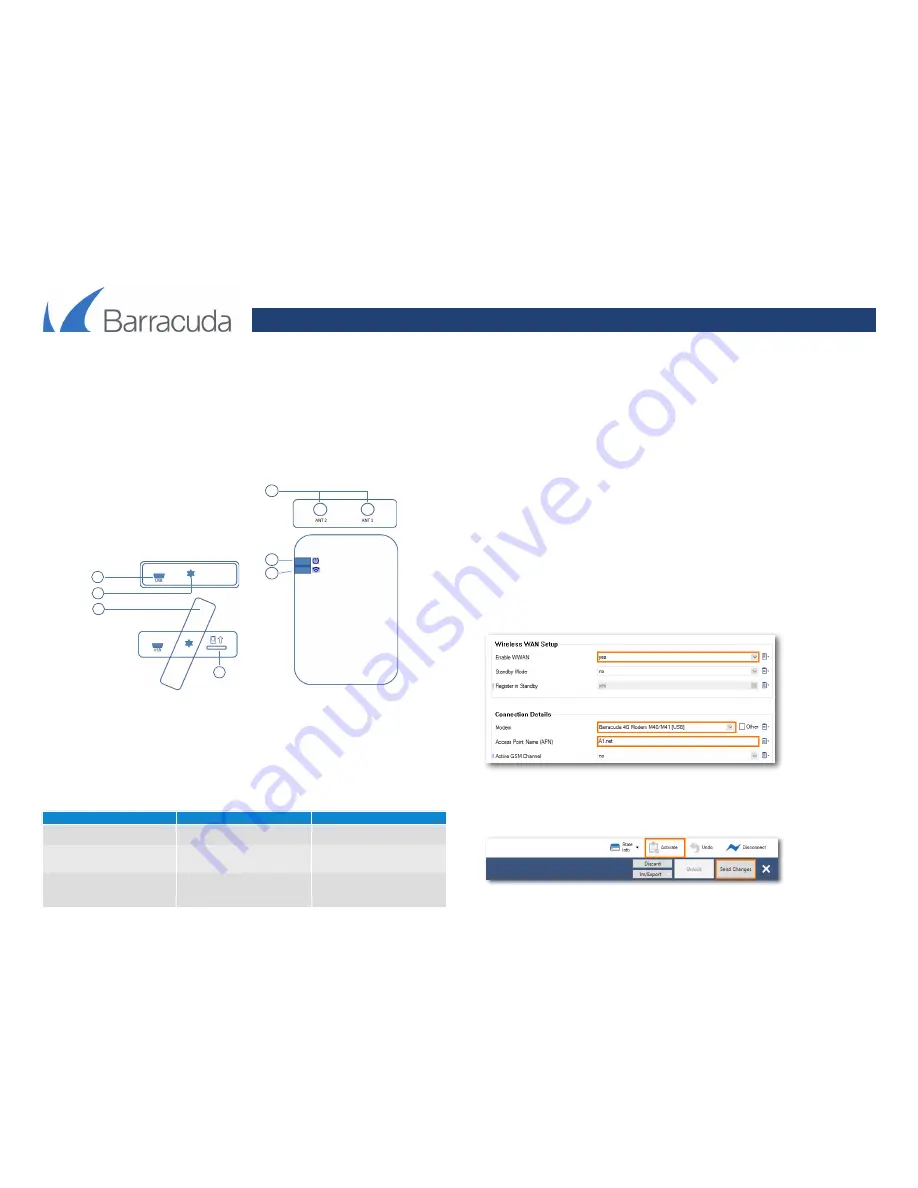
1.
USB Interface
2.
Secure screw (Torx size T9)
3.
Secure plate
4.
SIM card location
5.
SMA antenna interface
6.
Power LED (Blue)
7.
Network status LED (Green)
Status LED:
The modem is equipped with a network status LED that indicates the operational state by changing between
off, slow blinking, and fast blinking. The table below shows the different meanings of the glowing states:
Getting Started
1.
Open the secure plate with a T9 Torx screwdriver. Insert the micro SIM card as illustrated on the modem
until it gets locked. To remove the micro SIM card, carefully press on the micro SIM card until it unlocks
and slides out of the bay.
2.
Connect the modem to a free USB port on your Barracuda CloudGen Firewall by using the included USB
extension cable.
Note:
The firewall appliance needs to be powered off, as otherwise the modem driver will
not be initialized.
3.
Connect the external antennas to the ANT 1 and ANT 2 interfaces of the modem. The external antennas
are equipped with a magnetic base thus allowing for convenient placement on racks or any other metal
surfaces.
4.
Deploy the modem with a standard cap rail.
5.
Power on the Barracuda CloudGen Firewall and modify the WWAN network settings by navigating to
Configuration
>
Network
>
Wireless WAN
.
6.
Set
Enable WWAN
to
Yes
.
7.
Select the
Modem
type.
8.
Enter the
Access Point Name
of the provider (available from the provider).
9.
Enter the
SIM PIN
number (if PIN needed).
10.
Enter the
Phone Number
for dial-in (available from the provider).
11.
To activate the configuration, click
Send Changes
followed by
Activate
.
1
2
3
4
5
6
7
LED
State/Cycle Output
Meaning
OFF
OFF
GREEN
ON - 100ms
OFF - 2s
Registered 2G network
GREEN
ON - OFF
50ms; 2 times
OFF - 2s
Registered 3G/4G network


