


Remote controller with weekly timer
Owner’s Manual
– 24 –
8
SELECTING THE REMOTE CONTROLLER
FUNCTIONS
• Change the settings of the remote
controller functions as required by taking
the steps below.
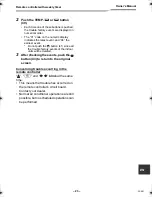
How to change the remote controller
functions
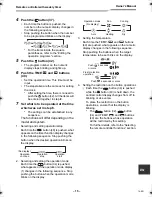
1
While operation is shut down, push
the button (43) and
button (48)
together for at least 4 seconds.
• The numeric displays and
display
blink, and the fixed louvers display lights.
2
Push the TEMP.
and
buttons
(49).
• Repeatedly push the buttons until the
setting to be changed blinks on the display.
3
Push the TIME
and
buttons
(40).
• Repeatedly push the buttons until the
setting to be changed blinks on the display.
4
Push the button (42). Then push
the button (43) to return to the
original screen.
• When the
button (42) is pushed, the
numeric displays and
display stop
blinking and light up, and when the
button (43) is pushed again, they go off.
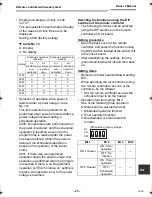
Items to be set
• 24-hour/12-hour display setting <code
No.10>
– The 24-hour display or 12-hour (AM/
PM) display can be selected for the
clock which is displayed on the remote
controller.
– This item’s selection is also reflected on
the clock displayed on the clock setting
screen and program input screen.
• Restriction on button operations <code
No.12>
This item sets the range of the restriction
placed on the button operations which can
be applied while scheduled operations are
being performed.
Setting: 0000 (factory setting)
▼
Code No.12
O: Can be operated.
X: Cannot be operated.
SETTING
SETTING
Setting Description
0000:
24-hour display (factory
setting)
0001:
12-hour (AM/PM) display
Setting
[ON/OFF]
[MODE]
[TEMP.]
0000
O
O
O
0001
X
O
X
0002
X
X
X
0003
O
X
X
0004
O
X
O
23-EN
+00EH99677901_01EN_OM_Remo_Weekly_UL.book Page 24 Thursday, October 8, 2009 2:03 PM
Содержание Carrier RBC-AMS41UL
Страница 26: ...EH99677901 ...


