7.
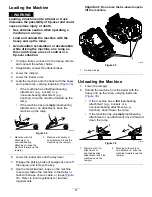
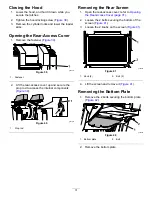
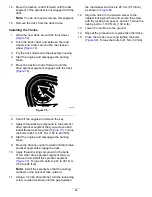
Loosen the 3 bolts securing the battery tray and
remove the tray with the battery (
8.
Remove the wing nut and rod.
9.
Remove the battery.
Charging the Battery
WARNING
Charging the battery produces gasses that
can explode.
Never smoke near the battery and keep sparks
and flames away from battery.
Important:
Always keep the battery fully charged
(1.265 specific gravity). This is especially
important to prevent battery damage when the
temperature is below 0°C (32°F).
1.
Remove the battery from the machine; refer to
Removing the Battery (page 39)
.
2.
Charge the battery for 4 to 8 hours at a rate of
3 to 4 A (
). Do not overcharge the
battery.
g003792
Figure 62
1.
Positive battery post
3.
Red (+) charger lead
2.
Negative battery post
4.
Black (-) charger lead
3.
When the battery is fully charged, unplug
the charger from the electrical outlet, then
disconnect the charger leads from the battery
posts (
Cleaning the Battery
Note:
Keep the terminals and the entire battery case
clean, because a dirty battery discharges slowly.
1.
Park the machine on a level surface, engage
the parking brake (if equipped), and lower the
loader arms.
2.
Shut off the engine and remove the key.
3.
Remove the battery from the machine;
Removing the Battery (page 39)
.
4.
Wash the entire case with a solution of baking
soda and water.
5.
Rinse the battery with clear water.
6.
Coat the battery posts and cable connectors with
Grafo 112X (skin-over) grease (Toro Part No.
505-47) or petroleum jelly to prevent corrosion.
7.
Install the battery; refer to
(page 40)
.
Installing the Battery
1.
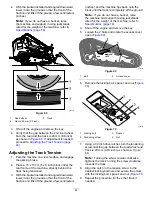
Place the battery on the battery tray and secure
it with the wing nut and rod (
2.
Install the battery tray to the machine and secure
with the 3 bolts (
). Torque the bolts to
41 N∙m (30 ft-lb).
3.
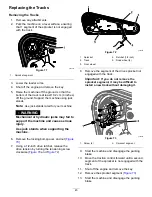
Using the fasteners previously removed, install
the positive (red) battery cable to the positive (+)
battery terminal (
).
4.
Slide the red terminal boot onto the positive
battery post.
5.
Using the fasteners previously removed, install
the negative (black) battery cable to the negative
(-) battery terminal (
6.
Install the rear screen.
Servicing a Replacement Battery
The original battery is maintenance-free and does not
require service. For servicing a replacement battery,
refer to the battery manufacturer’s instructions.
Jump-Starting the Machine
WARNING
Jump-starting the battery can produce gasses
that can explode.
Do not smoke near the battery, and keep
sparks and flames away from battery.
1.
Open the rear-access cover; refer to
the Rear-Access Cover (page 31)
.
2.
Remove the rear screen; refer to
Rear Screen (page 31)
.
3.
Check and clean corrosion from the battery
terminals before jump-starting. Ensure that the
connections are tight.
40


