Belt Maintenance
Adjusting the Belts
Service Interval:
Every 300 hours—Check the
condition and tension of belts.
Ensure that the belts are properly tensioned to ensure
proper operation of the machine and unnecessary wear.
Check belts frequently.
Adjusting the Reel Drive Belt
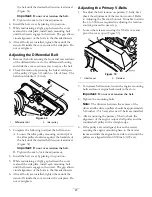
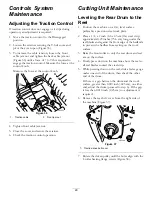
1. Remove the belt cover mounting fasteners and belt
cover to expose the belt (Figure 28).
Figure 28
1.
Belt cover
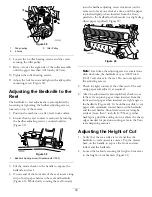
2. Check the tension by pressing the belt at mid span
of the pulleys (Figure 29) with 4 to 5 lb of force. The
belt should deflect 1/4 inch.
Figure 29
1.
Reel drive belt
2.
Idler pulley
3. Complete the following to adjust the belt tension:
A. Loosen the idler pulley mounting nut and pivot
the idler pulley clockwise against the backside of
the belt until you attain the desired belt tension
(Figure 29).
Important:
Do not over tension the belt.
B. Tighten the nut to lock the adjustment.
4. Install the belt cover by placing it in position.
5. While maintaining a slight gap between the cover
seal and the side plate, install each mounting bolt
until the threads engage in the insert. The gap allows
visual alignment of the bolts to the threaded inserts.
6. After all bolts are installed, tighten them until the
stand-offs inside the cover contact the side plate. Do
not overtighten.
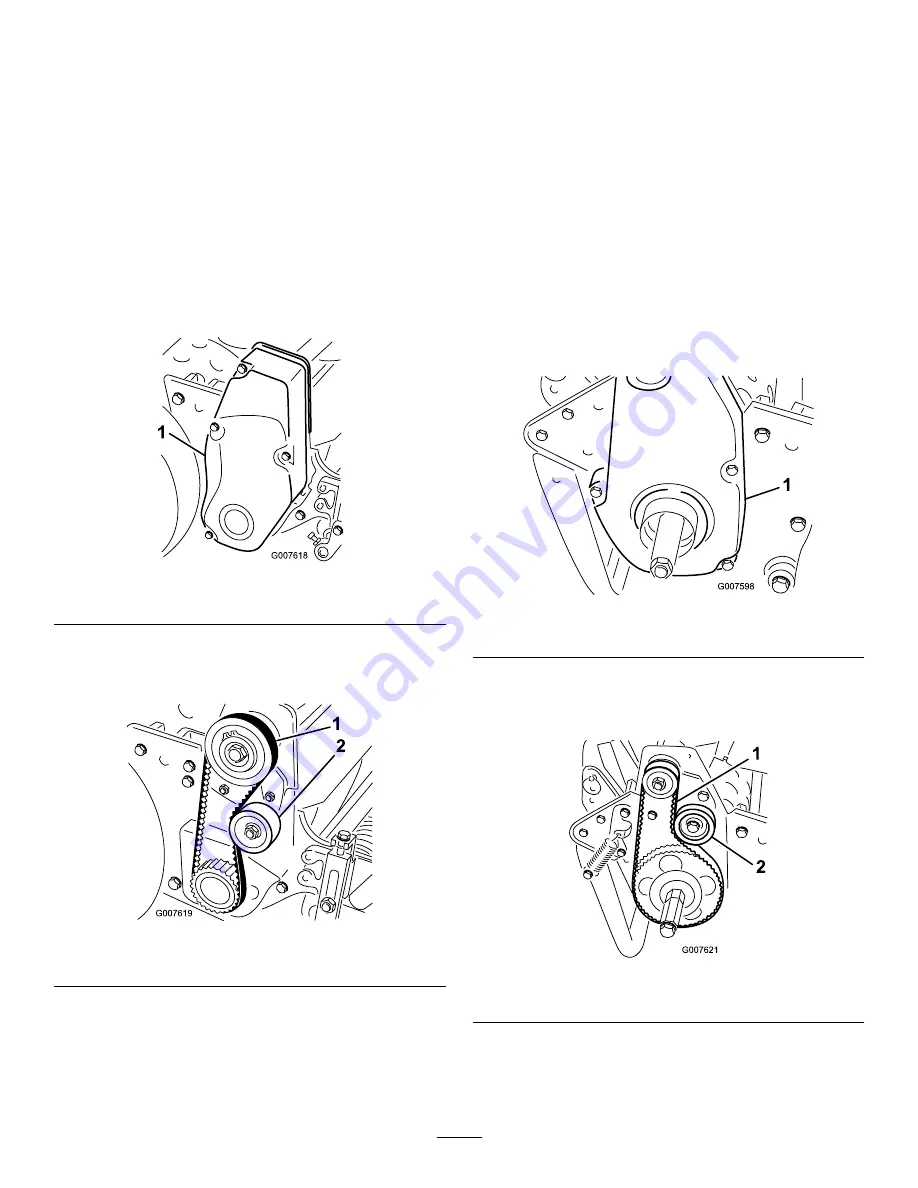
Adjusting the Traction Drive Belt
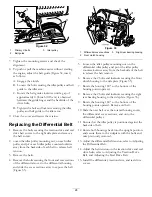
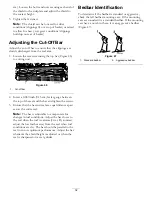
1. Remove the belt cover mounting fasteners and the
belt cover to expose the belt (Figure 30).
Figure 30
1.
Traction drive belt cover
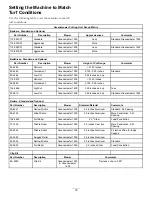
2. Check the tension by pressing the belt at mid span
of the pulleys (Figure 31) with 4 to 5 lb of force. The
belt should deflect 1/4 inch.
Figure 31
1.
Traction drive belt
2.
Idler pulley
3. Complete the following to adjust the belt tension:
A. Loosen the idler pulley mounting nut and pivot
the idler pulley clockwise against the backside of
26

