


5-7
5 INSTRUMENT SETTINGS
Selection items for wireless LAN
z
How to set up wireless LAN
[Setting example]
How to set up the instrument
Setting Items
Selection Items
MODE
AD-HOC/INFRA/OFF
AUTH
OPEN/SHARED KEY
SSID, WEP, IP, SUB, GW
Enter character strings for each setting item.
Refer to “Characters that can be entered for WEP key”(P5-6)
for characters for WEP key.
The GW setting is required for the infrastructure mode only.
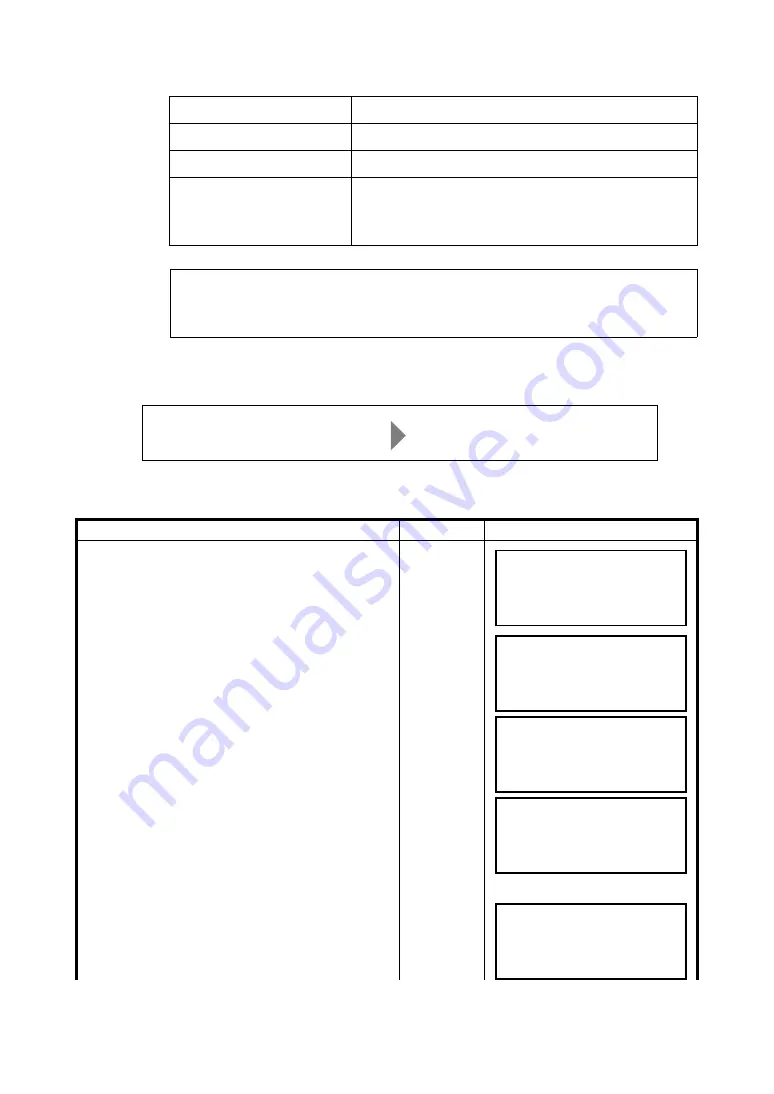
Operating procedure
Operation
Display
1
Press F3 (
↓
) key to display the second page of the
main menu.
[F3]
2
Press the [F2](SETTING MENU) key to select
SETTING MENU.
[F2]
3
Press the [F1](NETWORK SETTING) key.
4
Press [F4]( (
↓
) key four times.
[F1]
[F4]
[F4]
[F4]
[F4]
5
Press the [F2](EDIT) key to edit IP address.
[F2]
The IP address, subnet mask, SSID, and GW can be entered from the instrument or the PC/
access point side.
In order to perform wireless transmission between a PC and the instrument, match these
addresses.
[Setting after change]
IP address
: 10.1.1.240
SSID
: topcon
[Setting before change]
IP address
: 192.168.0.1
SSID
: gls1500
(Any number can be used for "IP address" and "SSID".)
SELECT MENU
F1 STATION MENU
F2 SCAN MENU
P1/2
↓
SELECT MENU
F1 PROJECT MENU
F2 SETTING MENU
P2/2
↑
SETTING MENU
F1 NETWORK SETTING
F2 DATA MANAGE
P1/4
↓
↑
NETWORK SETTING
→
IP:192.168.0.1
SUB:255.255.255.0
P3/3 EDIT
↑
↓
NETWORK SETTING
INPUT IP ADDRESS
[192.168.0.1 ]
<-
Содержание GLS-1500 Series
Страница 1: ...GLS 1500 SERIES LASER SCANNER INSTRUCTION MANUAL 64651 90021 ...
Страница 2: ......
Страница 85: ...EMC NOTICE 2010 TOPCON CORPORATION ALL RIGHTS RESERVED ...
Страница 86: ......
Страница 87: ......


