


❏ ❏
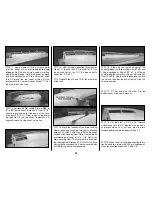
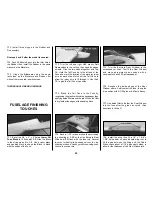
6. Roughen the mating area of both Wheel
Pant halves with coarse sandpaper. Tape the
upper half of the Wheel Pant in position, then
wick thin CA around the seam. Remove the tape
and fill the seam with Bondo
®
. Sand the Bondo
when it has hardened.
NOTE: Remove the Landing Gear from the
model to do the next several steps.
❏ ❏
7. Trim the ABS upper and lower
Landing
Gear Fairings
to the cut lines. Cut a slot in both
parts to fit at the top and bottom of the Landing
Gear as shown. Slide them onto the Landing
Gear strut but don’t glue them in position yet.
❏ ❏
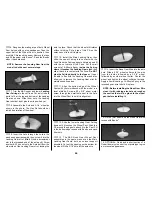
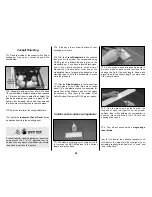
8. Assemble the Axle and 3-1/4” wheel as
shown in the photo. The Hex Nut should not
inhibit free rotation of the wheel.
❏ ❏
9. Insert the Axle through the hole in the
wooden support assembly, then screw it into the
Landing Gear strut. (
Hint:
Grind a screwdriver
slot in the threaded end of the axle bolt.) Screw
another 8-32 hex nut onto the Axle bolt from the
other side of the Landing Gear strut, locking the
axle in place. Check that the wheel still rotates
without binding. Put a drop of thin CA on the
outer hex nut to lock it in place.
❏ ❏
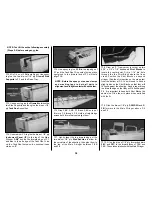
10. Install the Main Landing Gear, then
slide the upper Fairing into contact with the
Fuse. Sand the Fairing edges to obtain a good fit
with the curvature of the Fuse. Put a small
amount of 6-Minute Epoxy
inside the Fairing
where it touches the Landing Gear strut
, then
slide it back into contact with the Fuse.
Do NOT
glue the Fairing directly to the fuse
as it must
be able to flex with the Landing Gear and also
allow you to remove the Landing Gear strut for
maintenance if needed.
❏ ❏
11. Align the bottom edge of the Wheel
Pants with your workbench, with the model in a
level attitude. Screw a #2 x 3/8” sheet metal
screw through the small hole next to the Axle
into the Wheel Pant to hold it in alignment.
❏ ❏
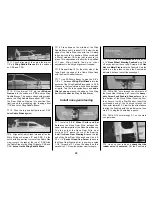
12. Slide the lower Landing Gear Fairing
down until it touches the Wheel Pant. Wick thin
CA around the edges to attach it to the Pant. Fill
in the bottom edge recess with Bondo and sand
it smooth.
❏ ❏
13. The ABS Nose Gear Wheel Pant
assembles in the same manner as the Main
Landing Gear Pants, but has no inner support
assembly. Cut out the opening on the bottom for
the wheel. Drill a 3/16” hole for the axle wire.
❏ ❏
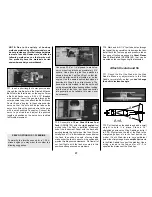
14. Insert the Nose Gear Wire into the axle
hole. Slide a 3/16” wheel collar onto the wire
from the inside followed by a 2-3/4” wheel
followed by another wheel collar. Center the
wheel and tighten the wheel collar set screws.
Apply a liberal coating of 6-Minute Epoxy to the
recessed gear wire to hold it in place.
NOTE: Before installing the Nose Gear Wire
clean it with rubbing alcohol and roughen
the section that will be glued to the wheel
pant before installing it.
15. Fill the joint seam and the Nose Gear wire
recess with Bondo
®
.
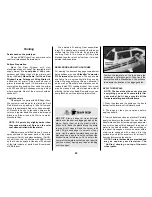
16. OPTIONAL: We added a short section of a
Robart dummy oleo strut to our prototype to give
a more scale appearance.
46


