


❏
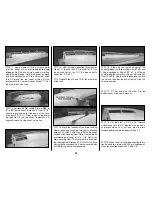
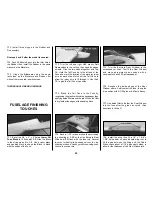
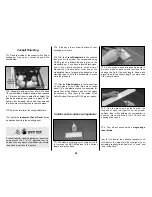
1. Use a
new # 11 blade
in a hobby knife to
score
around the
cutlines inside all three parts
of the ABS cowl as shown in the photo. Flex the
ABS along the scores until the excess material
breaks free. Use a Moto-Tool and cutting burr to
cut the air intakes and propshaft opening.
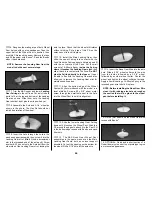
❏
2. Use a sanding block to clean up the edges
and to make any adjustments that may be needed
for a nice flush fit. Roughen the inside edges of the
joints with coarse sandpaper, then fit the three
parts together and secure them with tape. Carefully
wick thin CA around the joints and allow the parts
to cure. Do
not
use CA accelerator.
❏
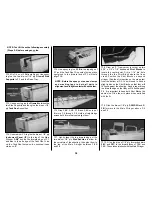
3. For added strength, epoxy 1”-wide
fiberglass cloth tape across all of the seams on
the inside of the cowl.
IMPORTANT: Hot air generated by the
engine MUST be vented from the cowl or
your engine will overheat and quit!
While
we experienced no overheating problems with
our
engine running slightly rich
and both air
inlets open, you may prefer
not
to open
both
air inlets. By leaving only the inlet in front of
the cylinder open,more air is forced directly
over the cylinder and out through the cowl
flaps. If you choose to open the second inlet, a
dummy cylinder head or baffle could be
installed behind the opening to restrict the
air-flow into the cowl.
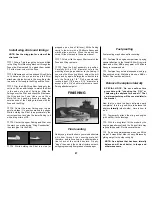
❏
4. Use a hobby knife to cut along the
embossed lines on the inside of the cowl for the
cowl flap openings. Use the patterns on the plans
to cut the cowl flap sides from excess 1/16” ply
leftover from the servo hatch die-cut sheet. Cut
out the
cowl flaps
from the ABS sheet, using the
cut lines for reference. Glue the cowl flap sides to
the inside edges of the cowl, then center the flap
across the sides and glue it in place.
❏
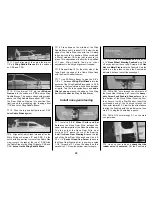
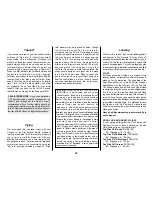
5. Fill the seams on the outside of the cowl
with
Bondo
®
type automotive body filler.
❏
1. Mount the engine. Slide the Cowl into
position as far as it will fit. Cut a slot in the Cowl
for the Nose Gear. Sand the hardwood Cowl
Mounting Blocks and balsa Cowl Ring until the
Cowl fits flush with the fuse. With the cowl in
position, install a spinner on the prop shaft and
check the clearance around the front of the
Cowl. Sand the aft edge of the Cowl until the
spinner is centered and is 1/16” away from the
front of the Cowl.
❏
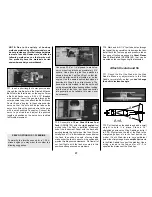
2. Draw a short line to extend the centerline of
each Cowl Mounting Block onto the forward
edge of the balsa sheeting.
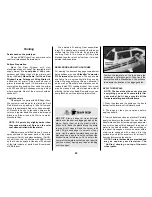
❏
3. Sandwich a T-pin between two scraps of
1/4” balsa to make a quickie height gauge. Glue
the top to the bottom piece of balsa with CA.
Hold the height gauge and the Cowl flat on the
work bench, then rotate the height gauge around
the perimeter of the cowl to
lightly
scribe a line.
NOTE: A pen or pencil may be substituted
for the “Pin” so long as the point is 1/4”
above the work surface.
Fit the cowl to the fuselage
and engine
Assemble the cowl
44


