This is a publication by Conrad Electronic SE, Klaus-Conrad-Str. 1, D-92240 Hirschau (www.conrad.com). All rights
including translation reserved. Reproduction by any method, e.g. photocopy, microfilming, or the capture in electronic data
processing systems require the prior written approval by the editor. Reprinting, also in part, is prohibited. This publication
represents the technical status at the time of printing.
Copyright 2018 by Conrad Electronic SE.
*1697190_v1_1018_02_dh_m_en(2)
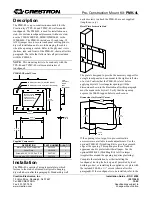
c) Mount Headstock, Attach Lever
Do not over-tighten the bolt on the headstock clamp
(3)
as excessive force may
cause damage.
• Slide the headstock
(5)
over the column
(2)
.
• Attach the base of the lever
(10)
to the headstock clamp
(3)
and secure the bolt using the
supplied hex key as indicated at position “A”.
• Connect the headstock
(5)
to the headstock clamp
(3)
as indicated at position “B”.
A
B
d) Extend the Guide Rail
•
Release the guide rail lock bolt
(11)
by rotating anti-clockwise using the
supplied hex key.
•
Fully extend the guide rail
(1)
.
• Tighten the guide rail lock bolt
(11)
.
Operation
Always unplug the drill from the power supply before attaching it to the stand, during
maintenance, and when not in use.
Consult an expert when in doubt about the operation, safety or connection of the
device.
a) Mounting the Drill
Use the supplied drill head adaptor when mounting a 38mm head sized hand drill.
• If necessary insert the drill head adaptor into the drill clamp
(13)
.
• Insert the drill into the drill clamp and tighten the drill clamp locking bolt using the supplied
hex key
b) Setting Up For Drilling
• Loosen the depth collar
(6)
so it can slide up or down the column
(2)
.
• Loosen the bolt on the headstock clamp
(3)
and slide the headstock
(5)
down to the desired
height above the work piece.
• Lock the headstock
(5)
into position by tightening the headstock clamp
(3)
.
• Determine the required drill depth by pulling the lever
(10)
down.
Refer to the stroke scale
(4)
for measured stroke distances.
• Lock the depth collar
(6)
at the desired stroke distance. This will prevent you from drilling
past your set point.
c) Drilling
The work piece must be securely locked into place by clamping, screwing or other
means.
Refer the user to the manual that came with the drill.
• Turn the power on.
• Hold the drill handle in one hand
and the lever
(10)
in the other
hand.
• Check for any vibrations, loose
parts or misalignments.
• Make adjustments if needed.
Swing-Away Headstock
• It is possible to drill into larger work pieces by allowing the headstock
(5)
to hang over the
edge of a bench or other work surface.
•
For this application, the base
(9)
should be securely fastened to the work surface via the base
mounting points
(8)
(fasteners not included).
• To reposition the headstock
(5)
, loosen the column-base bolt
(7)
and rotate the headstock to
the desired angle over the work piece.
• Tighten the column-base bolt
(7)
.
Care and Cleaning
• This product is generally maintenance free. You may occasionally need to apply a light
coating of anti-rust oil to the iron base
(9)
to protect it from corrosion.
• Let cool down then disconnect the drill from the power supply before removing drill from
stand.
• Do not use any aggressive cleaning agents, rubbing alcohol or other chemical solutions as
they can cause damage to the housing and malfunctioning.
•
Clean the product with a dry, fibre-free cloth.
Technical Data
Supported drill head size
.............. 38 mm, 43 mm (without plastic sleeve)
Stroke distance ............................. Max. 60 mm
Working height .............................. Max. 345 mm
Dimensions (L x W x H) ................ 250 x 150 x 550 mm
Weight .......................................... 2.86 kg