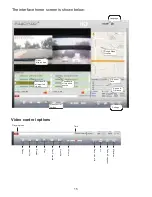
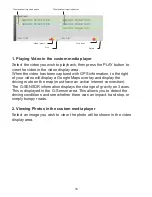
background image


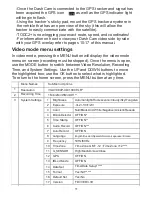
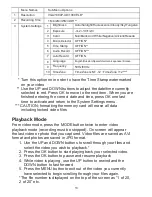
Menu Names 

Sub-Menu Options 

Resolution 

VGA/1080P-UD/1080P-LR* 

Recording Time 

1 Min/2Min/5Min/Off ** 

System Settings 

Brightness 

Auto/Sunlight/Fluorescence/Cloudy/Sky/Tungsten 

Exposure 

-3/-2/-1/0/1/2/3 

Color 

Null/Black And White/Negative/Ancient/Reseda 

Motion Detector 

OFF/ON* 

Time Stamp 

OFF/ON** 

Audio Record 

OFF/ON*** 

Auto Record 

OFF/ON 

Language 

English/Russian/Spanish/German/Japanese/ Korean 

Frequency 

50Hz/60Hz 

10  TimeZone 

Time Zone GMT -12 ~Time Zone +12**** 

11  G_SENSOR 

High/Medium/Low/Close 

12  GPS 

OFF/ON 

13  IRLed Mode 

OFF/ON 

14  Date Set 

Time/Date Setup***** 

15  Format 

Yes/No****** 

16  Default Set 

Yes/No 

17  Version 

FDV VER3.3H 


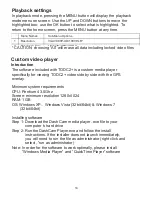
Menu Names 

Sub-Menu Options 

Resolution 

VGA/1080P-UD/1080P-LR* 

Recording Time 

1 Min/2Min/5Min/Off ** 


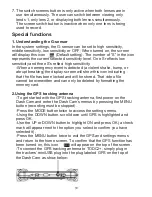
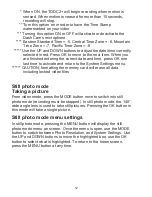
-Once the Dash Cam is connected to the GPS tracker and signal has 
been acquired the GPS icon 

as well as the GPS indicator light 

will begin to flash. 
-

Using the tracker ’s sticky pad, mount the GPS 

tracker anywhere in 

the vehicle that has an open view of the sky (this will allow the 

tracker to easily communicate with the satellite). 
-TODC2+ is now logging your exact route, speed, and coordinates! 
-For information on how to view your Dash Cam video side by side 
with your GPS overlay refer to pages 10-17 of this manual. 

Video mode menu settings 

In video mode, pressing the MENU button will display the video mode 
menu on screen (recording must be stopped). Once the menu is open, 
use the MODE button to switch between Video Resolution, Recording 
Time, and System Settings. Use the UP and DOWN buttons to move 
the highlighted box; use the OK button to select what is highlighted. 
To return to the home screen, press the MENU button at any time. 


11 

Содержание 4SKCO1

Страница 1: ...4SKCO1 4SKCO1...

Страница 2: ......

Страница 3: ...uction Cup Mount 7 Rotating lenses 8 Basic operations 9 Switching between modes 9 Video mode 9 Recording video 9 Video Mode Hot Keys 9 Special functions 10 Video Mode Menu Settings 11 Still Photo Mode...

Страница 4: ......

Страница 5: ...powered on and TODC2 is plugged in the Dash Cam will automatically power on and automatically begin recording When the vehicle s 12v outlet is powered off or the Dash Cam is unplugged the camera will...

Страница 6: ...ary slightly from what is contained within this manual The Original Dash Cam shall be entitled to modify the content or software without prior notice and the manufacturer shall be entitled to modify t...

Страница 7: ...he components will be damaged Operating temperature 0 140 F Do not drop strike or puncture the Dash Cam Be sure to remove any lens protector prior to first use to ensure your videos will be clear Plea...

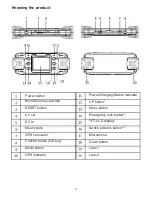
Страница 8: ...t RESET button AV out DC in Mount slide GPS connector Confirm button OK key Mode button GPS indicator 4 Power Charging Status Indicator UP button Menu button Emergency lock button TFT LCD display Swit...

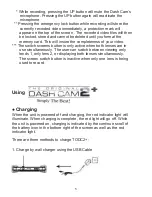
Страница 9: ...ch screens button is only active when both lenses are in use simultaneously The user can switch between viewing only lends 1 only lens 2 or displaying both lenses simultaneously The screen switch butt...

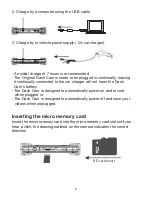
Страница 10: ...cted to the car charger will not harm the Dash Cam s battery The Dash Cam is designed to automatically power on and record when plugged in The Dash Cam is designed to automatically power off and save...

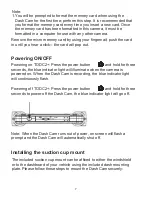
Страница 11: ...power button and hold for three seconds the blue indicator light will illuminate when the camera is powered on When the Dash Cam is recording the blue indicator light will continuously flash Powering...

Страница 12: ...he mount apply slight moisture to the rubber suction cup and place the camera in your desired location C Press down the plastic locking rod and the mount will lock into place The bracket port on the t...

Страница 13: ...he lens depending on the recording situation 3 While recording the MENU button remains inactive 4 While recording pressing the emergency lock button will immediately store the video file being recorde...

Страница 14: ...cating that the file has been locked and will be stored That video file cannot be overwritten and can only be deleted by formatting the memory card 2 Using the GPS tracking antenna To get started with...

Страница 15: ...is connected to the GPS tracker and signal has been acquired the GPS icon as well as the GPS indicator light will begin to flash Using the tracker s sticky pad mount the GPS tracker anywhere in the v...

Страница 16: ...return to the System Settings menu CAUTION formatting the memory card will erase all data including locked video files Still photo mode Taking a picture From video mode press the MODE button once to s...

Страница 17: ...60Hz 10 Version FDV VER3 3H Menu Names Sub Menu Options 1 Delete One All Turn this option on in order to have the Time Stamp watermarked on your video Use the UP and DOWN buttons to adjust the date ti...

Страница 18: ...mat English Russian Spanish German Japanese Korean 9 Default Set 50Hz 60Hz Playback settings In playback mode pressing the MENU button will display the playback mode menu on screen Use the UP and DOWN...

Страница 19: ...Take a Snapshot Maximize The interface home screen is shown below Language Google Maps Overlay Video display area G Sensor Thumbnails of imported videos Thumbnails of imported photos Data Speed Distan...

Страница 20: ...ation to the right of your video will display a Google Maps overlay and display the driving route on the map must have an active internet connection The G SENSOR information displays the change of gra...

Страница 21: ...system Note When the machine is not functioning normally the best first course of action is to always press the reset button RESET Accessories 1 12v Car charger 2 AV cable 3 Suction Cup Mount 4 USB c...

Страница 22: ...on which can be determined by turning the equipment off and on the user is encouraged to try to correct the interference by one or more of the following measures Reorient or relocate the receiving ant...

Страница 23: ......

Отзывы: