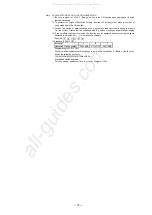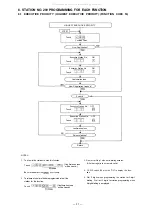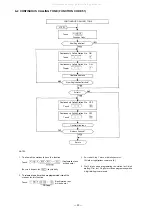
Make sure that you have turned off the AC power switch.
Connect the exchange, terminal boards and stations.
Are Data Transmitting and Receiving Units used?
YES
1. Connect Data Transmitting Unit (DT-
E60) and Data Receiving Unit (DR-
B61).
2. Set channel select switches (CHAN-
NEL SELECT) of DT-E60.
3. Set word select switches (WORD
SELECT) of DR-B61.
NO
Remove CP-66 from the exchange.
Set mini-Jumper for battery from OFF to ON position.
Set function selection switches (SW-A ~ SW-E) for required functions.
Insert the CP-66 into the exchange.
Set the "LINK SELECT" switches of the HC unit to Link No.15
Switch on the exchange.
Look at indication of LINE ADDRESS of HC (18 LEDs for HC-64 and 14 LEDs
for HC-62) and SIGNAL CODE indication (4 LEDs)
ALL LED lamps are out
Memory is normal
Some errors in memory
Lighted lamps of LINE ADDRESS
LEDs indicate erroneous MEMORY
ICs. See Section 3 (Page 11)
Place program switch on front panel of the CP in "ON" position.
Note:
*1;The first station of each ex-
change becomes the program-
ming station:
Exchange "A" ... No. 200 (100)
Exchange "B" ... No. 470 (400)
Exchange "C" ... No. 740 (700)
*2;lf there is any error in CMOS
memory, you hear calling tone
instead of confirmation tone.
Dial operation from station No. 200.
*1
— Initial programming of the exchange —
Dial the Following:
Dial tone will be heard
(Station No. 200 (100) becomes a programming station)
Confirmation tone will be heard. *2
(Clears function group S)
Confirmation tone will be heard. *2
(Clears function group A)
Confirmation tone will be heard. *2
(Clears function group B)
Confirmation tone will be heard *2
(Clears function group C)
Confirmation tone will be heard. *2
(Clears function group D)
Confirmation tone will be heard. *2
(Clears function group E)
Confirmation tone will be hard. *2
(Clears personal numbers, single digit dial
numbers and remote numbers)
Confirmation tone will be heard. *2
(Clears function group F)
Confirmation tone will be heard. *2
(Clears function group G)
Program desired functions (Refer to separate instructions for each function) *2
Place program switch on front panel of the CP in "OFF" position.
Dial operation from station No. 200.
*1
(Station No. 200 becomes a normal station.)
— 10 —
2. INITIAL CP-66 SET UP
For the tie-line system, programming has to be set up in every exchange.
All manuals and user guides at all-guides.com
all-guides.com


