


Getting Started Guide
11
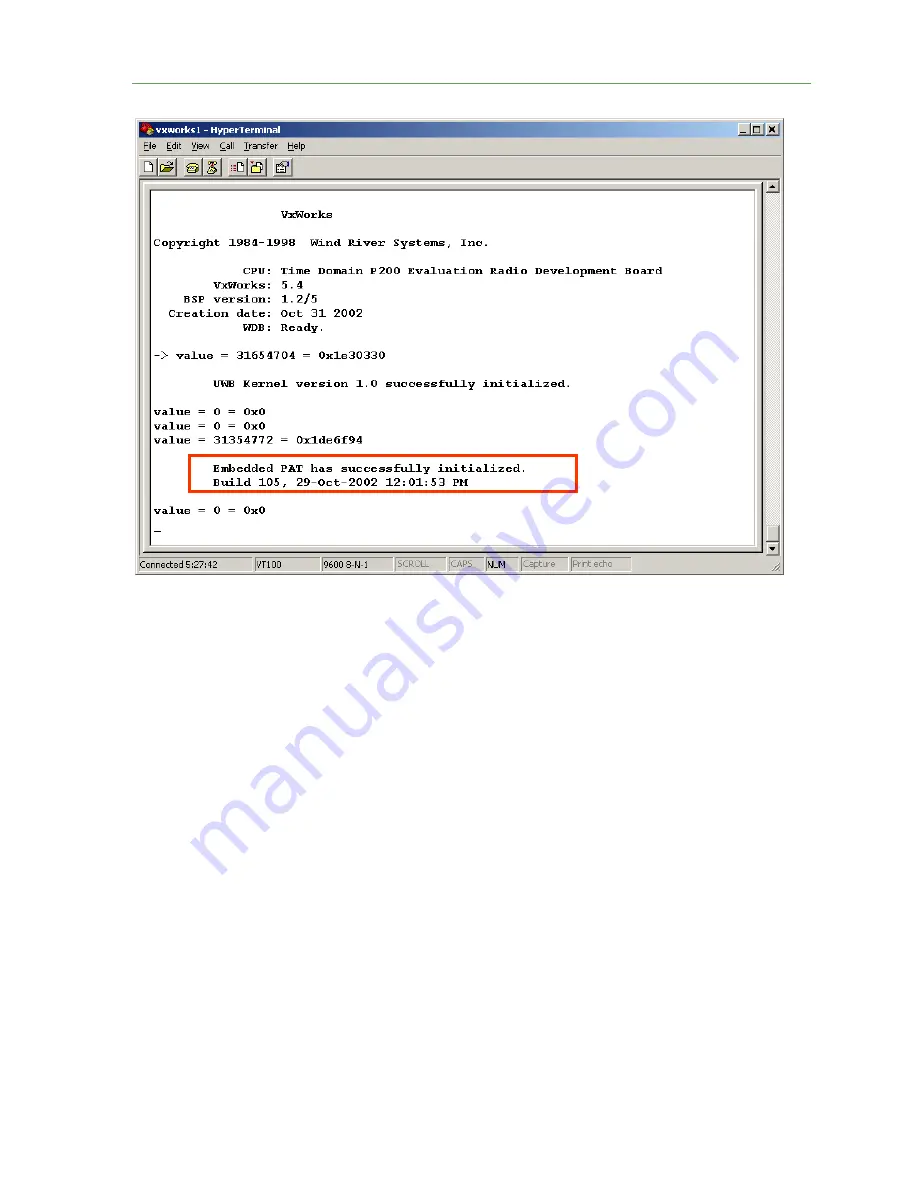
Fig. 8: The terminal display screen indicating that the PC and radio are communicating
(outlined in red box)
6. Hit <enter> on the keyboard. A command prompt "
->
" should appear, indicating the radio will
respond to PC commands.
7. Type the words "bootChange" (this is case sensitive) and hit <enter> (Fig. 9). Continue to hit
<enter> to scroll down until the “inet on ethernet (e)” line is displayed.
Caution: Do not change
the other boot entries, or your radio may fail to boot!
8. Do not overwrite or try to erase the old address. Position the cursor after the currently displayed
IP address and enter the new IP address. Type the new IP Address and submask text and hit
<enter> as shown in (Fig. 9). Since the default radio IP address is 10.1.4.2, the typical address
assigned to a
second
radio is 10.1.4.3. The submask should be set to "ffffff00" (six f's followed
by two 0's).
Proprietary Information: Do not disclose unless authorized under the the PulsON Developers Program Nondisclosure Agreement


