8
9
Checking the back box prior to installation
Before commencing
installation of the TileVision
®
the polystyrene blanking
panel must be removed from
the back box. Make sure that
all of the required input
cables are present within the
back box.
It is important to ensure that
the flange inside the back
box is thoroughly cleaned
using isopropyl alcohol and
allowed to dry.
Checking the Back Box
The second fix kit consists of:
1 TileVision
®
with Velcro fixing strips
1 waterproof remote control
1 remote control holder
1 standard remote control
1 mirrored acrylic surround
1 TileVision
®
instruction manual.
Remove the TileVision
®
from its packaging and place the mirrored
acrylic surround to one side for safe keeping.
☛
If any items are missing,
contact the dealer that
supplied the TileVision
®
.
The Waterproof Remote Control
The Common Interface (CI) Port
Unpacking the TileVision
®
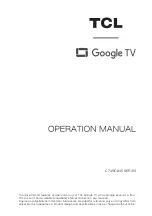
If a Conditional Access Module (CAM) is being used to add channels to the TileVision
®
the CAM
should be inserted into the CI Port of TileVision
®
with the power disconnected
.
Take a note of the Smart Card’s serial number and follow the CAM/Smart Card manufacturer’s
instructions to insert the Smart Card into the CAM and access the service.
The Smart Card must be activated in accordance with its service provider’s instructions before
installation is completed and the TileVision
®
is sealed (see page 19).
See page 29 for additional CI/Smart Card information.
The dotted line indicates the edge of the metalwork when a CAM is correctly inserted.
INSERT
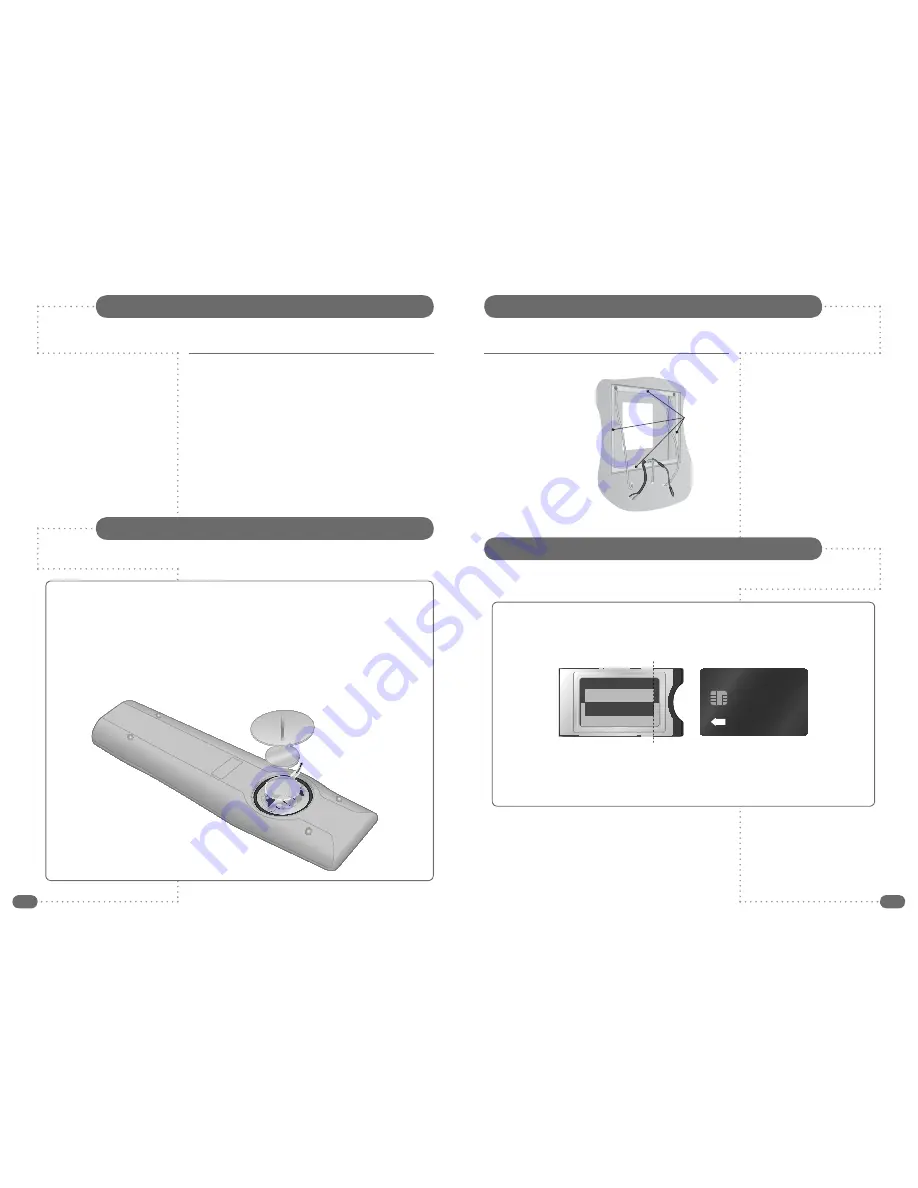
Before the waterproof remote control can be used the insulating plastic film must be removed from
beneath the battery.
Place the remote control face down on a horizontal flat surface and use the opener to release the
battery compartment cover by rotating it in an anti-clockwise direction. Set the battery cover and
opener to one side.
Rest one finger lightly on the battery and pull the printed tag to ease the insulating film from
underneath the battery. Try to avoid touching the black O-ring as it is coated in light grease.
Replace the battery cover and lock it back in place using the opener.
LiThium Cell
CR2032
3V
LiThium Cell
CR2032
3V
Remote control with battery cover removed
all of the
flange must
be cleaned


