background image

Need replacement parts?   

Take advantage of our online pricing policy at ;  

www.rgklife.com

User Manual 
Issue No: 16 | 2016

14

User Manual | Handling of Wheelchairs

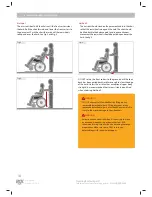
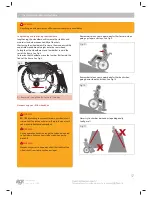
 Method 1

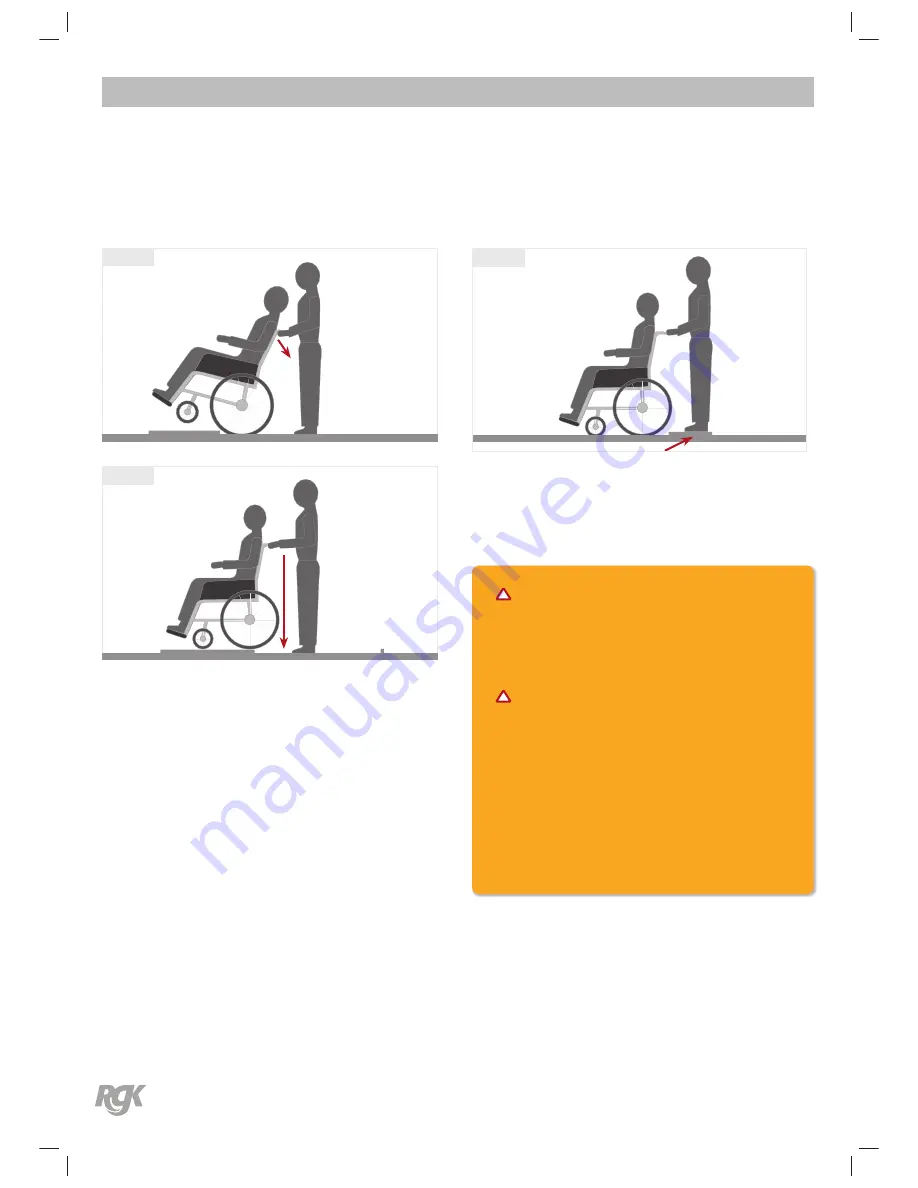
The assistant should tilt the chair until the front castors clear 
the kerb. Roll the chair forward and lower the front castors to 
the pavement. Push the chair forward until the rear wheels 
roll up and over the kerb. See Fig 3 and Fig 4.

Fig 3

Fig 4

 Method 2

The assistant should stand on the pavement and turn the chair 
so that the rear wheels are against the kerb. The chair should 
be tilted back to the balance point and, in one continuous 
movement, the rear wheels should be pulled up and over the 
kerb. See fig 5.

Fig 5

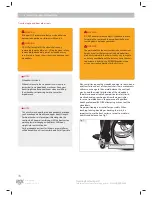
DO NOT return the front castors to the ground until the chair 
back has been pulled backward far enough to clear the edge 
of the kerb. Unless the assistant has exceptional upper body 
strength, it is recommended that two assistants be utilised 
when choosing Method 2.

 WARNING:

DO NOT attempt to lift a wheelchair by lifting on any 
removable (detachable) parts. Lifting by means of any 
removable (detachable) parts of a wheelchair may result in 
injury to the user or damage to the wheelchair.

 WARNING:

Extreme caution is advised when it is necessary to move 
an occupied wheelchair up or down the stairs. RGK 
recommends using two assistants and making thorough 
preparations. Make sure to use ONLY secure, non-
detachable parts for hand-hold supports.

Содержание Junio

Страница 1: ...UserManual Including TIGA Sub4 TIGA Junior TIGA TX EN MANUAL WHEELCHAIR ...

Страница 2: ...t first reading and understanding this manual If you are unable to understand the warnings and instructions contact a healthcare professional doctor therapist before attempting to use this equipment otherwise injury or damage may result UserManual Thankyou As the manufacturer RGK Wheelchairs declares that the lightweight wheelchairs conform to the 93 42 EEC 2001 47 EEC guideline Please contact RGK...

Страница 3: ...Troubleshooting Guide Mechanical 20 Maintenance 20 Suggested Maintenance Procedures 21 Procedure 1 21 Adjusting replacing the back upholstery 22 Procedure 2 22 Seat Upholstery Replacement 23 Procedure 3 23 Removing rear wheels and attaching them to and from your wheelchair 24 Procedure 4 25 Procedure 5 25 Handrim replacement 25 Repairing replacing rear wheel tyre tube 26 Procedure 6 26 Adjusting r...

Страница 4: ...individual rests solely with the user and his her health care professional capable of making such a selection DO NOT use the footplate as a platform when getting in or out of the wheelchair Always wear your seat restraint if recommended The wheelchair shown and described in this user guide may not correspond in every detail exactly to your own model and accessories However all instructions are com...

Страница 5: ...chair users not be transported in vehicles of any kind while in wheelchairs It is RGK s position that users of wheelchairs should be transferred into appropriate seating in vehicles for transportation and use be made of the restraints made available by the auto industry RGK cannot and does not recommend any wheelchair transportation systems As regards restraints seat belts it is the obligation of ...

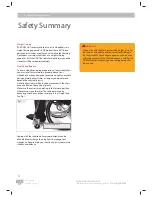
Страница 6: ...ies as long as you do not move beyond the centre of gravity Virtually all activities which involve movement in the chair have an effect on the centre of gravity Make sure the castors are pointing in the forward position whenever you lean forward This can be achieved by advancing the chair and then reversing it in a straight line See Fig 1 Fig1 Castors pointing forward Coping with the irritation of...

Страница 7: ...ose control and may lead to serious injury of the user and other people Safety Summary WARNING CHOKING HAZARD This mobility aid uses small parts which under certain circumstances may present a choking hazard to young children If and whenever possible during a journey in a specially fitted vehicle for disabled people vehicle occupants should use the seats in the vehicle and the appropriate restrain...

Страница 8: ...es fitted are positioned outside the danger area Secure your wheelchair on uneven ground or when transferring e g into a car by using the wheel locks Safety Summary For high amputees you must use anti tip tubes Before setting off check that your tyre pressure is correct For rear wheels it should be at least 3 5 bar 350 kPa The max pressure is indicated on the tyre The knee lever brakes will only w...

Страница 9: ...d lifetime of this product is 5 years Safety Summary NOTE The effect of the wheel locks as well as the general driving characteristics are dependant on tyre pressure The wheelchair is significantly lighter and easier to manoeuvre when the rear wheels are pumped up correctly and both wheels have the same pressure Make sure that your tyres have sufficient tread Please note that you are subject to an...

Страница 10: ...ional or RGK personnel This wheelchair is suitable for a means of transfer from one location to another where physical mobility is impaired or reduced and is not designed for any other purpose Consideration must be given at point of prescription to required usage with regard to the capabilities of the user and the environment and terrain on which the product will be used RGK TIGA Manual Propelled ...

Страница 11: ...Manual ProductDescription A Backrest B Brakes C RearWheel D Front Castor E Front Castor Forks F Footplate G Footplate cover H Camber Bar I Frame J Under Seat Brace Bar K Cushion Cover L Sideguard RGK TIGA Manual Propelled Wheelchair Forks J Under Seat Brace Bar K Cushion Cover L Sideguard A D E C F G K L J I H B ...

Страница 12: ...scription or inside the backrest upholstery A Pleaseprovidethefollowinginformationwheneveryouhavetoorderreplacementparts SerialNumber Name Dealer TIGASub 4 TGA001 1 2013 0044 1 543670077 info rgklife com MAXUSERWEIGHT125KG RGKWheelchairsLtd Unit8b cRingRd Zone2 BurntwoodIndEst Burntwood Staffs EnglandWS73JQ A Model B Chair Serial Number C Month Manufactured D Year Manufactured E Manufacturer Addre...

Страница 13: ...hair in one continuous movement See Fig 2 DO NOT let the chair drop the last few inches to the ground This could result in injury to the occupant Fig2 CAUTION DO NOT tilt the chair without assistance After mastering the techniques of tilting the chair use this procedure to tackle kerbs short stairs etc User Manual Handling of Wheelchairs WARNING A note to wheelchair assistants DO NOT attempt to li...

Страница 14: ...he rear wheels should be pulled up and over the kerb See fig 5 Fig5 DO NOT return the front castors to the ground until the chair back has been pulled backward far enough to clear the edge of the kerb Unless the assistant has exceptional upper body strength it is recommended that two assistants be utilised when choosing Method 2 WARNING DO NOT attempt to lift a wheelchair by lifting on any removab...

Страница 15: ...chair to tip backwards potentially causing injury or property damage WARNING User Manual Handling of Wheelchairs DANGER DO NOT use an escalator to move a wheelchair between floors as this could cause serious personal injury or property damage Transferring to and from other seats WARNING BEFORE attempting to transfer in or out of the wheelchair every precaution should be taken to reduce the gap dis...

Страница 16: ...tioning is essential for your safety When reaching leaning bending or bending forward it is important to use the front castors as a tool to maintain stability and balance See Fig 7 Fig7 Castors pointing forward User Manual Handling of Wheelchairs Transferring to and from other seats WARNING RGK does NOT recommend that your wheelchair be transported up or down stairways with you in it WARNING DO NO...

Страница 17: ...your RGK wheelchair WARNING BEFORE attempting to manoeuvre your new wheelchair it is important to practice and master these techniques until you are comfortable and competent WARNING During operation handrims can get hot when being used to slow down Extra caution is to be used when going downhill WARNING Manoeuvring across a slope may affect the stability of the wheelchair Use extreme caution on s...

Страница 18: ...spokes uniformly tight Front Castor Inspect wheel fork assembly for proper tension by spinning castor caster should come to gradual stop Loosen tighten locknut if wheel wobbles noticeably or binds to a stop Wheel bearings are clean and free of moisture CAUTION As with any vehicle the wheels and tyres should be checked periodically for cracks and wear and should be replaced when necessary Tyres Ins...

Страница 19: ...queaks and rattles Loose ness in chair Solutions Check tyres for correct and equal pressure Check for loose castor stem nuts Check all fixtures are secure and tight Check spokes and nipples for tension Check that both castors contact the ground at the same time WARNING After making adjustments always make sure that parts are properly tightened BEFORE using the wheelchair DO NOT over tighten hardwa...

Страница 20: ...cement in procedure 5 of this manual 8 Periodically adjust wheel locks in correlation to tyre wear Refer to adjusting wheel locks in procedure 8 of this manual 9 Periodically check castor wheel bearings to make sure they are clean and free from moisture Refer to replacing your front castor wheels in procedure 7 of this manual 10 Check upholstery for sagging rips or tears Adjust or replace as neces...

Страница 21: ...gStraps BackrestTail SeatSling WARNING The position of the footrest camber tube and rear seat height as well as the tautness of the back upholstery are directly related to the chairs stability Any change to one or any combination of the four may cause the chair to decrease in stability Use EXTREME caution when using a new seating position for the first time CAUTION Velcro used on upholstery may ca...

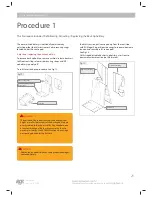
Страница 22: ...Fig 15 4 Remove the existing seat upholstery by peeling apart the velcro straps 5 Install the NEW seat upholstery making sure the fastening flaps hang over the right and left sides of the chair frame 6 Place the front fastening flaps in front of the cross frame bar and securely latch together 7 Securely latch the remaining fastening flaps together 8 Refit rear wheels See procedure 3 9 Reinstall th...

Страница 23: ...ase axle into the camber bar Pushing both axle and wheel towards your wheelchair Fig16 User Manual Procedure 3 WARNING Changing the size of your rear wheels can affect the performance of the wheelchair Please contact RGK Wheelchairs Ltd before changing rear wheel size The telephone number is located on the back of this manual NOTE Pull on the rear wheels to make sure the detent pin RGK cap of the ...

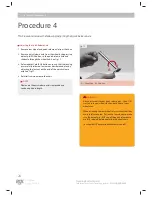
Страница 24: ...king pins are fully released Increase or decrease end play by adjusting the locknut on the end of the quick release axle See Fig 17 4 Reinstall rear wheel onto the chair NOTE Please note the quick release axle is removable and can be adjusted in length User Manual Procedure 4 Fig17 A B A Lengthen B Shorten WARNING Any adjustments to your quick release pins thenYOU must ensure your wheels lock on b...

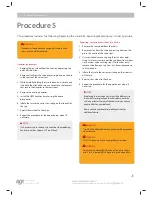
Страница 25: ...placing hand rim on either Spider or X CoreWheels User Manual Procedure 5 Repairing replacing rear wheel tyre tube 1 Remove the rear wheel from the chair 2 Remove all air from the tube by pressing down on the pin in the centre of the valve stem 3 Unscrew the valve securing ring Presta valves only Using tyre levers remove outside tyre bead from wheel rim unscrew valve securing ring Presta valves on...

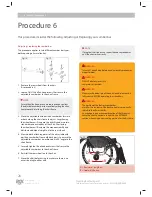
Страница 26: ...r wheels 4 Measure both attaching points of the adjustable axle position camber bar from both back posts to ensure the adjustable camber bar is positioned at a 90 angle to the chair frame 5 Securely tighten the allen head screws that secure the adjustable camber bar to the chair frame 6 Reinstall the rear wheels onto the chair 7 Move the chair before using to make sure there is no excessive drag t...

Страница 27: ...t castor if necessary Replacing Front Castor Wheels 1 Using two 4mm Allen keys remove 1 of the 2 screws that locate the castor axle 2 Remove the castor axle by sliding it out Remove the castor wheel and spacers from the castor fork 3 Install the NEW castor wheel castor axle and spacers to the castor fork by reversing STEPS 1 2 User Manual Procedure 7 NOTE Bearings must be fitted by an authorised d...

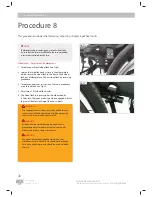
Страница 28: ...ure 3 To replace under seat scissor lock Use same procedure as push pull lock See Fig 22 4 Adjustment All wheel lock styles 5 The wheel lock tyre pressure bar should embed by 5 7mm into the pneumatic tyre when engaged Adjust to give satisfactory locking of the chair wheels WARNING After any adjustments repair or service and before use make sure all attaching hardware is tightened securely otherwis...

Страница 29: ...NG The position of the footrest camber tube and rear seat height as well as the tautness of the back upholstery are directly related to the chairs stability Any change to one or any combination of the four may cause the chair to decrease in stability Use EXTREME caution when using a new seating position for the first time Angle adjusting the footrest platform 1 To adjust the angle on your angle ad...

Страница 30: ...ding your backrest with cord support 1 To fold the backrest grasp cord support See Fig 25 2 Pull the cord strap towards the brace bar See Fig 26 this will release both locking pins allowing the backrest to fall forward 3 Push the backrest firmly down ensuring that the pins locate in the locking holes 4 To unfold the backrest reversing STEPS 1 2 3 Ensure that the locking pins are secure and located...

Страница 31: ...ht adjustable push handles 1 To operate this style of pushing handle open the mini quick release leaver as indicated Fig 28 By opening the quick release lever allows the stroller handle to be adjusted in height 2 Once the desired height is achieved then close the mini lever 3 If the lever becomes loose then the nut on the mini release lever requires tightening The nut on the mini release lever det...

Страница 32: ...ipper bar 2 Adjust the height of the anti tipper wheels to between 25mm and 50mm of the ground 3 Repeat steps 1 2 for the opposite anti tipper WARNING RGK strongly recommends ordering the anti tips as an additional safeguard for the wheelchair user NOTE Anti tippers MUST be fully engaged Ensure the release button of the anti tipper fully protrudes out of the hole in the anti tipper socket Ensure b...

Страница 33: ...table Armrest Height Adjustment 1 Rotate height release lever 2 to the second position 2 Slide the armrest pad up or down to the required height 3 Return the lever to the locked position against the armrest 4 Push the arm pad until the upper arm post locks firmly into place Fig35 WARNING RGK Wheelchairs DOES NOT encourage the transportation of any person in a vehicle using a lapbelt strap as a met...

Страница 34: ...side guards if fitted and fastened across the lap or pelvis Other option is passing around the back and inserted in between the insides of the centre pad as per Fig 36 This style of strap is a positioning strap only Fig36 WARNING It is not designed for use as a safety device to withstanding high stress loads such as auto safety belts With regards to chest positioning straps it is the obligation of...

Страница 35: ...uick release axle Fixings Side guards Anti Tippers Frame Footrest Plastic Handles Tube stoppers Castors Footplate covers Arm pads Packing Plastic bags made from polyethylene cardboard Upholstery Woven polyester Cotton Leather Disposal or recycling should be carried out by a disposal company or at a public disposal point You could also return your wheelchair to your dealer for disposal There may be...

Страница 36: ...of this warranty we provide a warranty in accordance with these warranty conditions for the remaining warranty period for the wheelchair in accordance with point 1 4 For original spare parts which have been fitted at the customer s expense these will have a 12 months guarantee following the fitting in accordance with these warranty conditions 5 Consumable parts such as pads tyres inner tubes and s...

Страница 37: ...amber bar and quote this whenever calling the office regarding your chair For example if you would like to order replacement parts we will be able to find out the ones you have and also alternatives that fit your chair Chair Model Serial No Sunrise Medical Thorns Road Brierley Hill West Midlands DY5 2LD England Phone 0845 605 66 88 Fax 0845 605 66 89 www SunriseMedical co uk User Manual Warranty ...

Страница 38: ...Needreplacementparts Takeadvantageofouronlinepricingpolicyat www rgklife com UserManual Issue No 16 2016 38 ...

Страница 39: ...Needreplacementparts Takeadvantageofouronlinepricingpolicyat www rgklife com UserManual Issue No 16 2016 39 ...

Страница 40: ...ww SunriseMedical eu International Sunrise Medical S A S ZAC de la Vrillonnerie 17 Rue Mickaël Faraday 37170 Chambray Lès Tours Tel 33 0 247554400 Fax 30 0 247554403 www sunrisemedical fr Sunrise Medical S r l Via Riva 20 Montale 29122 Piacenza Italia Tel 39 0523 573111 Fax 39 0523 570060 www SunriseMedical it Sunrise Medical AG Lückhalde 14 3074 Muri Bern Schweiz Suisse Svizzera Fon 41 0 31 958 3...

Отзывы: