background image

4

14. 

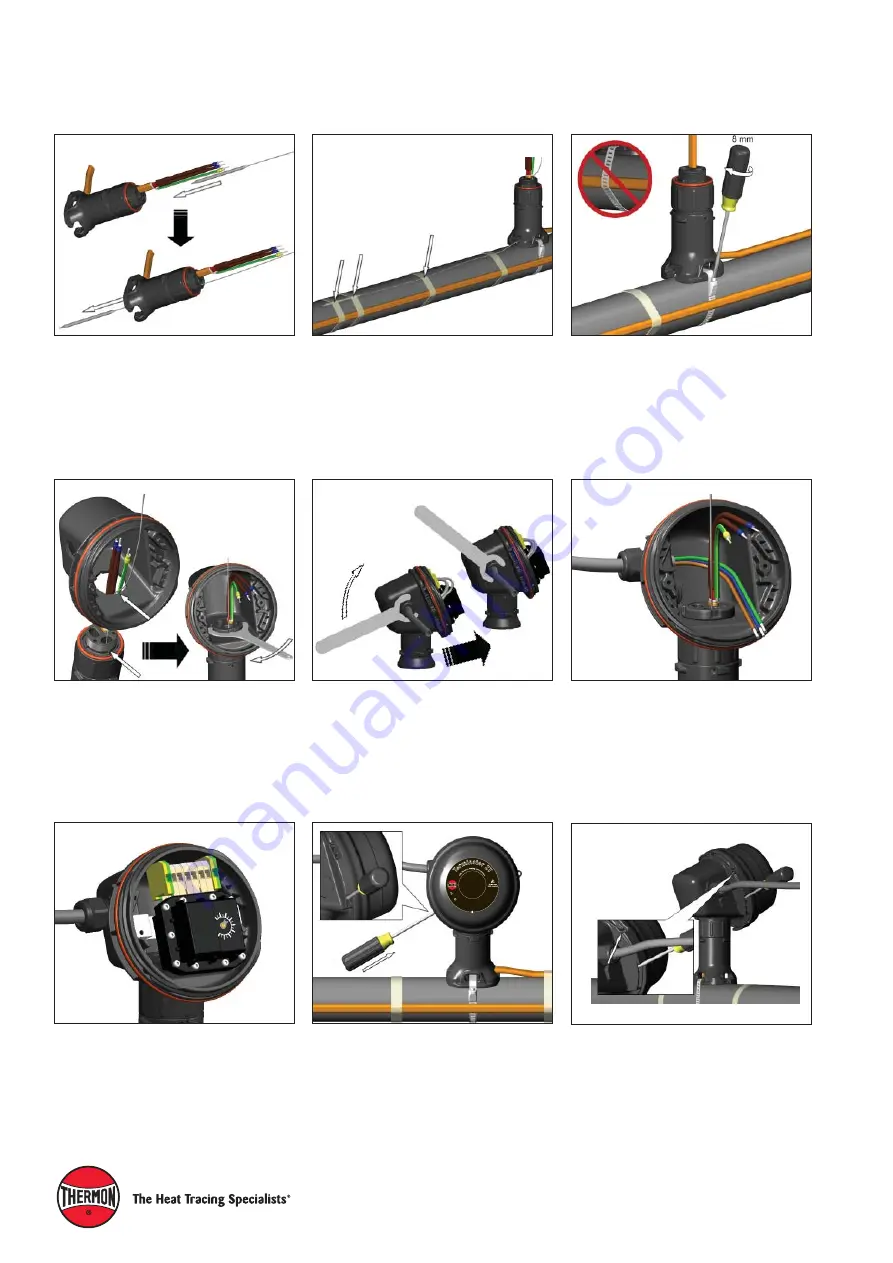
Remove M25 dust cap. Install M25 power 
gland (order separately) and M25 blind plugs. 

15. 

Install power cable (if necessary).

17. 

Install junction box lid and twist hand tight. 
Insert screwdriver into ratchet slots located on 
side of junction box base. Use screwdriver to 
ratchet on junction box lid. Lid will rotate 30 
degrees.

18. 

Lid latch mechanism fully engaged. To remove 
lid, repeat step 17 but in the opposite direction.

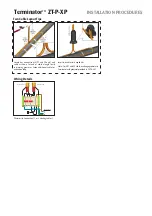
Terminator

TM

 ZT-P-XP 

INSTALLATION PROCEDURES

13. 

Take out thermostat. Mount junction box base 
on expediter. Make sure to align slots to properly 
orient junction box base. Tighten nut with 
Terminator-LN-Tool. If mounting horizontally, 
threaded gland holes must face downward.

16. 

Install thermostat and complete system wiring. 
Terminal set screws shall be tightened to a torque 
value of 1.4 Nm (12.4 lb-in). See page 5 for wiring 
details. Set thermostat at desired setpoint.

11. 

Fix thermostat bulb and capillary tube to pipe.

10. 

Route thermostat bulb through nut and 
expeditor opening in junction box base. If 
necessary, apply lubricant (user supplied) to 
end of thermostat bulb. Slide through conical 
grommet hole. Push excess capillary tube 
through expeditor.

Te

rm

inator ZT


IP66

-45

°

C


Ta 


+


55

°

C

Fo

r u

se

 as

 an 

adjust

able control th

erm

osta

w

ith

 T

he

rm

on h

eating cable 

sys

tem

II 2 G & D   EEx ed II C T5

0539

DEMKO 02ATEX132552X


 17

25


    I

I 2

 GD

  Ex d

b eb IIC

 T5-T6, Ex tb IIIC

 T10

0°C

-T8

C,

 F

M

 1

0A

TE

X

0

0

5

8

X

IEC

Ex F

MG 1

0.0022X

             Ex db

 eb I

IC 

T5

-T6

, E

tb

 II

IC

 T

10

0

°C

-T

8

5

°C

PN 27656

Te

rm

inator Z

Fo

r u

se

 as

 an

 adj

ustable

 control/lim

iter th

erm

ost

at

IP

6

6 -

60

°C


 Ta


 +50

°C T5, 100°C; -60°C 

 Ta


 +4

T6

, 8

5

°C

12. 

Mount expediter to pipe using pipe band. Do 
not band over cable. Tape cable expansion 
loop to pipe.

Содержание THERMON Terminator ZT-P-XP

Страница 1: ...I I C T 1 0 0 C T 8 5 C PN 27656 T erminator Z T F o r u s e as an adjustable control limiter ther m o s t a t I P 6 6 6 0 C Ta 50 C T5 100 C 60 C Ta 40 C T 6 8 5 C For Thermostat Connection 1 2 Heat...

Страница 2: ...tional and local codes Component approvals and performance ratings are based on the use of Thermon specified parts only De energize all power sources before opening enclosure Avoid electrostatic charg...

Страница 3: ...4 Slide expediter toward pipe and route cable through support base entry 8 Terminate cable with appropriate PETK termination kit Refer to PETK installation instructions Push excess cable back through...

Страница 4: ...tightenedtoatorque valueof1 4Nm 12 4lb in Seepage5forwiring details Set thermostat at desired setpoint 11 Fix thermostat bulb and capillary tube to pipe 10 Route thermostat bulb through nut and expedi...

Страница 5: ...or expansion loop Two Cable Layout Tips Insert two cables into expediter Note For HPT and FP cable exchange grommet in Terminator with grommet provided in PETK 3 ZT Wiring Details TerminatorTM ZT P XP...

Страница 6: ...ouillage du couvercle pleinement engag Pour supprimer le verrouillage du couvercle r p ter les tape 17 mais dans le sens oppos Deutsch Terminator ZT P XP Thermostat Anschluss Set INSTALLATIONSANWEISUN...

Страница 7: ...jaci n en el Expediter y col quela en posici n 6 Fije el Expediter sobre la tuber a mediante la banda de fijaci n Tenga precauci n de no poner la banda de fijaci n sobre el cable 7 Corte el final del...

Страница 8: ...ok heen Zorg ervoor dat de knooppunt in de verwarmingskabel betreffende HPT and FP buiten de voet bevinden 4 Schuif de opvoersok naar de leiding en voer de verwarmingskabel door de daartoe dienende op...

Отзывы: