


Portable Optical Tweezers Kit
Chapter 6: Setup and Adjustment
Page 44
MTN012639-D02
6.2. Controller and Software Setup
6.2.1.
LED Controller
The front of the LED Controller has a current limit adjuster. Set the
maximum current of 1 A when using the MCWHL5 LED. The mode
switch on top of the controller should be set to CW.
6.2.2.
Laser Controller
Install the Kinesis control software, which will allow for control of the laser diode controller
and sample positioning stages. The software can be installed using the provided CD or
downloaded from the Thorlabs website. Connect the laser controller to the PC only after
you are asked to during the installation. Afterwards, open the newly installed program.
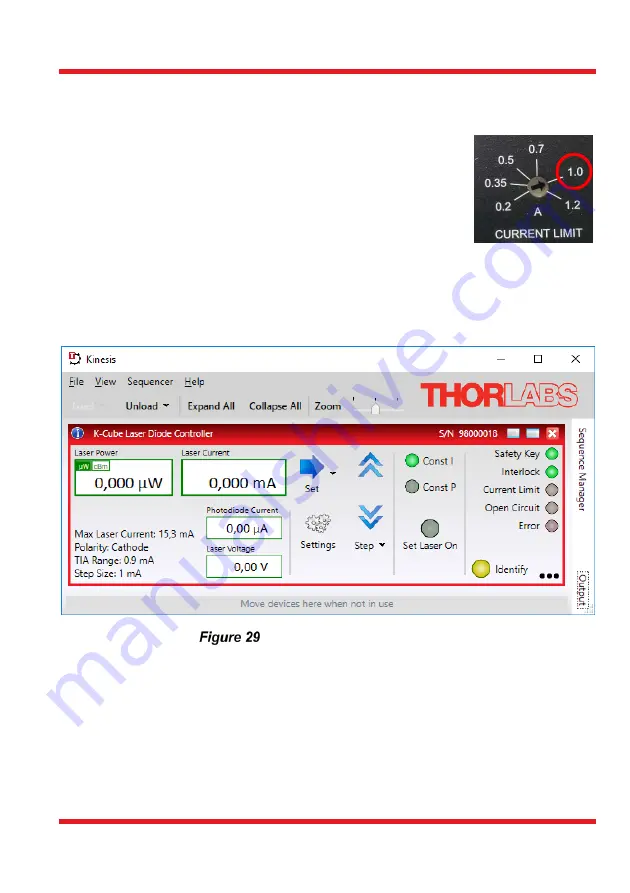
Kinesis Laser Controller Panel.
In the Kinesis control panel, see Figure 29,
press “Settings”.
To operate the laser properly, the polarity setting of the diode will need to be
switched to anode grounded
in the “Control” tab. For that, select “Anode” in the
drop-
down menu labeled “Polarity”, see Figure 30.
Set the maximum current for safe operation of the diode
in the tab “Max Current”
to 100 mA, see Figure 30.
By activating the “Persist Settings to Hardware”
checkbox, you can store the settings on the device.
Содержание EDU-OT2
Страница 1: ...EDU OT2 EDU OT2 M Portable Optical Tweezers User Guide...
Страница 91: ......
Страница 92: ...www thorlabs com...


