background image

EN

10

English

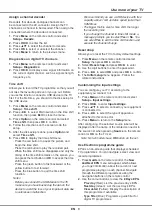
• 

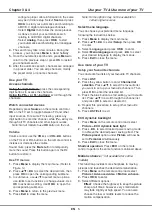
Press the blue button to display the 

programmes’ type and subtype lists.

• 

Navigate through the different types and 

subtypes using the navigation buttons on the 
remote control.

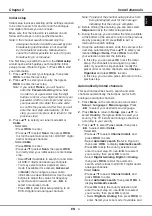
• Select one or more types, which you want to 

highlight from the 

Type

 list, press 

OK

 to select (or 

deselect). A checkmark will appear to the left of 

the type when selected. When you select a type, 
all its subtypes will be selected accordingly.

• Also, you can select some desired subtypes 

without selecting any type irst.

• Press the blue button to exit the type and 

subtype list.

• After iltering, all your desired digital TV 

programmes will be highlighted.

-  

Add schedule 

(Option): Press 

Option

 on the 

remote control to bring up the 

Schedule list


menu. For details on scheduled recording, refer 
to the 

Schedule list

 section. 

3.

  Press 

Guide/Exit

 to exit the EPG and switch to 

the selected channel.

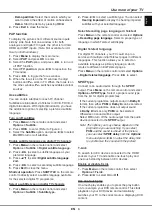
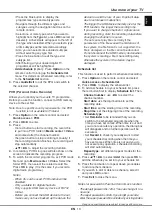
PVR (Personal Video Recorder)

Allows you to record your favourite TV programme. 
Before you use the function, connect a USB memory 

device to the set irst. 

Note:  Due to speciic country requirements, the PVR 

function is not available for Finland.

1.

  Press 

Option

 on the remote control and select 

Quick access > PVR

.

2.

  Press 

OK/

 to enter.

3.

  Press:

-  

the red button to start recording, the record ile 

is put into a PVR folder in 

Media center > Video


and named after the channel number; 

-  the green button to stop recording manually; if 

the recording duration inishes, the recording will 

stop automatically.

-  

/ /

/

 to adjust the recording duration.

4.

  In recording, PVR mini pane will also show on the 

screen to indicate the recording progress.

5.

  To watch the recorded programme, exit PVR mode 

irst and go to 

Media center > Video

. Select the 

folder PVR, then select the related record ile. 

Press 

OK

 to play. (It is the same if you record a 

digital radio programme).

Notes: 


-  When CI+ card is used, PVR function will be 

disabled. 

-  Only available for digital channels. 
-  

Only supports USB memory device of FAT32 

format.

-  Before you connect the USB device to the set, 

make sure you have backed up the data in the 

device to avoid the loss of your important data 
due to unforeseen malfunction.

-  The bigger the USB device memory size for the 

PVR function, the longer the recording time.

-  If you want to change channel or signal source 

during recording, store the recording data before 
changing the channel or source. 

-  

The set cannot play iles normally if the 

parameters of the ile exceed the limitations of 

the system, the ile format is not supported, the 

ile is damaged, or the ile cannot be decoded.

-  Do not disconnect the USB memory device when 

the system is reading a ile or transmitting data, 

otherwise the system or the device may be 
damaged.

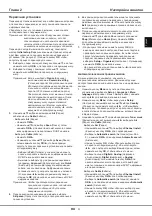
Schedule list

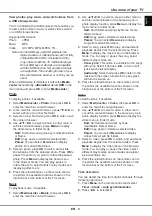
This function is used to perform scheduled recording.

1.

  Press 

Option

 on the remote control and select 

Quick access > Schedule list

.

2.

  Press 

OK/

 to display the schedule list. 

3.

  To add a schedule into your schedule list, press 

the red button irst to display 

Schedule list

. Then, 


-  

Channel number

: use 

/

 to select the 

channel number. 


-  

Start date

: use the digit buttons to set the 

recording date. 


-  

Start time

: set the starting time of the recording.


-  

Stop time

: set the stopping time of the recording.


-  

Schedule type

:

• S

et 

Reminder

 to be reminded that you can 

switch to the scheduled programme when the 
time you have set comes. When time is out and 
you do not execute any operation, the dialog box 
will disappear and no further operation will be 
executed. 

• S

et 

Record

 to check if you really want to start 

your scheduled recording when the time you 
have set comes. When time is out and you do 
not execute any operation, scheduled recording 
will start automatically. 


-  

Repeat type

: set different repeat modes for the 

recording. 

4.

  Press 

/ /

/

 to select 

Add

, then press 

OK

 to 

add the schedule you set into your schedule list. 

5.

  Press the red button to repeat above procedures 

to add another schedule. 

6.

  If you wish to edit or delete a schedule, select it 

and press 

OK

 to enter. 

7.

  Press 

Exit

 to close the menu.

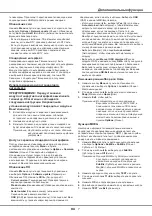
Notes for password in Parental Control Lock function: 

-  The default password is 1234. You can change it to a 

new one.

-  The super password is 0423. If you forget your code, 

enter the super password to override any existing codes.

Design and speciications are subject to change without notice.

Use more of your TV

Содержание T32E32DU

Страница 1: ...T32ED33DU T39ED33DHU T32E32DU T42E32DHU ...

Страница 2: ...LCD cov 16 10 03 10 44 Page 2 ...

Страница 3: ...c update Analog manual scan Air manual installation Clean channel list Back Exit Select Enter Back Exit Select Subtitle Subtitle Digital subtitle language Digital subtitle language 2nd Subtitle type On English English Normal Picture Sound PAP Options USB Timer Lock Setup Initial setup Welcome to use the Wizard for Initial Setup Please press OK to start the wizard Welcome ...

Страница 4: ...f glass Therefore it can break when the product is dropped or impacted upon by other objects The TV screen is a very high technology product giving you inely detailed pictures Occasionally a few nonactive pixels may appear on the screen as a ixed point of blue green or red This does not affect the performance of your product Care Use a glass cleaning product to clean the screen and a soft cloth an...

Страница 5: ...available on all models The location of the power socket on the TV may vary according to TV model The positions and names of the function buttons and connectors on the TV may vary according to TV model Cable Note Disconnect the power cord before connecting devices Cable TV DVD player Home theatre system TV PC Note Before connecting a PC set the PC monitor refresh rate to 60Hz Or use an HDMI connec...

Страница 6: ...or VOL VOL or VOL VOL or VOL MENU or Menu MENU or Menu OK OK Remote control functions Most of your television s functions are available via the menus that appear on the screen The remote control supplied with your set can be used to navigate through the menus and to conigure all the general settings Switch the TV on and off 1 When powered on the TV will be turned on directly or be in standby mode ...

Страница 7: ... channels Note To prevent the channel setup process from being interrupted wait for the message indicating that the setup is complete 4 Before starting the scanning you can also select Skip scan to skip the initial setup process 5 During the setup you can follow the hints available at the bottom of the screen to return to the previous step by pressing Or press Exit to exit or interrupt the search ...

Страница 8: ... the low or middle levels to reduce the motion compensation Use your TV Use more of your TV Chapter 3 4 conigure proper cable information in the same way as in Initial setup Select Scan and press OK to start your automatic search relating to all DVB C digital and analogue channels Select Digital then follow the same process as above to start your automatic search relating to all DVB C digital chan...

Страница 9: ...nd select Options Subtitle Subtitle type 2 Press to select a subtitle type You can select Hearing impaired to display the hearing impaired subtitles with your selected language Select decoding page language in Teletext Press Menu on the remote control and select Options Decoding page language Select a proper type of language in which Teletext will display Digital Teletext language For digital TV c...

Страница 10: ...ions and content are provided by your digital TV service operator Software update Press Menu on the remote control and select Options Software update Press OK to enter Refer to Figure 5 Current version Checks the current version of the software Product name Displays the product name of your set Serial number if available Displays the serial number of your set OAD over air download Enables you to i...

Страница 11: ...hen press OK to enter the main ile content browser 2 Use to select a song in either main or sub ile content browser in the same way as in photo display function press Menu to display the music menu in folder mode Sort Sort folders and songs by Name Genre Artist or Album Edit Copy paste or delete a selected song Parser You can select Recursive to display songs from all sub ile folders 3 Select a so...

Страница 12: ...ur important data due to unforeseen malfunction We recommend you use a USB device with free capacity above 1GB and disk speed faster than 5 0MB sec The bigger the ile size for time shift the longer the recording time If you change the channel in time shift mode a message prompts you to select Yes or No You can select Yes to exit the time shift function and execute the channel change Reset shop All...

Страница 13: ...in the device to avoid the loss of your important data due to unforeseen malfunction The bigger the USB device memory size for the PVR function the longer the recording time If you want to change channel or signal source during recording store the recording data before changing the channel or source The set cannot play iles normally if the parameters of the ile exceed the limitations of the system...

Страница 14: ...RU 1 1 35 85 POWER VESA ...

Страница 15: ...OUT OUT OUT IN ANTENNA IN OUT OUT IN ANTENNA OUT RU 2 POWER DVD ro TB DVD Blu ray Disc HD HD HD HDMI USB USB TB Blu ray Disc HD TB TB TB DVD HDMI DVD 60 ...

Страница 16: ... PR PR PR PR PR PR OK VOL VOL VOL VOL VOL VOL VOL VOL MENU Menu MENU Menu OK OK Source 0 9 ECO Guide EPG Menu Exit USB Zoom 4 3 TB OK Option Return USB V Info Mute P TEXT SUBTITLE LIST TV TB MHEG Lang 1 POWER 2 POWER 3 ...

Страница 17: ...ed Quick ID OK DVB C 4 Skip scan 5 Exit 6 Shop Home OK 7 OK Setup Organiser OK 1 Menu Setup Language Menu language 2 Menu Setup Country 3 Tuner mode Air Cable Air Channel install OK Automatic search 2 OK Automatic search OK OK Digital Analog Digital Analog OK DVB T Cable Channel install OK Automatic search OK Automatic search OK OK 2 ...

Страница 18: ...e OK P OK VOL VOL V Mute V 1 Menu 3 2 OK 3 OK OK 4 Menu 5 Exit 1 Menu 2 Setup OK 3 Language OK 4 Menu language 5 Exit 4 1 LIST 2 Channel list selection OK 3 OK 4 5 LIST Exit ECO 1 Menu Picture ECO dynamic back light 2 Picture preset Picture Personal 3 Exit ECO 1 Menu Picture Advanced video Motion enhance 2 OK 3 Effect high ...

Страница 19: ...btitle Digital subtitle language 2 3 Digital subtitle language 2nd 4 5 Exit SUBTITLE 1 Menu Options Subtitle Subtitle type 2 Hearing impaired Menu Options Decoding page language Menu Options Digital teletext language SPDIF SPDIF Menu Options SPDIF type SPDIF Dolby D PCM Dolby D Dolby D PCM Off SPDIF PCM SPDIF delay SPDIF Options CEC HDMI 1 Menu Options T Link 2 On Off DVD DVD DVD System standby ...

Страница 20: ...ate OK 5 Current version Product name Serial number OAD OAD OAD OAD OK Yes Auto download No Auto download Manual OAD download OAD OK OK Exit Shop Home 1 Menu Options Location 2 Shop Home 3 Exit 2009 125 EC 4 Options MHEG BBC1 1 Menu Options Subtitle Subtitle 2 Subtitle Off MHEG Subtitle On MHEG 3 TEXT 4 5 OK 6 7 TEXT Exit ...

Страница 21: ...B USB OK Media center 1 Media center Photo OK 2 3 K 4 Menu Sort Edit Parser Recursive 5 OK OK Menu 6 1 Media center Music OK 2 Menu Sort Name Genre Artist Album Edit Parser Recursive 3 OK Menu Show lyrics Audio only OK 4 1 Media center Video OK 2 Menu Sort Edit Parser Recursive 3 OK Menu 4 ...

Страница 22: ...1 Menu Setup Time shift 2 On Exit 3 Option Time shift OK 4 5 Option Time shift 6 OK OK USB USB 1 5 Yes No Yes 1 Menu Setup OK 2 Reset shop OK 3 4 OK OK 5 Initial setup 1 Menu Setup Input settings 2 OK Input settings 3 4 5 Menu Setup Source OK OK EPG EPG EPG 1 Guide Now and Next EPG EPG 2 8 Days EPG EPG 8 Prev day EPG Next day EPG ...

Страница 23: ... Option Quick access PVR PVR 2 OK 3 PVR Media center Video 4 PVR 5 PVR Media center Video PVR OK CI PVR USB FAT32 USB USB PVR USB 1 Option Quick access Schedule list 2 OK 3 Schedule list Channel number Start date Start time Stop time Schedule type Reminder Record Repeat type 4 Add OK 5 6 OK 7 Exit Parental Control Lock 1234 0423 ...

Страница 24: ...TCH 4 IN 1 TMDS I F VGA In Scart DVB T C Tuner YPbPr Audio in Head phone USB LVDS DDR DDR JTA G CI Socket Parallel TS CI Interface IP GPIO FLASH AUDIO AMP USB VGA Audio In 4052 IR KEY Panel LV DS DDR3 Nor Flash 64Mbit Audio Amp Spdif Out Speaker YPbPr in MEMC Flash DDR3 DDR JTAG LVDS IN LVDS TX A LVDS TX B FLASH GPIO LV DS LV DS Panel LV DS ...

Страница 25: ...селей Угол обзора градусов Срок службы лет Количество цветов 1 Жидкокристаллическая панель 2 Питание Входное напряжение Потребляемая мощность Вт Потребляемая мощность в режиме ожидания Вт 3 Внешние входы Антенный AV SCART VGA HDMI 4 Совместимость Система цветности ПК 7 Звуковая мощность RMS 5 Формат экрана 6 Система управления пользователя 8 Размеры мм 80 1366 x 768 3 16 7 млн цветов 70 AC 220 240...

Отзывы: