5
2.2 Full Instructions
Power on:
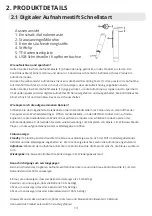
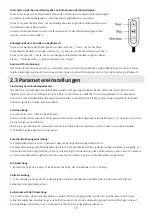
Press and hold the Power/Recording button (1) for 3 seconds and wait for the red and blue lights (2) to indicate
the battery level.
The pen will start recording or file playback after the red light flashes 3 times depending on if headphones are
connected.
Power off
:
Press and hold the Power/Recording button (1) for more than 2 seconds in any state, the pen will power down
and be off once the red and blue lights (2) flash 3 times.
This will also stop and save any current recording.
Voice Recording:
One-key recording
:
Once powered on, the light indicator (2) will first show the battery level and then the red light will flash 3 times.
Once the red light goes out for the 3rd time, recording starts.
To Pause Recording
: Press the Power/Recording Button, the status indicator light will be red when paused.
To Stop Recording
: Press and hold the Recording/Power (1) button for more than 2 seconds to stop and save
the recording file. This will also turn off the Pen.
Voice Controlled Recording:
Auto Recording needs to be enabled by using the following instructions in Parameter Settings.
Once powered on, the light indicator (2) will first show the battery level and then the red light will flash 3 times.
Recording will not start until a sound is heard.
Once a sound is heard the recording will start, if no sound is heard the recording will pause and will restart
when further sound is heard.
To Stop Recording: Press and hold the Recording/Power (1) button for more than 2 seconds to stop and save
the recording file. This will also turn off the Pen.
During recording, the recording file will be automatically saved and named according to the recording
parameters in the configuration settings.
The recording filename is named using a timestamp, for example, R20221225-100641.WAV or V20221225-
100641.WAV. The character R stands for ordinary recording, while the V stands for voice-activated recording;
“20221225” shows the date that the recording was taken and “100641” shows the time the recording was
made.
Recording/Music Playback:
Enabling Playback:
Connect the Pen to the USB to earphone jack adapter cable and plug in the included earphones.
Turn on the Voice Recorder Pen and if the headphones are connected it will immediately enter playback mode,
the blue indicator light (2) will start flashing slowly.
If the earphones are not plugged in, the pen will enter recording state first when turned on, and when the
included earphones are connected, the pen will switch to playback mode and start to play the currently saved
recording file.
Short press the “Play” button on the earphone controller to pause/play the files.


