background image

Bigwater 780e

CL-W0169

English

English


                                              Limited Liability

   These warranties replace all other warranties, expressed or implied including, 
but not limited to, the implied warranties of merchantability and fitness for a 
particular purpose.  

   Thermaltake disclaims all other warranties, expressed or implied including, 
without limitation, implied warranties of merchantability and fitness for a particular 
purpose.  

   Some jurisdictions do not allow the exclusion of implied warranties so this 
limitation may not apply to you.  All expressed and implied warranties are limited in 
duration to the limited warranty period.  No warranties apply after that period, some 
jurisdiction do not allow limitation on how long an implied warranty lasts, so this 
limitation may not apply to you.  

   Limitations of liability, Thermaltake's responsibility under this, or any other 
warranty, implied or expressed, are limited to repair or replacement, as set forth 
above.  These remedies are the sole and exclusive remedies for any breach of 
warranty.  Thermaltake is not responsible for direct, special, incidental, or 
consequential damages resulting from any breach of warranty or under any other 
legal theory including, but not limited to, lost profits, downtime, goodwill, damage 
to or replacement of equipment and property, and any cost of recovering, 
reprogramming, or reproducing any program or data stored in or used with a 
system containing Thermaltake product.  Some jurisdictions do not allow the 
exclusion or limitation of incidental or exclusions may not apply to you.  

   Extent of limited warranty, Thermaltake does not warrant that your product will 
be free from design defects or errors known as "ERRATA". Current characterized 
errata are available upon request.  This limited warranty does not cover any costs 
relating to removal or replacement of any part that is soldered or otherwise affixed 
to your system's motherboard.  This limited warranty does not cover damages due 
to external causes, including accidental, problems with electrical power, usage not 
in accordance with product instructions, misuse, neglect, alteration, repair, 
improper installation, or improper testing.  Nor is Thermaltake held liable for any 
bodily damage that may result during the installation, maintenance, repair, or is 
otherwise associated with this product, Thermaltake is free from any legal actions 
that may result in death, pain and anguish, or any other form of personal damage 
that may occur by purchasing this product.  

   You, the buyer, agree to this warranty and its term set within its expressed and 
implied limited warranty.  This limited warranty gives you specific legal rights, and 
you may also have other right that varies from jurisdiction to jurisdiction.

CAUTION

  Before installing Thermaltake Bigwater 780e 

Liquid Cooling System, we strongly suggest you 

to read the manual throughly and make sure all 

components are included in the package. Please 

do follow the installation guide step-by-step.

   Improper installation may cause serious 

damage to the system as well as to the water 

cooling unit. Thermaltake will not responsible for 

any damages due to incorrect installation and 

incorrect usage of this product.

Содержание Bigwater 780e

Страница 1: ...hnology Co Ltd All Rights Reserved 2008 01 O4655 C Tested To Comply With FCC Standards FOR HOME OR OFFICE USE All other registered trademarks belong to their respective companies www thermaltake com 7...

Страница 2: ...tation of incidental or exclusions may not apply to you Extent of limited warranty Thermaltake does not warrant that your product will be free from design defects or errors known as ERRATA Current cha...

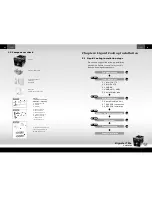
Страница 3: ...wer on the system Installation waterblock 2 1 2 2 2 3 2 4 2 5 2 6 2 7 2 8 3 1 3 2 3 3 3 4 3 5 4 1 4 2 4 3 4 4 05 05 07 09 12 15 17 17 18 19 21 21 24 27 32 34 35 36 37 38 39 40 STEP1 STEP2 STEP3 STEP4...

Страница 4: ...ansparent UV tube 3 8 UV sensitive 1000 cc Coolant x 1 Refill Bottle G L 2 1 Liquid Cooling Installation steps Components check 2 1 Intel LGA 775 2 2 Intel P4 478 2 3 AMD K8 2 4 AMD AM2 AM2 2 5 Instal...

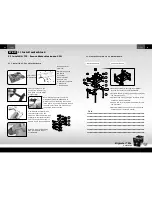
Страница 5: ...g the cushion onto the motherboard with the adhesive will prevent you from removing the cushion in the future If you are planning to remove the cushion for future use please don t remove the protectiv...

Страница 6: ...Insulator D 50mm screws E Thumb nuts G Thermal compound I Stand offs J Red washers A B C D E I G J Combine the insulator C and the cushion B using the adhesive Stick the metal H type clip A with the i...

Страница 7: ...oes NOT have threaded standoffs please continue with 2 3 2 Completed View 1 Apply a thin layer of thermal compound G onto the processor 2 Place waterblock on the processor 3 Secure the waterblock on t...

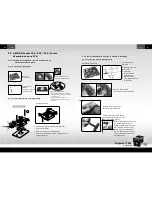
Страница 8: ...ng the screws to prevent the electric current 3 Put the stand offs I along the screws to fix the screws on the motherboard 4 Apply a thin layer of thermal compound G onto the processor 5 Place waterbl...

Страница 9: ...are planning to remove the cushion for future use please don t remove the protective tape A B C D E F I G 2 4 2 2 Install Waterblock on Motherboard Combine the insulator C and the cushion B using the...

Страница 10: ...iers to tighten the hose clips Repeat the steps for the other side First determine the length required for tubing from waterblock to the main unit Then cut the tubing accordingly Insert the hose clips...

Страница 11: ...ive bay Pull the right hand side of the lever to remove the 5 25 device Installation complete STEP2 2 7 ESA PCB Introduction a b d e f g h i c a Power connector Connect the 4 pin power connector b Cas...

Страница 12: ...D D Ground VCC 5V Step 2 Connect to USB connector on the motherboard USB connector cable f Step 3 Connect LED cable from the ESA chassis if you are using this Watercooling with Tt ESA chassis as well...

Страница 13: ...t the Quickconn connector Turn on the PC power switch Please make sure liquid is flowing continuously and smoothly within the tube Close the cap of liquid tank Liquid level will decrease when you powe...

Страница 14: ...ay tap the tubing gently to remove them until all are gone 2 After installation is completed please ensure there are no bent tubings Adjust the fan speed 800 2500 RPM Turn off the PC power switch Clos...

Страница 15: ...irements Uninstall any previous versions of NVIDIA NV Monitor Performance System update before installing the latest version Installation Instructions 1 Download the zip file then unzip to a temporary...

Страница 16: ...irmware posted at Thermaltake Website is for products sold and packaged by Thermaltake Updating the ESA firmware only if you have problems and you are sure that the new firmware revision will solve yo...

Страница 17: ...Bigwater 780e CL W0169 English English 29 30 Step 2 You need to browse the folder where you put the ESA Watercooling firmware for example file and then open it...

Страница 18: ...the firmware update please click the OK bottom Step 3 Click the load FW button to load firmware After selecting the performance icon the user must select Accept End User License Agreement link and ag...

Страница 19: ...adjust PWM PWM Fan speed in percentage All the adjustment will display in NVIDIA Monitor Figure1 Once you implement the NVIDIA Monitor software you are able to select which components that you want to...

Страница 20: ...products sold and packaged by Thermaltake Updating the ESA firmware only if you have problems and you are sure that the new firmware revision will solve your problems Careless updating may result to...

Страница 21: ...t users can monitor and control temperature current and voltage regulation 3 Automatic Fan Speed Control All ESA power supplies can detect the inside heat and automatically adjust the fan speed to pro...

Страница 22: ...on coolant What s happening and what can I do A The Performance Coolant included with main unit contains water based material so it is subject to natural evaporation It is normal for the coolant to de...

Страница 23: ...e CL W0169 English English 41 42 Tubing Tubing Connections Tubing within the system must not be bent Replace tubing if necessary Make sure each connection is tightly secured and that there are no sign...

Отзывы: