

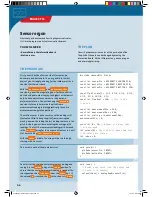


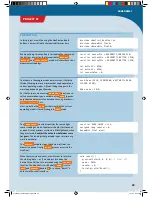


void setup() {
pinMode(sensorPin, INPUT);
pinMode(button1Pin, INPUT);
pinMode(button2Pin, INPUT);
Serial.begin(115200);
reset();
}
void loop() {
switch(mode) {
case IDLE:
loopIdle();
break;
case COUNTDOWN:
loopCountdown();
break;
case WAIT_UNTIL_DARK:
loopUntilDark();
break;
case CLOSED:
loopClosed();
break;
case OPEN:
loopOpen();
break;
}
}
</>
In
setup()
as usual, we determine the operating modes
of the pins being used and initialize the output through the
serial interface. Then,
reset()
is invoked to return the
drawer monitor to its starting state.
In the main loop, depending on operating mode, different
loop functions may be invoked. The
switch(mode)
instruction handles that, introducing a case
differentiation. For each case, or possible
mode
value, a
different function is invoked:
• If
mode
has the value
IDLE
,
loopIdle()
is invoked.
• If
mode
has the value
COUNTDOWN
,
loopCountdown()
is invoked, etc.
The
break;
instruction is important here for breaking off
the treatment of a case and ending the case
differentiation. Without the
break;
instruction, the code
for the next case would also be carried out.
That ends the basic skeleton of our program. Now we will
just have to think about what exactly we want the drawer
monitor to do in its various operating modes.
◀
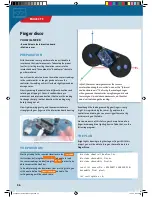
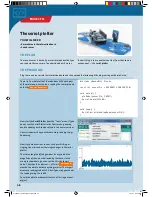
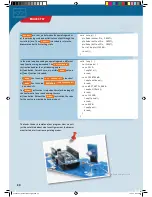
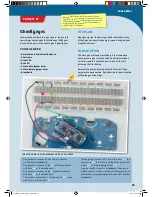
Board with light sensor
50
PROJECT 17
CodeGamer manual inside english.indd 50
7/19/16 12:33 PM


