


Insert the line
Serial.begin(115200);
in
setup()
.
Whenever you want to output something to the serial
monitor, you can do that by using the commands
Serial.print()
and
Serial.println()
. The difference
between the two versions is that
Serial.println()
inserts an extra line break. The next output, in other
words, starts on a new line.
Let’s take a look with the help of a little example:
void setup() {
Serial.begin(115200);
}
void loop() {
Serial.print("Hello!");
delay(500);
}
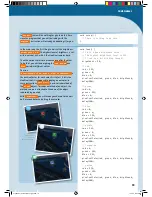
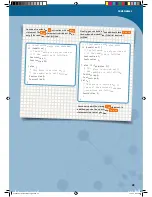
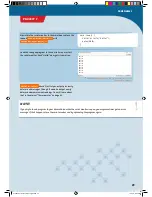
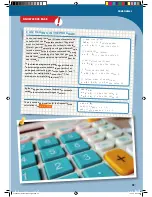
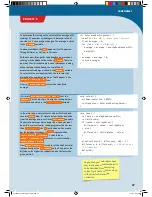
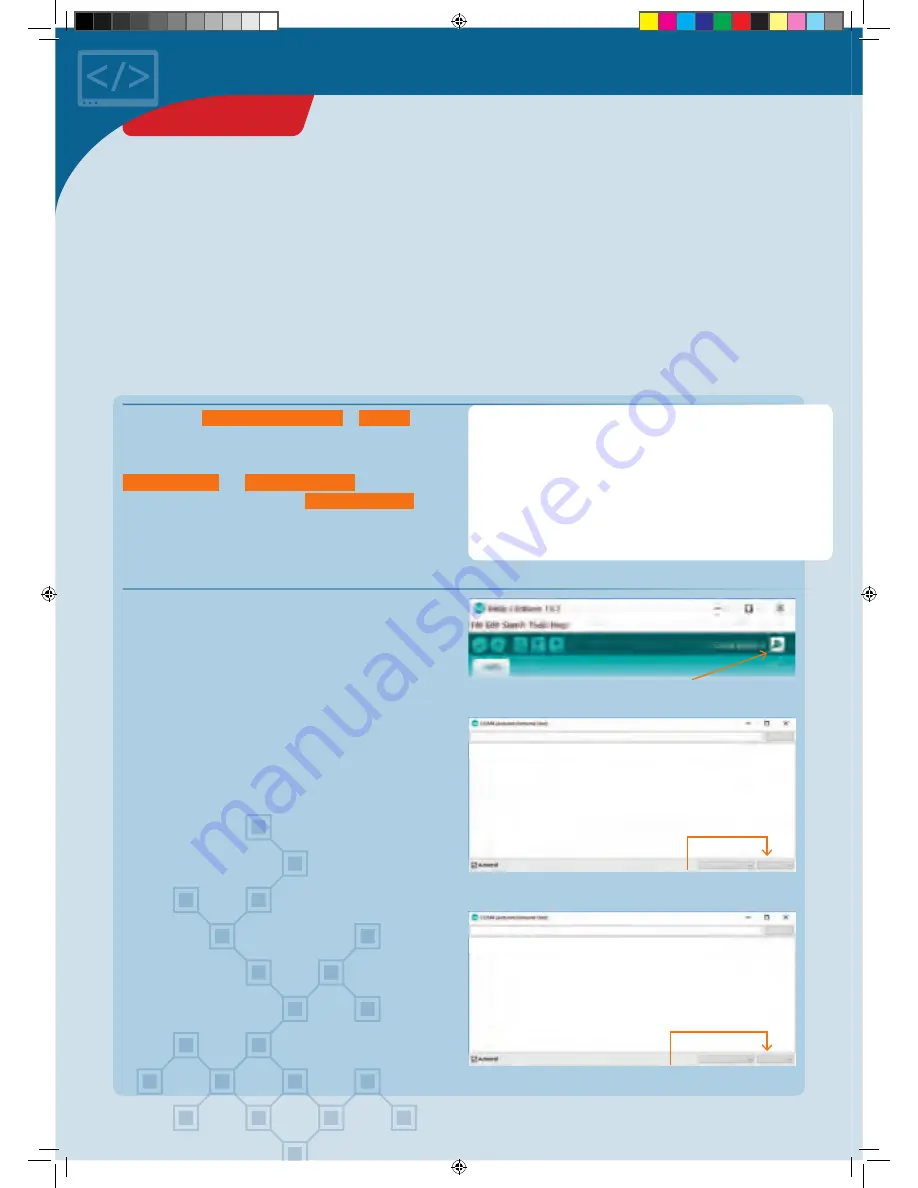
Upload the program to your KosmoDuino. Nothing will
seem to happen. Now click on the magnifying glass
symbol at the top right of the Arduino environment. A new
window will open for the serial monitor.
At first, you will probably just see some funny symbols.
You can fix that in a jiffy by setting the transmission rate
correctly. At the bottom right in the serial monitor, you
will find a drop-down list with a “115200 baud” option.
Select that, and you should see one “Hello!” after another
appear in the window.
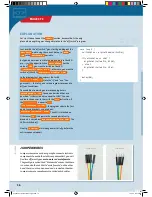
▲
A click on the magnifying glass at the
upper right will launch the serial monitor.
▲
If the wrong baud rate is set (9600 baud in this
case), you will only see a jumble of symbols.
▲
Once the right transmission rate is set, you can
receive “messages” from the KosmoDuino.
</>
÷ôôõôõõõôõôõõôõõôõõõôõõúúúôôõõõõõôô
Hello!Hello!Hello!
115200 Baud
9600 Baud
Senden
Senden
No line ending
No line ending
The serial monitor
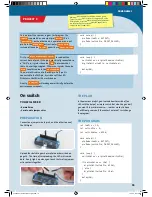
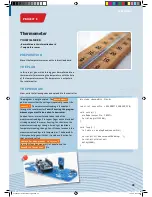
YOU WILL NEED
› KosmoDuino
› Computer
› USB cable
THE PLAN
With the help of the serial monitor, you can send yourself
a brief message from your KosmoDuino and have it appear
on your computer screen.
To be able to use the serial monitor, proceed as follows:
THE PROGRAM
28
PROJECT 7
CodeGamer manual inside english.indd 28
7/19/16 12:32 PM


