


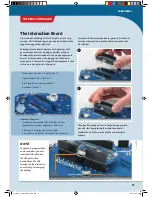


The Interaction Board
OK, we admit it. Making a little LED light up is not very
exciting. Still, it helped to give you a quick introduction to
programming your KosmoDuino.
To help you learn how to do more exciting things with
your microcontroller as quickly as possible, we have
developed the interaction board. You may have gotten to
know it a little already while playing the CodeGamer
video game. It has several very practical components that
will come in handy for lots of projects:
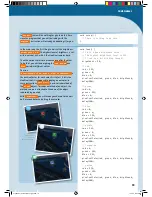
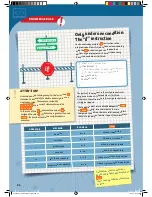
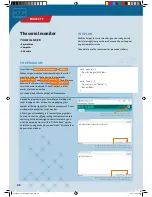
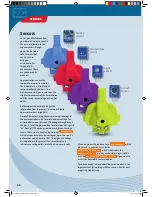
To work with the interaction board, you will first have to
insert your KosmoDuino into the board’s pin socket (see
illustration).
!
NOTE!
To upload a program to the
microcontroller, you will
insert the USB cable into
the USB port on the
KosmoDuino. The USB
terminal on the interaction
board is only for charging
the battery.
1
2
Upload
program
Charge battery
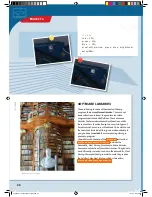
• Two buttons (“button 1” and “button 2”)
• A multicolored LED (“NeoPixel”)
• A rotating wheel (“rotary encoder”)
• A speaker (“buzzer”)
And most important:
• A socket for connecting the KosmoBits sensors
(temperature, motion, brightness, loudness)
• A battery so that you can also use your
KosmoDuino when it isn’t attached to a computer.
Then you’ll be ready to start! In the following projects,
you will start by exploring the interaction board’s
capabilities, and then move on to the more complex
projects.
17
CodeGamer
INTERACTION BOARD
CodeGamer manual inside english.indd 17
7/19/16 12:31 PM


