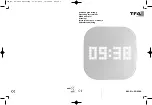
DESIGN
– Glass wall clock
DESIGN
– Glass wall clock
11
10
If your device fails to work despite these measures contact the supplier from whom you pur-
chased it.
12. Waste disposal
This product has been manufactured using high-grade materials and components which can
be recycled and reused.
Never dispose of empty batteries and rechargeable batteries in household
waste.
As a consumer, you are legally required to take them to your retail store or to
an appropriate collection sites depending on national or local regulations in
order to protect the environment.
The symbols for the heavy metals contained are:
Cd=cadmium, Hg=mercury, Pb=lead
This instrument is labelled in accordance with the EU Waste Electrical and Elec-
tronic Equipment Directive (WEEE).
Please do not dispose of this instrument in household waste. The user is obligat-
ed to take end-of-life devices to a designated collection point for the disposal
of electrical and electronic equipment, in order to ensure environmentally-com-
patible disposal.
13. Specifications
Power consumption:
Power adapter:
Input: AC 100 – 240 V ~50/60 Hz, 0.2 A max / output: 6.0V, 0.4 A
(included)
Backup battery:
1 x CR 2032 (included)
Housing dimension:
240 x 80 x 240 mm
Weight:
835 g (instrument only)
TFA Dostmann GmbH & Co.KG, Zum Ottersberg 12, D-97877 Wertheim.
No part of this manual may be reproduced without written consent of TFA Dostmann. The technical data
are correct at the time of going to print and may change without prior notice.
www.tfa-dostmann.de
01/13
7. Operation
• The instrument will automatically quit the setting mode if no button is pressed within 60
seconds.
• Press and hold
UP
or
DOWN
button in the setting mode for fast running.
7.1 Setting of the clock
• Press the
DOWN
button to choose 12 HR or 24 HR system.
• In 12 HR system P appears after 12 o’clock on the display.
• Hold and press the
MODE
button for three seconds.
• The hour digit is flashing. Press
UP
or
DOWN
button to adjust the hours.
• Confirm the setting with
MODE
button.
• The minute digit is flashing. Press
UP
or
DOWN
button to adjust the minutes.
• Confirm with
MODE
button.
• The second digit is flashing. Press
UP
or
DOWN
button to set the seconds to 00.
• Confirm with
MODE
button.
• The set time appears on the display.
7.2 RESET
• If the instrument does not work properly use a pin to press
RESET
button, then the clock
will return to the initial mode.
8
. Care and maintenance
• Clean it with a soft damp cloth. Do not use solvents or scouring agents. Protect it from
moisture.
• Remove the battery and pull out the plug of the socket, if you do not use the product for
a lengthy period.
• Keep the instrument in a dry place.
9. Battery
•
Attention:
The product only works with the power adapter.
• CR2032 button cell is a back-up battery to maintain clock operation in the event of black-
out or other power failure.
• In case of battery replacement, observe correct polarity (+ pole above).
10. Positioning
• Make sure that there is a socket for the mains plug nearby.
11. Troubleshooting
Problems
Solution
No display
➜
Connect unit to mains adapter
Incorrect display
➜
Use a pin to press
RESET
button
➜
Restart the instrument
TFA_No. 60.4000 Anleitung 17.01.2013 10:00 Uhr Seite 6


