A
IN
P
A
IN
M
ADC
Reset
Copyright © 2017, Texas Instruments Incorporated
www.ti.com
Software Control
5
SLAU467D – November 2012 – Revised February 2017
Submit Documentation Feedback
Copyright © 2012–2017, Texas Instruments Incorporated
ADS42JB46, ADS42JB49, and ADS42JB69 Evaluation Module
2.2
Quick Start
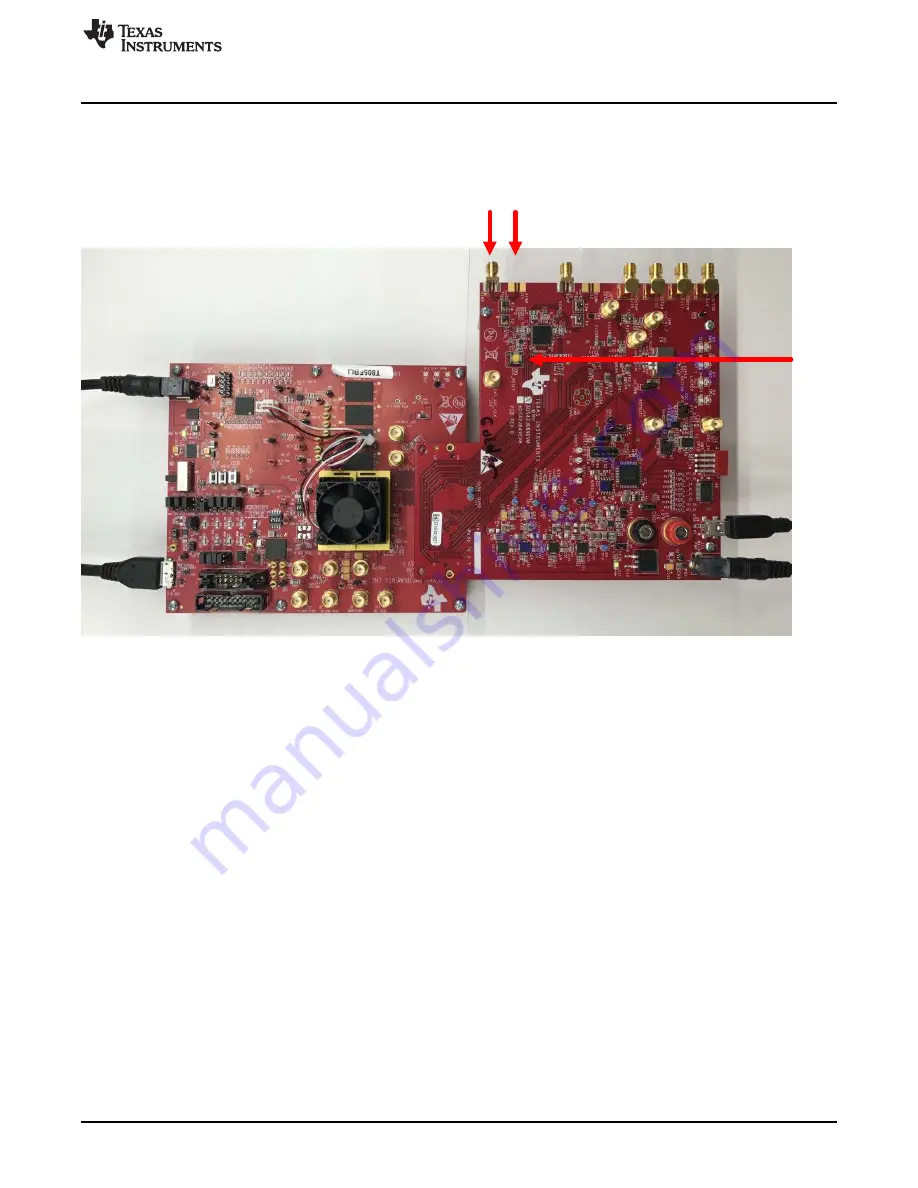
Figure 2
illustrates the EVM hardware setup.
Figure 2. EVM Hardware Setup
Use the following steps to set up the ADS42JBxxEVM and TSW14J5xEVM for evaluation:
1. Connect the ADS42JBxx EVM to the TSW14J5x via the FMC connector.
2. Plug one end of the provided 5-V power cables into both EVMs and connect the other ends to a +5V
DC power supply capable of providing 4 amps.
3. Plug a mini-USB into both EVMs. Plug the other end of USB to the PC or laptop running the
ADS42JBxx software and HSDC Pro software.
Note:
When plugging the ADS42JBxxEVM board into the computer through the USB cable for the first
time, you are prompted to install the USB drivers.
•
Microsoft
®
Windows
®
XP: If Windows XP does not automatically install the drivers, follow the
prompts on the screen to do so. Do not let Windows XP search Microsoft Update for the drivers,
but do let Windows XP install the drivers automatically.
•
Windows 7: After installing the GUI, Windows 7 should automatically be able to install the drivers
for the ADS42JBxxEVM with no user input.
4. Move SW6 on the TSW14J56 (or SW3 on the TSW14J57) to the ‘ON’ position to power up the board.
5.
IMPORTANT:
Push the hardware reset (SW1) on the ADS42JBxx EVM board. This is required each
time the EVM is powered up to ensure proper operation.


