background image

10

D- Using a Multiswitch with an Antenna Input

1. Complete “Scenario A” instructions. (Page 5)

2. Locate your multiswitch and disconnect the satellite wire from

the 18 volt or Satellite A/101 18 volt terminal.

3. Connect the satellite wire to the TV/SAT terminal of the diplexer.

See Fig 16.

4. Use one of the supplied white 12” antenna cables to connect 

the “TV terminal” of the diplexer to the ANTENNA INPUT on 
the multiswitch. 

See Fig 16.

5. Use the other supplied white 12” antenna cable to connect the

“SAT terminal” of the diplexer to the 18 volt (or Satellite “B”
Terminal) of the multiswitch. 

See Fig 16.

6. Continue to “Installing the Indoor Diplexers.”

Diplexer

Logo Side

Dish Side

Fig 16.

T4-0048-TV44-OM.qxp  4/28/04  11:31 AM  Page 10

All manuals and user guides at all-guides.com

all-guides.com

Содержание TV42

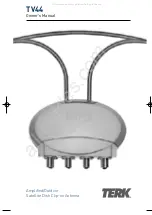
Страница 1: ...TV44 Owner s Manual Amplified Outdoor Satellite Dish Clip on Antenna All manuals and user guides at all guides com a l l g u i d e s c o m...

Страница 2: ...of the ground and can easily be touched by an assembled antenna Please read and follow these important safety precautions Get help from a qualified professional when removing the old antenna if there...

Страница 3: ...can always rotate the antenna on the dish to adjust your reception Before you begin Please take a moment to familiarize yourself with the various elements in the TV44 package Please make sure that yo...

Страница 4: ...nd unplugged from the electrical outlet 2 Unsnap the antenna from the back notch of the mounting clamp See Fig 2 3 Hold the antenna to the back of the dish so that the circular housing is centered wit...

Страница 5: ...notch of the mounting clamp 6 Tighten the clamps by turning the thumb wheel screw clockwise Note We recommend the use of the enclosed security clips for any dish 20 or larger Snap the security clips o...

Страница 6: ...the LNB from the arm of the satellite dish to expose the satellite cables See Fig 6 2 Disconnect the satellite cable s from the satellite dish s LNB and pull them out through the bottom of the satelli...

Страница 7: ...8 5 Reconnect the LNB to the dish arm See Fig 8 6 Connect the remaining end of the 2 black 32 antenna cables to the IN 1 and IN 2 terminals on the TV44 antenna See Fig 9 7 Continue to Installing the...

Страница 8: ...es See Fig 10 2 Disconnect the satellite cable s from the satellite dish s LNB and pull them out through the bottom of the satellite dish arm See Fig 10 3 Connect the satellite cables to the terminals...

Страница 9: ...econnect the LNB to the dish arm See Fig 12 6 Connect the remaining end of the 4 black 32 antenna cables to the IN 1 IN 2 IN 3 and IN 4 terminals on the TV44 antenna See Fig 13 7 Continue to Installin...

Страница 10: ...to the OUT 1 OUT 2 OUT 3 and OUT 4 terminals on the TV44 antenna See Fig 14 3 Using 4 black 32 antenna cables connect the IN 1 IN 2 IN 3 and IN 4 terminals of the TV44 to the OUTPUT or TO RECEIVER ter...

Страница 11: ...See Fig 16 4 Use one of the supplied white 12 antenna cables to connect the TV terminal of the diplexer to the ANTENNA INPUT on the multiswitch See Fig 16 5 Use the other supplied white 12 antenna ca...

Страница 12: ...sing a barrel connector and extra RG6 coaxial cable if they are not long enough 3 Using 2 black 32 antenna cables connect the TO RECIEVER terminals on the SW21 multiswitches to the IN 1 and IN 2 termi...

Страница 13: ...ed SAT on the inside diplexer to your satellite receiver s SAT IN terminal See Fig 20 4 Connect the other white 12 connector cable from the terminal labeled TV on the inside diplexer to your satellite...

Страница 14: ...for one year from the date of purchase During this warranty period this product will be repaired or replaced at TERK s option without charge Please read your instructions thoroughly and use this produ...

Отзывы: