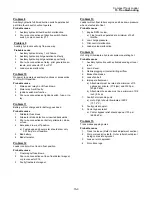
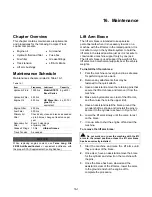
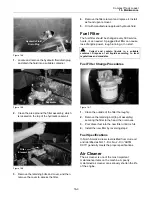
background image

Compact Track Loader 

13. Loader Disassembly and Assembly 


13-6

Lift Arm Bushing Removal and 
Installation 

The tools required for lift arm and lift arm bushing 
removal and installation are listed in Table 13-3. Use                    
manufacturer-recommended tools whenever                  
possible.  

Table 13-3 

Required Tools 

Socket 
Dead Blow Hammer 
Combination Wrench 
Crescent Wrench 
Mechanical Support 
Lifting Device 
Pry Bar 


Lift Arm Bushing Placement 


Figure 13-19 

Upper Friction Points: 

Note:

 Each worn bushing will be removed one at a 

time.  


Figure 13-20 

1.

  Lower the lift arm to the chassis stops. Then 

attach suitable lifting device to them as shown, 
to secure them during the procedure. 

2.

  Turn the engine start switch to the OFF position 

and remove the key to avoid accidental start. 


Figure 13-21 

3.

  Remove the bolts from each side of the lift arm 

that secure the pins to the chassis. 


Figure 13-22 

4.

  Remove the pins from each side of the chassis. 


Figure 13-23


5. 

Raise the lifting device until arm has cleared the 
chassis and the hydraulic hoses. Use a pry bar 
to guide the lift arm upward if necessary.  

6.

  Inspect the bushings for wear according to the                 

procedure in page 16-6, step 3. If it is                           
determined that replacement is needed,                     
continue onto step 7 of this procedure.  

Lower 

Friction  

Point 

Upper 

Friction 

Point 

Bushings 

Pry bar

Содержание PT-30

Страница 1: ...PT 30 Part Number 2010 513 Printed 1 11 Service Manual Compact Track Loader ...

Страница 2: ......

Страница 3: ......

Страница 4: ...1 Chassis Disassembly and Assembly Procedures 6 1 Seat Removal and Installation 6 1 Seat Removal 6 1 Seat Installation 6 2 Fuel Sending Unit Removal and Installation 6 2 Fuel Sending Unit Removal 6 3 Fuel Sending Unit Installation 6 3 Fuel Tank Removal and Installation 6 4 Fuel Tank Removal 6 4 Fuel Tank Installation 6 6 7 Radiator Oil Cooler Disassembly and Assembly Chapter Overview 7 1 Personal ...

Страница 5: ...emoval 11 3 Exhaust Pipe Installation 11 4 Battery Removal and Installation 11 5 Battery Removal 11 5 Battery Installation 11 6 Bleeding the Fuel System 11 7 12 Undercarriage Disassembly and Assembly Chapter Overview 12 1 Personal Safety 12 1 Machine Preparation 12 1 Undercarriage Disassembly and Assembly Procedures 12 1 Wheel Removal and Installation 12 1 Wheel Removal 12 2 Wheel Installation 12 ...

Страница 6: ... and Filter Change Procedures 16 2 Fuel Filter 16 3 Fuel Filter Change Procedures 16 3 Fuel Specifications 16 3 Air Cleaner 16 3 Air Filter Change Procedures 16 3 Track Tension 16 4 Track Tension Adjustment Procedures 16 4 Checking for Proper Track Adjustment 16 4 Fuse Box 16 5 Grease Fittings 16 5 Lift Arm Bushings 16 6 17 Hydraulic Pressure Check Adjustment Chapter Overview 17 1 Personal Safety ...

Страница 7: ......

Страница 8: ... is not specifically recommended by Terex you must satisfy yourself that it is safe for you and others You must also ensure that the machine will not be damaged or be made unsafe by the operation lubrication maintenance or repair procedures that you choose Basic Precautions Safety Labels Safety labels have been included and are displayed in various places throughout the machine to serve as warning...

Страница 9: ...is released from the electrolyte through the battery outlets Do not let electrolyte solution make contact with skin or eyes Electrolyte solution is an acid In case of contact immediately wash skin with soap and water For eyes flush with large amounts of water for at least 15 minutes Call Physician Keep out of reach of children Pressurized Items 1 Do not use hands or any other body part to check fo...

Страница 10: ...e removing the last two nuts or bolts completely 10 Repairs requiring welding should be performed only by personnel adequately trained and knowl edgeable in welding procedures and with the guid ance of appropriate reference information Determine the type of metal being welded and select the correct welding procedure and filler material to provide a weld that is as strong or stronger than the origi...

Страница 11: ...r serious injury can result from contact with moving lift arm or attachment Keep clear of lift arms and attachments 1 4 Compact Track Loader 1 Product Safety 1 1 When replacement parts are required for your machine use only genuine Terex replacement parts or parts that meet or exceed original specifications including but not limited to physical dimensions type strength and material Installing less...

Страница 12: ...sult in serious injury or death No Riders Fall Hazard Falling from a machine can result in serious injury or death Carry loads low Load unload and turn on level ground Travel on inclines with heaviest end of machine uphill Rollover Ejection Hazard Serious injury or death can result WARNING Injection Hazard Escaping fluid under pressure can penetrate skin causing serious injury Relieve internal pre...

Страница 13: ...1 6 ...

Страница 14: ...he machine if the attach ment motor fails or contaminants are introduced from the quick couplers Lift Arm Control Valve Make Husco Relief Pressure 3000 psi 20 684 kPa Pilot pressure required to move spools 180 220psi 1241 1517 kPa Oil Cooler Operating pressure 250 psi 1724 kPa Bypass relief pressure 80 psi 551 6 kPa Hot oil sending unit 225 F 107 2 C Avg oil operating temp 50 60 F 10 16 C above am...

Страница 15: ......

Страница 16: ...ary circuit system Drive loop system Figure 3 1 PT 30 Filtering and Cooling System Filtering and Cooling System The filtering and cooling system Figure 3 1 contains the following major components Hydraulic reservoir Radiator oil cooler Loader valve Auxiliary gear pump Pilot control manifold 3 Circuit Diagrams 3 1 100psi 689 5 kPa ...

Страница 17: ...iary circuit system Figure 3 2 contains the following major components Loader valve Pilot control manifold Auxiliary gear pump Loader control joystick Figure 3 2 PT 30 Auxiliary Circuit System 3 2 Compact Track Loader 3 Circuit Diagrams ...

Страница 18: ...t control manifold Drive control joystick Figure 3 3 PT 30 Drive Loop System 3 3 Compact Track Loader 3 Circuit Diagrams DRIVE MOTOR DRIVE MOTOR CHARGE PRESSURE TEST PORT DRIVE CONTROL TANK CASE DRAIN BRAKE TANDEM PUMP WITH DRIVE AND CHARGE PRESSURE RELIEF VALVES CASE DRAIN TO IMPLEMENT VALVE Drive Reliefs Charge Reliefs ...

Страница 19: ......

Страница 20: ...Figure 4 2 are positioned in the overhead dash panel for ease of access and visibility when seated inside the operator enclosure Instruments include the following components 1 Fuel Gauge 2 Tachometer optional 3 Engine Coolant Temp Gauge optional 4 Hour Meter 5 Warning Indicator Display Engine Oil Pressure Warning Light Engine Temperature Warning Light Hydraulic Oil Temperature Warning Light Batter...

Страница 21: ...s and visibility The standard and optional switches are listed below 1 Work lights 2 Heater fan optional 3 Front wiper optional 4 Beacon light optional 5 Ignition glow plug pre heat 6 Auxiliary hydraulics 4 2 Compact Track Loader 4 Machine Controls and Instrumentation 4 3 1 2 3 4 5 6 ...

Страница 22: ... Loader As a precaution disconnect the battery cables from the battery terminals tape the battery clamps and remove the key from the ignition switch prior to per forming any service work on a Compact Track Load er Place a Do Not Operate tag prominently on the machine to inform personnel that the machine is be ing worked on Operator Enclosure Disassembly and Assembly Procedures Disassembly and asse...

Страница 23: ...ry pocket and gently pry the light assembly out of the light bar Light Bar Installation Figure 5 5 1 Carefully position the light bar without pinching the wiring harness against the cab roof Figure 5 6 2 Secure the light bar to the cab roof with the two capscrews Ignition Switch Removal and Installation The tools required for ignition switch removal and installation are listed in Table 5 2 Use man...

Страница 24: ...ll the ignition switch out from the rear of the dash panel Figure 5 9 4 Unplug the ignition switch connector Ignition Switch Installation Figure 5 10 1 Insert the ignition switch from the rear of the dash panel Figure 5 11 2 Install the nut that secures the ignition switch to the dash panel Figure 5 12 3 Plug in the ignition switch connector Remove Nut Install Nut ...

Страница 25: ...possible Table 5 3 Required Tools Combination wrench Gauge Removal 1 Lower the light bar Refer to Chapter 5 Light Bar Removal procedure Figure 5 13 2 Disconnect the connector from the gauge Figure 5 14 3 Remove the two nuts that secure the gauge to the retaining bracket Figure 5 15 4 Pull the gauge out from the front of the dash panel Gauge Installation Figure 5 16 1 Insert the gauge from the fron...

Страница 26: ... Bar Gas Assist Spring Removal Raise Lap Bar Shown in Down Position Gas Assist Spring Figure 5 19 1 Put the lap bar in the UP position to relieve ten sion on the lap bar gas assist spring Remove Retaining Clip Figure 5 20 2 Using a small screwdriver remove the retaining clip from each end of the gas assist spring Figure 5 21 3 Remove the gas assist spring by pulling both ends out from the ball joi...

Страница 27: ...e Disassembly and Assembly 5 6 Install Endson Ball Joints Figure 5 23 2 Install the ends of the lap bar gas assist spring onto the ball joints Insert RetainingClip Figure 5 24 3 Slide the retaining clip on to each end of the gas assist spring ...

Страница 28: ...s a precaution disconnect the battery cables from the battery terminals tape the battery clamps and remove the key from the ignition switch prior to per forming any service work on a Compact Track Load er Place a Do Not Operate tag prominently on the machine to inform personnel that the machine is be ing worked on Chassis Disassembly and Assembly Procedures Disassembly and assembly procedures are ...

Страница 29: ... Plug in the Connector Figure 6 5 2 Tilt the seat forward and reach behind the seat to plug in the seat switch connector Note The machine will not operate unless the seat switch connector is plugged in insert Seat Bolts Figure 6 6 3 Position the seat so the holes in the seat mounts are aligned with the holes in the frame Insert the four seat mount bolts and washers Fuel Sending Unit Removal and In...

Страница 30: ...t fasten the unit to the tank Mark the wires and hoses Note If the fuel sending unit wires are crossed the fuel gauge will not work If the hoses are crossed the engine will not run Figure 6 8 4 Remove the fuel sending unit Be careful not to damage the float mechanism when pulling it through the opening in the fuel tank Figure 6 9 5 The fuel pickup line will also come out with the fuel sending unit...

Страница 31: ... wires or hoses If the fuel sending unit wires are crossed the fuel gauge will not work If the hoses are crossed the engine will not run 4 Install the seat Refer to Chapter 6 Seat Instal lation procedure Fuel Tank Removal and Installation The tools required for fuel tank removal and installa tion are listed in Table 6 3 Use manufacturer recommended tools whenever possible Table 6 3 Required Tools ...

Страница 32: ...15 5 Remove the floor pan Fuel Sending Unit Figure 6 16 6 Remove the hoses and wires from the fuel send ing unit Remove Filler Piece Figure 6 17 7 Remove the steel filler piece behind the fuel tank Remove Bolt Figure 6 18 8 Remove the bolt that fastens the fuel tank to the frame Disconnect Vent Hose Figure 6 19 9 Disconnect the Compact vent hose from the fuel tank ...

Страница 33: ...refully from the machine Fuel Tank Installation Figure 6 22 1 Place the fuel tank in the machine in approx imately its normal position Attach Filler Hose Figure 6 23 2 Attach the filler hose to the rear of the tank Connect Vent Hose Figure 6 24 3 Connect the vent hose to the fuel tank Insert Bolt and Washer Figure 6 25 4 Insert the bolt and washer that connect the fuel tank to the frame ...

Страница 34: ...ller piece behind the fuel tank Fuel Sending Unit Figure 6 27 6 Attach the hoses and wiring to the fuel sending unit Figure 6 28 7 Replace the floor pan Install Floor Pan Bolts and Washers Figure 6 29 8 Install the four floor pan bolts and washers 9 Install the seat Refer to Chapter 6 Seat Instal lation procedure ...

Страница 35: ......

Страница 36: ...e injury or death to personnel working on a Compact Track Loader As a precaution disconnect the battery cables from the battery terminals tape the battery clamps and remove the key from the ignition switch prior to per forming any service work on a Compact Track Load er Place a Do Not Operate tag prominently on the machine to inform personnel that the machine is be ing worked on Radiator Oil Coole...

Страница 37: ...n guard mounts Fan and Fan Shroud Removal and Installation The tools required for fan and fan shroud removal and installation are listed in Table 7 2 Use manufac turer recommended tools whenever possible Table 7 2 Required Tools Combination Wrench Socket Wrench Fan and Fan Shroud Removal Hot fluids can cause burns Allow the machine to cool thoroughly prior to proceeding Figure 7 3 1 Remove the upp...

Страница 38: ...d pulled back reach between the radiator cooler and the fan and remove the four bolts that secure the fan to the engine Figure 7 6 5 Remove the fan from the engine compartment Figure 7 7 6 Remove the shroud from the engine compart ment Fan and Fan Shroud Installation Figure 7 8 1 Place the fan shroud in the engine compartment Figure 7 9 2 Place the fan in the engine compartment Remove Bolts Remove...

Страница 39: ...val Hot oil can cause personal injury Make sure the oil is cool before removing any components or lines Remove the oil filler cap only when the engine is stopped and has been allowed to cool thoroughly Personal injury can result from hot coolant steam and alkali At operating temperature engine coolant is hot and under pressure The radiator and hoses contain hot coolant and steam Allow the machine ...

Страница 40: ...ing the petcock on the bottom of the radiator Figure 7 15 5 Remove the lower hose from the oil cooler sec tion Cap the hose and fitting Figure 7 16 6 Remove the upper hose from the oil cooler sec tion Cap the hose and fitting Figure 7 17 7 Remove the upper hose from the radiator sec tion Cap the hose and fitting Figure 7 18 8 Remove the lower hose from the radiator sec tion Cap the hose and fittin...

Страница 41: ... Cooler Installation Figure 7 21 1 Position the radiator cooler in the engine com partment Figure 7 22 2 With the radiator cooler in position install the three mounting bolts on each side of the radia tor cooler Figure 7 23 3 Remove the hose and fitting caps and install the lower hose on the radiator section Figure 7 24 4 Remove the hose and fitting caps and install the upper hose on the radiator ...

Страница 42: ...t and the hydraulic reservoir with oil Radiator Oil Cooler Adjustment Procedures Adjustment procedures are provided for the follow ing radiator oil cooler components Fan Shroud Fan Guard Fan Shroud Adjustment The tools required for fan shroud adjustment are listed in Table 7 4 Use manufacturer recommended tools whenever possible Table 7 4 Tool Name Combination Wrench Figure 7 28 1 The fan shroud c...

Страница 43: ...djustment are listed in Table 7 5 Use manufacturer recommended tools whenever possible Table 7 5 Tool Name Combination Wrench Figure 7 29 1 The fan guard can adjust forward or rearward To adjust loosen the capscrews that fasten the fan guard to the fan guard mounts Tighten the capscrews when finished Loosen Capscrews to Adjust ...

Страница 44: ... terminals tape the battery clamps and remove the key from the ignition switch prior to per forming any service work on a Compact Track Load er Place a Do Not Operate tag prominently on the machine to inform personnel that the machine is be ing worked on Hydraulic Reservoir Disassembly and Assembly Procedures Disassembly and assembly procedures are provided for the following hydraulic reservoir co...

Страница 45: ...een allowed to cool thoroughly Note During disassembly cap all hoses and fittings to prevent fluid loss and contamination of the system fluids Figure 8 1 1 Remove the screws securing the cover to the filter assembly Figure 8 2 2 Remove the cap from the filter assembly as shown Figure 8 3 3 Remove the filter from the reservoir as shown Figure 8 4 4 Disconnect the hose from the filter assembly Figur...

Страница 46: ...e the filter assembly gasket in position on top of the reservoir Replace if damaged Figure 8 8 2 Position the filter head onto the gasket with the mounting holes aligned install bolts Figure 8 9 3 Reconnect the hose to the filter head and se cure Figure 8 10 4 Reinstall the filter and filter tube into the reser voir as shown Figure 8 11 5 Install the cap onto the filter head as shown ...

Страница 47: ...components or lines Remove the oil filler cap only when the engine is stopped and the machine has been allowed to cool thoroughly Figure 8 13 1 Slightly loosen the access cover bolt to separate the upper cap from the oval shaped clamping disk on the underside of the assembly This will allow the assembly to be removed Do not re move the bolt entirely or the oval shaped clamp will fall into the rese...

Страница 48: ...Collect and contain liquids in a suitable contain er Dispose of all liquids according to local regula tions and mandates Note During disassembly cap all hoses and fittings to prevent fluid loss and contamination of the system fluids 1 Drain the hydraulic fluid Refer to Chapter 16 Hydraulic Fluid and Filter Change 2 Remove the filter assembly Refer to Chapter 8 Filter Assembly Removal Figure 8 17 3...

Страница 49: ...al Hot oil can cause personal injury Make sure the oil is cool before removing any components or lines Remove the oil filler cap only when the engine is stopped and the machine has been allowed to cool thoroughly Collect and contain liquids in a suitable contain er Dispose of all liquids according to local regula tions and mandates Note It is normally not necessary to replace the suction screen un...

Страница 50: ...leaning The tools required for hydraulic reservoir cleaning are listed in Table 8 5 Use manufacturer recommended tools whenever possible Table 8 5 Tool Name Combination Wrench Hot oil can cause personal injury Make sure the oil is cool before removing any components or lines Remove the oil filler cap only when the engine is stopped and the machine has been allowed to cool thoroughly Collect and co...

Страница 51: ......

Страница 52: ...nform personnel that the machine is be ing worked on Loader Transmission Controls Disassembly and Assembly Procedures Disassembly and assembly procedures are provided for the following loader transmission control compo nents Drive Control Joystick Loader Control Joystick Loader Float Magnet Loader Valve Note Procedures are provided for only those loader transmission control components listed above...

Страница 53: ...k procedure is described below Note During disassembly cap and plug all hoses and fittings to prevent fluid loss and contamination of the system fluids 1 Remove the seat from the machine according to the procedure in chapter 6 seat removal 2 Lower the lift arms to the ground 3 Turn the ignition switch to the OFF position 4 Relax all hydraulic circuits Figure 9 1 5 Remove the various screws holding...

Страница 54: ...e equipped with a heater you must disconnect the heater lines at the heater unit in order to remove the side panel Cap and plug hoses and ports to mini mize coolant loss Loader Float Magnet Removal and Installation The tools required for loader float magnet removal and installation are listed in Table 9 2 Use manufacturer recommended tools whenever possible Table 9 2 Loader Float Magnet Removal Fi...

Страница 55: ...ttings to prevent fluid loss and contamination of the system flu ids 1 Lower the lift arms to the ground 2 Turn the engine start switch to the OFF position 3 Relieve hydraulic pressure from the auxiliary cir cuit 4 Drain the hydraulic fluid Refer to Chapter 16 Hydraulic Fluid and Filter Change 9 4 Compact Track Loader 9 Loader Transmission Controls Combination Wrenches Required Tools Hot oil can c...

Страница 56: ...the rear valance panel to the chassis to allow for removal Figure 9 14 8 Carefully remove the rear valance from the machine to allow access to the loader valve Figure 9 15 9 Locate the loader valve on the side of the hydraulic reservoir Figure 9 16 10 Disconnect the tubes from the top and bottom of the loader valve Cap and plug all openings to pre vent fluid loss 9 5 Compact Track Loader 9 Loader ...

Страница 57: ...tallation is the reverse of the removal proce dure 16 Once all components have been reinstalled and are secure add manufacturer approved hydraulic fluid until full mark is reached on the level gauge Note To eliminate trapped air from the system acti vate all hydralic circuits and run machine through its paces including moving the lift arms up and down curl ing and tilting the Q A driving forward a...

Страница 58: ...Loader As a precaution disconnect the battery cables from the battery terminals tape the battery clamps and remove the key from the ignition switch prior to per forming any service work on a Compact Track Load er Place a Do Not Operate tag prominently on the machine to inform personnel that the machine is be ing worked on Transmission and Drive Disassembly and Assembly Procedures Disassembly and a...

Страница 59: ...local regula tions and mandates Note During disassembly cap all hoses and fittings to prevent fluid loss and contamination of the system fluids 1 Lower the lift arms to the ground 2 Turn the engine start switch to the OFF position 3 Relieve hydraulic pressure from the auxiliary circuit 4 Drain the hydraulic fluid Refer to Chapter 16 Hydraulic Fluid and Filter Change 5 Remove the seat Refer to Chap...

Страница 60: ...fold tube from the gear pump this can be done after the pump is removed if necessary Auxiliary Gear Pump Installation Figure 10 7 1 With the lower manifold tube attached to the auxiliary gear pump align the mounting bolt holes in the auxiliary gear pump with the holes in the tandem pump It will be necessary to slide the manifold tube into the transmission hose to properly position the auxiliary ge...

Страница 61: ...l Hot oil can cause personal injury Make sure the oil is cool before removing any components or lines Remove the oil filler cap only when the engine is stopped and has been allowed to cool thoroughly Collect and contain liquids in a suitable contain er Dispose of all liquids according to local regula tions and mandates Note During disassembly cap all hoses and fittings to prevent fluid loss and co...

Страница 62: ...washer and flat washer from the left hand side of the tandem pump Figure 10 14 11 Remove the tandem pump with pump drive coupler attached from the pump mounting plate Tandem Pump Installation Figure 10 15 1 With the pump drive coupler attached to the tan dem pump position the tandem pump against the pump mounting plate Make sure the teeth on the pump drive coupler mesh properly with the flywheel g...

Страница 63: ...drive coupler removal and installation are listed in Table 10 3 Use manu facturer recommended tools whenever possible Table 10 3 Required Tools Screwdriver Combination Wrench Socket Wrench Pump Drive Coupler Removal Hot oil can cause personal injury Make sure the oil is cool before removing any components or lines Remove the oil filler cap only when the engine is stopped and has been allowed to co...

Страница 64: ...ump Drive Coupler Installation Figure 10 21 1 Slide the pump drive coupler all the way onto the tandem pump drive shaft Figure 10 22 2 Tighten the locking screw that secures the pump drive coupler to the tandem pump drive shaft 3 Install the tandem pump Refer to Chapter 10 Tandem Pump Installation 4 Install the auxiliary gear pump Refer to Chapter 10 Auxiliary Gear Pump Installation 5 Install the ...

Страница 65: ......

Страница 66: ...lamps and remove the key from the ignition switch prior to per forming any service work on a Compact Track Load er Place a Do Not Operate tag prominently on the machine to inform personnel that the machine is be ing worked on Engine Components Disassembly and Assembly Procedures Disassembly and assembly procedures are provided for the following engine components Muffler Battery Exhaust Pipe Bleedi...

Страница 67: ... the exhaust system Figure 11 1 1 Loosen the nuts on the muffler clamp Figure 11 2 2 Spray the joint with penetrating lube then slide the curved pipe out of the muffler inlet A pry bar may be helpful in removing this pipe section Figure 11 3 3 Remove the four bolts that fasten the muffler to the chassis They can be accessed from the un derside of the machine right rear corner 4 Carefully guide the...

Страница 68: ...orted Use caution and care as you install the pipe section Figure 11 7 4 Install the muffler clamp and secure in place Exhaust Pipe Removal and In stallation The tools required for exhaust pipe removal and in stallation are listed in Table 11 2 Use manufacturer recommended tools whenever possible Table 11 2 Required Tools Socket Combination Wrench Pry Bar Penetrating Lubricant Rubber Mallet Plasti...

Страница 69: ... the muffler inlet A pry bar may be helpful in removing this pipe section Exhaust Pipe Installation Figure 11 12 5 Carefully slide the curved pipe into the muffler inlet You may need to tap it into place with a rubber mallet or similar device NOTICE If it is necessary to tap the pipe section into the muffler do so carefully as the pipe walls are thin and easily distorted Use caution and care as yo...

Страница 70: ...d for battery removal and installa tion are listed in Table 11 3 Use manufacturer recommended tools whenever possible Table 11 3 Required Tools Combination Wrench Socket Wrench Battery Removal Figure 11 16 1 Identify the positive and negative battery termin als Figure 11 17 2 Disconnect the battery cable from the negative battery terminal Figure 11 18 3 Disconnect the battery cable from the positi...

Страница 71: ...ise Tilt up the front of the battery and remove the battery from the machine Battery Installation Figure 11 21 1 Place the battery in position in the engine com partment Figure 11 22 2 Position the battery holdown bracket and install the two capscrews and nuts Figure 11 23 3 Connect the battery cable to the positive battery terminal Figure 11 24 Remove Capscrews Install Capscrews Connect Negative ...

Страница 72: ...nding on the serial number of your machine For serial numbers 001 through 1357 Figure 11 25 1 Locate the bleed screw directly above the fuel injectors 2 Loosen the bleed screw two full turns 3 Turn over the engine from the operators com partment until fuel is flowing from the bleed screw without any air bubbles 4 Tighten the bleed screw 5 Engine should now start within 10 seconds For serial number...

Страница 73: ......

Страница 74: ... a Do Not Operate tag prominently on the machine to inform personnel that the machine is being worked on Undercarriage Disassembly and Assembly Procedures Disassembly and assembly procedures are provided for the following undercarriage components Wheels also see track procedure Sprockets Sprocket rollers Sprocket bearing plates Tracks Drive motors Note Procedures are provided for only those underc...

Страница 75: ...3 steps 1 4 Figure 12 2 2 Remove the snap ring securing the wheel cap with snap ring pliers Figure 12 3 3 Remove the wheel cap using a large channel lock pliers Figure 12 4 4 Remove the nut that fastens the wheel to the shaft with the correct size socket Figure 12 5 5 Remove the washer Figure 12 6 6 Remove the bearing Front Idler Wheels Rear Idler Wheels Bogie Wheels ...

Страница 76: ...as shown Note During installation carefully slide the wheel onto the axle shaft to prevent seal damage Note Bogie wheels will have a large washer that is installed before the wheel 2 Install the bearing washer and wheel nut to the axle Torque the nut to 110 ft lbs 149Nm 3 Install the cap and secure it with the snap ring Make sure the snap ring is fully seated in its grove Track Removal and Install...

Страница 77: ...ior wheels are to be equipped with ball type bearings They are not interchangeable in this application Figure 12 9 Figure 12 10 1 Loosen the jam nut located on the track tensioner using the correct size wrench Turn the track tensioner until the track has significant slack Figure 12 11 2 Remove the nut from the bolt that fastens the track tensioner to the drive sprocket assembly Figure 12 12 3 Usin...

Страница 78: ...he track outward as shown Track Installation To remove the tracks the machine must be jacked up and placed on jack stands sturdy enough to support the weight of the machine Terex approved jack stands are recommended Track Drive Lugs Figure 12 17 1 Place the track around the rear wheels and on top of the drive sprocket Make sure the track drive lugs mesh with the sprocket Apply Soap Figure 12 18 2 ...

Страница 79: ... Install the remaining wheels making sure the bearing washer wheel nuts wheel caps and snap rings are properly installed Refer to Chapter 12 Wheel Installation pg 12 3 Figure 12 23 7 Tighten the track by turning the track tensioner When proper track tension has been achieved tighten the jam nut on the track tensioner 8 Check for proper track tension Refer to Chapter 16 Maintenance Checking for Pro...

Страница 80: ...four bolts that secure the bearing assembly to the bearing plate remove the bearing plate Figure 12 27 6 Remove bearing from sprocket with bearing puller tool Inspect sprocket rollers for wear If replacement is needed refer to sprocket roller removal on page 12 8 of this chapter Sprocket Bearing Plate Installation 1 To install the sprocket bearing plate reverse removal procedure with following add...

Страница 81: ...ocket are easily replaceable The track DOES NOT need to be removed to replace these rollers Note In order to remove the sprocket rollers and pins you must remove the torsion axle retaining bolts and washers then slide the undercarriage away from the chassis slightly approx 1 2 54 cm This will provide clearance for the sprocket bolts to be removed for roller pin replacement Figure 12 29 Figure 12 3...

Страница 82: ...Removal and Installation The tools required for sprocket removal and installation are listed in table 12 5 below Use manufacturer recommended tools whenever possible Sprocket Removal Table 12 5 1 Remove the sprocket bearing plate as described on page 12 7 Figure 12 35 2 Install the puller by positioning the push bolt into the end of the sprocket shaft and then threading the puller bolts into the h...

Страница 83: ...nt it fills in small inconsistencies in the shaft and creates a better bond between the shaft and the sprocket Figure 12 39 3 Align the key on the shaft with the key way in the drive sprocket and then slide the sprocket onto the shaft Install the bolt into the end of the sprocket shaft and finger tighten Complete the next step as soon as possible to prevent the Loc tite from drying before the spro...

Страница 84: ...ensure hydraulic systems is free from debris Figure 12 43 3 Remove the four bolts that secure the drive motor to the drive table using a thin wall socket Figure 12 44 4 Remove drive motor by turning motor with the hydraulic hose fittings facing upward and angle the motor out of the table weldment and pull in upward motion Drive Motor Installation 1 Position the drive motor so the hydraulic fitting...

Страница 85: ......

Страница 86: ...ove the key from the ignition switch prior to performing any service work on a Compact Track Loader Place a Do Not Operate tag prominently on the machine to inform personnel that the machine is being worked on Lift Arm Disassembly and Assembly Procedures Disassembly and assembly procedures are provided for the following loader components Lift Cylinders Tilt Cylinders Pressure Release Valve Lift Ar...

Страница 87: ...chanical support with the arms resting about 6 inches off the ground 2 Turn the ignition switch to the OFF position and remove the key to avoid accidental start Figure 13 1 3 Remove the zip tie that secures the hydraulic hose to the lift cylinder 4 Release hydraulic pressure by performing step 3 on page 13 6 of this chapter Figure 13 2 5 Disconnect and cap the hose on the rear end of the cylinder ...

Страница 88: ...als Removal Table 13 2 Required Tools Channel Lock Pliers Bench Vice Blade Type Screwdriver Socket Rubber Mallet Lift Cylinder Tilt Cylinder Seal Removal Note The procedures for removing seals on the lift cylinders and tilt cylinders are similar only the lift cylinder procedure is described below Figure 13 7 1 Secure the cylinder into a vice and remove the end gland by turning counter clockwise wi...

Страница 89: ...nd off the rod Figure 13 13 7 Remove the three o rings located on the outside of the end gland with a small blade type screwdriver paying close attention to the order they are removed to aid during installation of new seals Figure 13 14 8 Remove the shaft wiper and then the rod seal from the inside of the end gland with a small blade type screwdriver Pay attention to seal orientation upon removal ...

Страница 90: ...er Tilt Cylinder Seal Kit Install Note The procedures for installing the seal kits on the lift cylinders and tilt cylinders are similar only the lift cylinder procedure is described below Lift Cylinder Seal Kit P N 2010 552 Tilt Cylinder Seal Kit P N 2010 548 1 Reverse the cylinder seal removal procedure to install seal kits on both the lift and tilt cylinders 2 Make sure your work area is clean a...

Страница 91: ...the chassis stops Then attach suitable lifting device to them as shown to secure them during the procedure 2 Turn the engine start switch to the OFF position and remove the key to avoid accidental start Figure 13 21 3 Remove the bolts from each side of the lift arm that secure the pins to the chassis Figure 13 22 4 Remove the pins from each side of the chassis Figure 13 23 5 Raise the lifting devi...

Страница 92: ...ing This action will force the remaining worn bushing out and drive the first replacement bushing to its permanent position 10 Clean and remove any debris then apply anti seize to the inside of the bushings 11 Perform steps 7 10 on opposite side of lift arm to remove remaining bushings Figure 13 26 12 With an assistant lower lifting device to drop lift arm back into position to re install pins A p...

Страница 93: ...ime Figure 13 30 Figure 13 31 1 Lower lift arms onto a mechanical support with quick attach resting about 1 ft off the ground Then attach a lifting device to secure the lift arm in position Figure 13 32 2 Remove bolt from pins that secure the tilt cylinder to the quick attach Figure 13 33 3 Remove pin from the cylinder and quick attach Figure 13 34 4 Remove bolt from pins that secure the quick att...

Страница 94: ...te side of the lift arm for removal 10 Repeat steps 7 9 for opposite side of lower lift arm 11 Clean and remove any debris then apply anti seize to the inside of the bushings 12 Reverse steps 2 6 to install the pins and bolts Figure 13 38 13 Add grease to the zerks located on each of the lift pins and lubricate them Quick Coupler Block Pressure Release Valve Removal and Installation The tools requ...

Страница 95: ...on and remove the key to avoid accidental start Figure 13 39 3 Press the button on top of the quick coupler block to release hydraulic pressure Figure 13 40 4 Disconnect and cap all three hydraulic tubes Figure 13 41 5 Remove the four bolts that secure the quick coupler block to the loader frame and remove the block Quick Coupler Block Pressure Release Valve Installation Figure 13 42 1 Install the...

Страница 96: ...pe the battery clamps and remove the key from the ignition switch prior to performing any service work on a Compact Track Loader Place a Do Not Operate tag prominently on the machine to inform personnel that the machine is being worked on Quick Attach Disassembly and Assembly Procedures Disassembly and assembly procedures are provided for the following quick attach components Latch Mechanism Quick...

Страница 97: ... installation is the reverse of the removal procedure 2 Add removable lock tite to allen bolt threads Quick Attach Assembly Removal and Installation The tools required for quick attach assembly removal and installation is listed in Table 14 2 Use manufacturer recommended tools whenever possible Table 14 2 Required Tools Combination Wrench Quick Attach Assembly Removal 1 Remove any attachments and ...

Страница 98: ...tach assembly is now free and ready to be moved by a forklift Quick Attach Assembly Installation 1 With a forklift move the quick attach assembly in position to be secured to the loader frame and tilt cylinders Figure 14 7 2 Insert the pin and install the bolt that secures each end of the quick attach assembly to the loader frame Figure 14 8 3 Insert the pin and install the bolt that secures each ...

Страница 99: ......

Страница 100: ...duct Safety for personal safety informa tion Machine Preparation Accidental machine starting can cause injury or death to personnel working on a Compact Track Loader As a precaution disconnect the battery cables from the battery terminals tape the battery clamps and remove the key from the ignition switch prior to per forming any service work on a Compact Track Load er Place a Do Not Operate tag p...

Страница 101: ...d should be adjusted to approximately 1 16 inch 16 cm away from steel pickup bracket 4 Poor ground check ground wires on bottom left rear side of hydraulic reservoir 5 Safety relay is not activating 6 Faulty safety solenoid or safety solenoid spool 7 Poor wire connections on fuse relay or safety sole noid 8 Low charge pressure Problem 4 Loader operates but tracks will not move Probable cause 1 Lea...

Страница 102: ...w only 0 01 amps in off position 5 Bad battery 6 Bad alternator Problem 12 Loader control will not lock in float position Probable cause 1 Float magnet fuse blown 2 Poor wire connections at fuse float detent magnet or pin connector P18 3 Faulty float detent magnet Problem 13 Loader will not float labors engine and has down pressure when detented into float Probable cause 1 Engine RPM too low a Flo...

Страница 103: ......

Страница 104: ...to hold the lift arms in the raised position just as it is not safe to crawl under a machine support only by one jack The lift arm brace is used support the weight of the lift arms much mechanical supports bear the vehicle weights To install the lift arm brace 1 Park the machine on level ground in a safe area for performing service work 2 Remove any attachments that may be fastened to the quick at...

Страница 105: ...lly available oils Terex Heavy Duty Diesel Engine Oil 10W30 is recommended If Terex lubricants are not available use a substitute meeting the following qualifications API CH 4 multi grade engine oil Hydraulic Fluid and Filter The hydraulic fluid should be changed every 500 service hours and the hydraulic filter should be changed every 250 hours Hydrostatic components require extremely clean oil fo...

Страница 106: ...ower rough running or no start Collect and contain liquids in a suitable container Dispose of all liquids according to local regulations and mandates Fuel Filter Change Procedures Figure 16 7 1 Clean the outside of the filter thoroughly 2 Remove the retaining bolt top of assembly securing the filter to the head then removes 3 Pour diesel fuel into the new filter until it is full 4 Install the new ...

Страница 107: ...e the secondary element The secondary element is not serviceable or washable It should be replaced with every three cleanings of the primary element Track Tension Proper track tension is very important for optimum performance and long track life Tracks that are run too loose can cause misfeeding and ratcheting possibly causing damage to the track During the first 50 hours of operation the tracks w...

Страница 108: ...he track should not deflect more than 0 75 inch 1 9 cm between the top of the track and the straightedge 5 If the track deflects more than 0 75 inch 1 9 cm tighten the track Fuse Box Figure 16 14 The fuse box is located on the left side of the engine compartment The machine should never be operated with the fuse box cover removed Grease Fittings Figure 16 15 The locations of the grease fittings fo...

Страница 109: ...approximately 45 from level Then lower the lift arm until the bucket contacts the ground repeatedly Have an assistant look for independent movement between the Lift arms chassis Lift arms lift cylinder Lift cylinder chassis Any movement will be readily noticeable by the attendant If movement is detected bushings will need further inspection as shown in the following step 3 Refer to Chapter 13 of L...

Страница 110: ...ma tion Machine Preparation Accidental machine starting can cause injury or death to personnel working on a Compact Track Loader As a precaution disconnect the battery cables from the battery terminals tape the battery clamps and remove the key from the ignition switch prior to per forming any service work on a Compact Track Load er Place a Do Not Operate tag prominently on the machine to inform p...

Страница 111: ...te In the following procedure some components are shown detached from the machine to facilitate the descrip tion However the charge pressure check is normally per formed from under the machine with only the center skid plate removed Hot oil can cause personal injury Make sure the oil is cool before removing any components or lines Remove the oil filler cap only when the engine is stopped and has b...

Страница 112: ...shims 9 Connect the hose coupling on the tandem pump T adapter 10 Check the charge pressure 11 Install the belly pan Drive Pressure Relief Valve Adjustment The service tools required for drive pressure relief valve adjustment are listed in Table 0 3 Use manu facturer recommended tools whenever possible Table 0 3 Required Tools Combination Wrench Socket Wrench Hot oil can cause personal injury Make...

Страница 113: ...nut Turning Clockwise will increase pressure Never adjust by more than a quarter turn before checking pressure 8 Insert the high pressure relief valve collar valve spring spring loading nut and pressure spring in the valve cavity 9 Replace the high pressure relief valve locking screw and o ring Auxiliary Pressure Check Adjustment The service tools required for the auxiliary pressure check and adju...

Страница 114: ...d on the right side of the dash panel Make sure it is in the direction that sends flow to the gage Jam Nut Adjustment Screw Figure 13 Loosen the jam nut and turn the adjustment screw in with an allen wrench to increase pressure and turn screw out to decrease pressure Tighten jam nut when after adjustment has been made ...

Страница 115: ......

Страница 116: ...Terex Construction Americas 8800 Rostin Road Southaven MS 38671 888 201 6008 662 393 1800 www terex com ...

Отзывы: