EN
Replacement of Brushes and Pads
! ATTENTION: before carrying out the operations
GHVFULEHGEHORZVWRSRQDÀDWDQGOHYHOVXUIDFH
VZLWFKRႇWKHPDFKLQHDQGUHPRYHWKHLJQLWLRQNH\
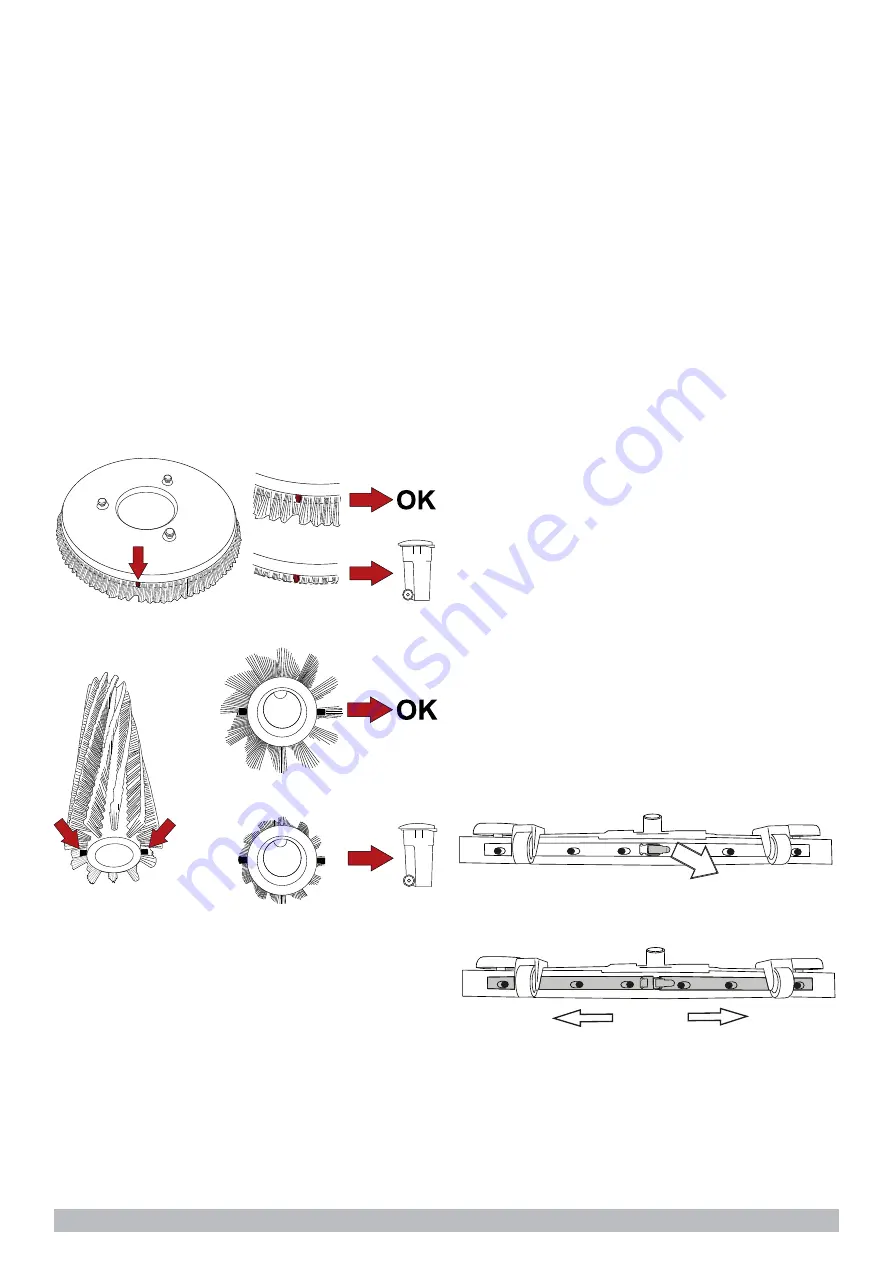
The machine can be equipped with disc brushes, roller
brushes and pads. Check the brushes and the pads every
day to make certain there are no wires, threads or strings
entangled around the brush or the drive board. Check for
wear on the brushes and the pads.
Replaces the brushes when the bristles are worn down to
the point of exposing the red or black indicator.
5HSODFHWKHSDGVZKHQWKH\QRORQJHUFOHDQHႈFLHQWO\
Wash the brushes and pads with soap and water following
use, and hang them up to dry.
Replacing the squeegee blades
! ATTENTION: before carrying out the operations
GHVFULEHGEHORZVWRSRQDÀDWDQGOHYHOVXUIDFH
VZLWFKRႇWKHPDFKLQHDQGUHPRYHWKHLJQLWLRQNH\
7KHVTXHHJHHEODGHVFROOHFWWKH¿OPRIZDWHUDQGGHWHUJHQW
IURPWKHÀRRUDQGSUHSDUHWKHZD\IRUSHUIHFWGU\LQJ:LWK
time, and the constant wiping action, the edge of the blade
LQ FRQWDFW ZLWK WKH ÀRRU EHFRPHV URXQGHG DQG FUDFNHG
GLPLQLVKLQJ LWV GU\LQJ HႈFLHQF\ VR WKDW XOWLPDWHO\ D QHZ
blade is required.
-
Remove the suction hose from the squeegee.
-
Remove the squeegee from its mount by
unscrewing the two knobs completely.
-
Release the locking catch / or unscrew the bolt.
-
Remove the two blade retainers by pushing them
toward the outside of the squeegee then pulling
them out.
-
Remove the blade.
-
5H¿WWKHVDPHEODGHVZLWFKLQJLWDURXQGVRWKDW
all four edges in turn are placed in contact with the
ÀRRUXQWLODOODUHZRUQRXWRUUHSODFHZLWKDQHZ
EODGH ¿WWLQJ LW WR WKH VFUHZV RQ WKH ERG\ RI WKH
squeegee.
-
Reposition the two blade retainers by aligning
WKHZLGHVWSDUWRIWKHVORWVZLWKWKH¿[LQJVFUHZV
on the squeegee body, then pushing the blade
retainers inwards.
-
Re-engage the locking catch / or tighten the bolt.
-
Replace the squeegee on its mount.
29
Содержание LPTB03308
Страница 8: ...EN X Y Z See TECHNICAL SPECIFICATIONS table MACHINE DIMENSIONS X Y Z 8 ...
Страница 35: ......


