


5-4
T12 Service Information 9009917 (12-12)
SERVICE
SIDE bRUSH LIFT ACTUATOR
NOTE: The side brush lift mechanism is under spring tension
when in the raised/retracted position.
for Safety: before leaving or servicing machine, stop
on level surface, turn off machine and remove key .
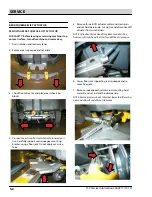
removinG SiDe bruSh lift actuator
1 .
2 .
3 .
4 .
5 .
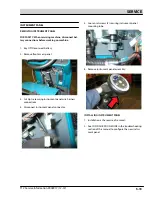
Proceed to step 2 if the actuator failed in the extended/
lowered position.
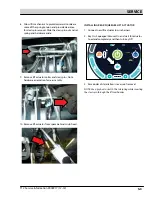
It is difficult to access the side brush
lift mechanism if the actuator fails in the raised (re-
tracted) position . use a pry bar to release the rod-end
from the ball stud as shown below . replace the rod-
end assembly after this is done .
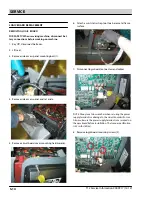
remove actuator pivot bracket mounting bolt (1) .
remove actuator mounting clevis (2) and cotter (2)
pins .
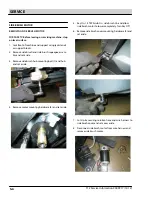
Cut zip tie securing actuator connector to wire har-
ness and disconnect actuator from wire harness .
remove lift actuator .
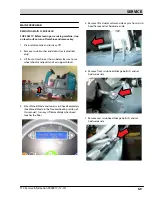
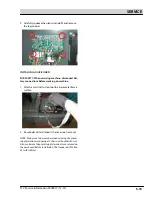
NOTE: The side brush spring tube assembly must be adjust-
ed following the installation of the lift actuator or machine
damage will occur.
NOTE: Using a pry bar to separate the ball stud from the rod
end will damage the rod end assembly. The rod end must
be replaced if this is done.
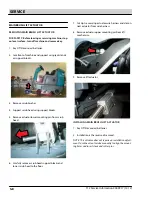
TIP: Remove the RH headlight assembly to access the pin
insertion cutout of the main frame. Use a needle nose pliers
to drop the clevis pin in from above.
for Safety: before leaving or servicing machine, stop
on level surface, turn off machine and remove key .
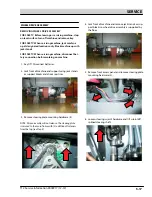
inStallinG SiDe bruSh lift actuator
1 . Installation is the reverse of removal .
Содержание EC-H2O T12
Страница 8: ...1 4 T12 Service Information 9009917 12 12 SAFETY PRECAUTIONS...
Страница 68: ...3 44 T12 Service Information 9009917 12 12 MAINTENANCE...
Страница 132: ...4 64 T12 Service Information 9009917 12 12 TROUBLESHOOTING...
Страница 177: ......
Страница 178: ......


