background image

T12 Service Information 9009917 (12-12)

5-29

SERVICE

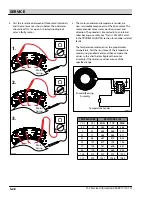
TESTING PROPEL MOTOR CAbLES

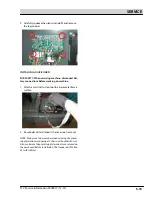
1 .  key off .  disconnect batteries . remove terminal box  


cover screws and set cover aside . 

BET009

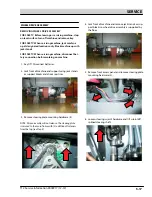
2 .  disconnect u, v, and w cables from w1, a-, and a+  


terminals (respectively) .   

PMT002

W

U

V

PMT006

U

V

W

12

35

23

1

24

13

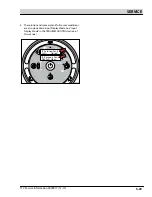
3 .  disconnect u, v, and w cables from Curtis 1232 


controller as shown below .

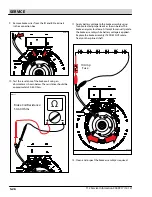
4 .  reconnect battery connection and test each cable  


using an ohmmeter for a short to b as shown  


below . each cable should test as “o .L .” or open to 


b . replace shorted cable(s) . 

PMT007

W

U

V

W

U

V

W

U

V

1.

2.

3.

3.

U

V

W

+

-

+

-

+

-

+

-

+

-

+

-

6 Volt 

6 Volt 

6 Volt 

6 Volt 

6 Volt 

6 Volt 

for Safety: before leaving or servicing machine, stop 

on level surface, turn off machine and remove key .

for Safety: When servicing machine, disconnect bat-

tery connection before working on machine .

Содержание EC-H2O T12

Страница 1: ...ion Manual 9009917 Rev 00 12 2012 Battery North America International To view print or download the latest parts or operator s manual visit www tennantco com manuals The Safe Scrubbing AlternativeR Te...

Страница 2: ...l out at time of installation for future reference MACHINE DATA INTENDED USE The T12 is an industrial commercial rider machine designed to wet scrub both rough and smooth hard surfaces concrete tile s...

Страница 3: ...Brush Option 3 23 Replacing the Side Brush 3 23 Squeegee blades 3 24 replacing or rotating the Contents Page rear squeegee blades 3 24 leveling the rear squeegee 3 27 adjusting the rear squeegee blad...

Страница 4: ...in Scrub head 5 9 removal 5 9 installation 5 10 main scrub brush motor cylindrical 5 11 removal 5 11 installation 5 12 Carbon Brushes 5 12 instrument panel 5 13 Removal 5 13 Installation 5 13 logic bo...

Страница 5: ...zard FOR SAFETY 1 Do not operate machine Unless trained and authorized Unless operator manual is read and understood Under the influence of alcohol or drugs While using a cell phone or other types of...

Страница 6: ...fore working on machine Avoid contact with battery acid All repairs must be performed by a trained service mechanic Do not modify the machine from its original design Use Tennant supplied or approved...

Страница 7: ...rging FOR SAFETY LABEL Read manual before operating machine WARNING LABEL Flammable materials or reactive metals can cause explosion or fire Do not pick up Located on electrical panel Located on elect...

Страница 8: ...1 4 T12 Service Information 9009917 12 12 SAFETY PRECAUTIONS...

Страница 9: ...l Matrix 2 10 Specifications 2 12 Fastener Torque 2 12 Machine dimensions 2 13 General Machine Dimensions Capacities 2 14 General Machine Performance 2 14 Power Type 2 15 Tires 2 15 ec H2O System Opti...

Страница 10: ...Pumps D Batteries E SV 3 Side Brush Water Valve F Wheel Drive Assembly Motor Encoder Temp Sender G Seat Switch H Circuit Breakers 1 8 I Warning Light Backup Alarm J Solution Tank K Vacuum Fan Housing...

Страница 11: ...T U Y Z X W V Components S Module Main Scrub T Module Interface U Module IRIS Telemetry V Main Scrub Head Lift Actuator W Module Water Pickup Diodes 1 2 and 3 X Onboard Battery Charger Y M2 Relay Circ...

Страница 12: ...ER GND TO CURTIS 22 BRN Y R G 8 Y R G 8 1 RED CAN YEL 79 WHT 77 PUR 94 YEL POWER GND TO CURTIS CABLE B TO M1 GND 13 BLK WHT 79 WHT 13 BLK WHT 13 BLK WHT CAN GRN 105 GRN TO SCRUB MODULE MOUNTING PLATE...

Страница 13: ...LE MOUNTING PLATE 58 13 79 77 1 CB 4 2 5A REAR MAIN NO DRIP VALVE ALARM 1 VARIABLE VOLUMN AUDIBLE ALARM P1 1 P2 1 B J1 1 GND J1 4 SQGE_ACT1 J2 2 SQGE_ACT2 J2 3 VAC1 J1 2 VAC1 J1 3 NOT_USED J4 4 SHIELD...

Страница 14: ...GND J1 4 SQGE_ACT1 J2 2 SQGE_ACT2 J2 3 VAC1 J1 2 VAC1 J1 3 SOL FULL J2 6 NOT_USED J4 4 SHIELD J4 3 CAN J4 2 CAN J4 1 EXTRA_OUT1 J2 5 EXTRA_OUT2 J2 4 FLYBACK J2 1 OPEN2 J2 10 OPEN1 J2 9 EXTRA_IN2 J2 8...

Страница 15: ...YEL 22 13 CAN CAN 22 2 3 2 2 CB 7 2 5A REAR PRESS NC OPENS 25PSI 2PSI FAULT COM NC NO 3 CB 9 20A FRONT C 1 CAPACITOR 0 01UF 200V 5 CB 10 2 5A FRONT 1 EC H20 MODULE VCC_1 J4 1 GND_1 J4 14 FLYBACK J4 3...

Страница 16: ...LK 92 BRN 90 TAN 90 TAN 92 BRN 76 BLU 13 BLK 13 BLK 17 PUR 17 PUR 22 BRN 8EA GRY 7EA PUR 3EA ORA 4EA YEL 63 ORA 13 BLK 13 BLK 13 BLK 64 YEL 64 YEL 64 YEL 13 BLK 13 BLK 13EA BLK 9EA WHT 22 BRN 15 GRN 5...

Страница 17: ...T Key Switch Battery DPDT Switch Pressure Switch Motor 3 Phase AC Induction Motor Motor Encoder Momenary Switch N O Contact Switch N C Solenoid Valve Sensor Variable Resistor Circuit Breaker Fuse Diod...

Страница 18: ...ry Low Battery Voltage Load Current Fault Main Scrub Brushes 1 STEP Scrub ON Fwd Rev Throttle Command 1 STEP Scrub OFF Neutral Ready State Recovery Tank Full Solution Tank Empty Very Low Battery Volta...

Страница 19: ...ON ecH2O Button ON Fwd Rev Throttle Command 1 STEP Scrub OFF Solution Control OFF ecH2O Button OFF Neutral Ready State Recovery Tank Full Solution Tank Empty Very Low Battery Voltage ecH2O System Fau...

Страница 20: ...80 104 130 170 171 265 228 383 3 4 750 129 168 215 280 313 407 592 688 1 1 000 258 335 500 650 757 984 1281 1489 Thread Size 4 8 5 6 8 8 Stainless Steel 10 9 12 9 Set Screws M3 43 56 Ncm 99 128 Ncm 1...

Страница 21: ...ormation 9009917 12 12 2 13 GENERAL INFORMATION MACHINE DIMENSIONS Frame roller to roller 945 mm 37 25 in 1420 mm 56 in 1710 mm 67 25 in Rear Squeegee 990 mm 39 in Width with side brush 1065 mm 42 in...

Страница 22: ...s Weight with standard 240 AH batteries 664 Kg 1460 lbs GVWR 1000 Kg 2200 lbs GENERAL MACHINE DIMENSIONS CAPACITIES Item Measure Aisle turnaround width 1854 mm 73 in Travel Speed Forward 8 Km 5 mph Tr...

Страница 23: ...36 360 20 hr rate 44 kg 97 lb POWER TYPE Type Use Voltage kW hp Electric Motors Scrub brush disk 36 VDC 0 75 1 00 Scrub brush cylindrical 36 VDC 0 75 1 00 Vacuum Fan 36 VDC 0 6 0 8 Propelling 36 VAC...

Страница 24: ...uous 20 amps average 40 60 Amps Peak Motors Main cylindrical brush Down pressure 1 10 11 Amps Motor default 10 Amps Down pressure 2 11 16 Amps Motor default 14 5 Amps Down pressure 3 11 22 Amps Motor...

Страница 25: ...ushes 3 17 Checking Cylindrical Scrub Brush Pattern 3 18 Adjusting Cylindrical Brush Taper 3 21 Adjusting Cylindrical Brush Pattern Width 3 22 Side Brush Option 3 23 Replacing the Side Brush 3 23 Sque...

Страница 26: ...al Person Resp Key Description Procedure Lubricant Fluid No of Service Points Daily O 1 Side and rear squeegees Check for damage and wear 4 O 2 Main brushes Check for damage wear and debris 2 O 3 Reco...

Страница 27: ...les Check and clean 12 T 8 Cylindrical brush drive belts Check for damage and wear 2 T 13 Steering chain T12XP Only Lubricate check tension and check for damage and wear GL 1 T 9 Steering gear chain L...

Страница 28: ...d on the steering column directly under the control panel Check for damage or wear and lubricate the steering chain after every 200 hours STEERING GEAR CHAIN The steering gear chain is located directl...

Страница 29: ...After Charging NOTE Make sure the battery caps are in place while charging CHECKING CONNECTIONS CLEANING After every 200 hours of use check for loose battery connections and clean the surface of the...

Страница 30: ...en when charging NOTE If the charger FAULT CODE lights flash when the batteries are plugged into the charger refer to the charger manufacturer manual for fault code definitions 6 The Tennant charger w...

Страница 31: ...charging See CHECKING THE ELECTROLYTE LEVEL 4 Plug the on board battery charger cord into a properly grounded wall outlet WARNING Batteries emit hydrogen gas Explosion or fire can result Keep sparks...

Страница 32: ...Safety thermostat exceeded maximum internal temperature Interrupts charging cycle Ensure the charger vents are not obstructed Clear obstructions E03 Exceeded maximum time for charging phase leaving th...

Страница 33: ...electrical outlet The charger will display a sequence of the following codes three digits the code when the cord is connected A Charging current U Battery Voltage h Charging time C Charging ampere hou...

Страница 34: ...g the charger AC power supply cord from the wall outlet WARNING Electrical Hazard Unplug charger before servicing machine 3 Disconnect the battery cables from the batteries FOR SAFETY When servicing m...

Страница 35: ...ies prior to using the battery watering system Do not add water to batteries before charging the electrolyte level will expand and may overflow when charging See CHARGING THE BATTERIES OFF BOARD CHARG...

Страница 36: ...e flow indicator will spin The red balls stop spinning when the batteries are full 6 Disconnect the battery fill tube from the fill regulator 7 Turn off the water supply 8 After adding water replace t...

Страница 37: ...e overload that caused the circuit breaker to trip is still present the circuit breaker will continue to stop current flow until the problem is corrected The chart below shows the circuit breakers and...

Страница 38: ...brushes on the main brush motors and side brush motor after the first 1000 hours of operation and every 100 hours after the initial check Refer to the table below for carbon brush replacement interval...

Страница 39: ...e pads with a pressure washer Hang pads or lay pads flat to dry NOTE Always replace brushes and pads in sets Otherwise one brush or pad will be more aggressive than the other REPLACING DISK BRUSHES OR...

Страница 40: ...ine 2 Squeeze the spring clip together and remove the center disk from the pad driver 3 Remove the scrub pad from the pad driver 4 Flip or replace the scrub pad Center the scrub pad on the pad driver...

Страница 41: ...ace turn off machine and remove key 1 Open the main brush access door and side squeegee support door 2 Remove the idler plate from the scrub head 3 Remove the brush from the scrub head 4 Position the...

Страница 42: ...mark will remain on the floor 2 Park the machine several feet behind the chalked area and shut off the machine 3 Press and hold the configuration mode button while turning the key to the on position C...

Страница 43: ...ress the Brush pressure button to enable the brush pressure test C16 Dwn Pres Tst Enabled should appear on the LCD display The symbol should no longer appear in front of Enabled 9 Turn the key to the...

Страница 44: ...r lights should be illuminated 12 Press the 1 STEP button to raise the scrub head 13 Position the machine over the chalked area 14 Press the 1 STEP button to lower the scrub head and allow the brushes...

Страница 45: ...not the same see ADJUSTING THE CYLINDRICAL BRUSH WIDTH section of this manual 10653 19 Turn the key to the off position to return to normal operation ADJUSTING CYLINDRICAL BRUSH TAPER FOR SAFETY Befo...

Страница 46: ...head and turn off the machine 2 Open the side squeegee support door 3 Loosen the bolt securing the adjustment bracket located on the front of the scrub head frame 4 Rotatethe adjustment bracket to adj...

Страница 47: ...DE BRUSH Replace the brush when it no longer cleans effectively 1 Loosen the side brush squeegee assembly handle and remove the squeegee assembly from the machine 2 Squeeze the spring handles and let...

Страница 48: ...ection of the squeegee blades daily or when scrubbing a different type of surface Check the leveling of the rear squeegee every 50 hours of operation REPLACING OR ROTATING THE REAR SQUEEGEE BLADES 1 L...

Страница 49: ...emove the squeegee from the squeegee assembly 7 Slide both retainers out away from the squeegee assembly 8 Remove the inner frame from the outer frame 9 Remove the squeegee from the outer frame 10 Ins...

Страница 50: ...12 Slide both retainers into the squeegee assembly 13 Place the rotated or new squeegee blade onto the inner frame Be sure the squeegee is securely attached on each tab on the inner frame 14 Insert t...

Страница 51: ...l length of the squeegee blade 3 If the deflection is not the same over the full length of the blade use the tilt adjust knob to make adjustments DO NOT disconnect the vacuum hose from the squeegee fr...

Страница 52: ...forward and slowly bring the machine to a stop FOR SAFETY Before leaving or servicing machine stop on level surface turn off machine and remove key 2 Look at the amount of deflection or curl of the sq...

Страница 53: ...om the side squeegee assembly 4 Remove the retaining band from the side squeegee assembly 5 Remove the squeegee blade from the side squeegee assembly 6 Install the rotated or new rear squeegee blade o...

Страница 54: ...he thickness of the blade 1 Loosen the side brush squeegee assembly handle and remove the squeegee assembly from the machine 2 Loosen the retaining band latch 3 Remove the retaining band squeegee blad...

Страница 55: ...12 3 31 MAINTENANCE 4 Install the rotated new squeegee blades spacer and retaining band onto the side brush assembly 5 Fasten the side brush retaining band latch 6 Reinstall the side brush squeegee as...

Страница 56: ...urs of operation BELTS CYLINDRICAL BRUSH DRIVE BELTS FOR SAFETY Before leaving or servicing machine stop on level surface turn off machine and remove key The brush drive belts are located on the cylin...

Страница 57: ...rking brake disabled FOR SAFETY Do not operate machine with brake disabled TRANSPORTING THE MACHINE 1 Raise the squeegee scrub head and brushes FOR SAFETY When loading unloading machine onto off truck...

Страница 58: ...zer bars in front of the machine and the holes in the rear jacking brackets at the rear of the machine 9 If the loading surface is not horizontal or is higher than 380 mm 15 in from the ground use a w...

Страница 59: ...tion at the front of all machines Jacking point location at the rear of machines not equipped with the optional rear squeegee protector Jacking point location at the rear of machines equipped with the...

Страница 60: ...rface and turn off machine 1 Lift the operator seat open and engage the seat support 2 Remove the drain hose from the ec H2O compartment 3 Press the connector button to disconnect the outlet hose from...

Страница 61: ...e in order to reset the system indicator light and alarm 9 Pour 2 gallons 7 6 liters of cool clean water into the solution tank 10 Press and release the flush switch to rinse any remaining vinegar fro...

Страница 62: ...n the recovery tank cover to promote air circulation 5 If storing machine in freezing temperatures proceed to FREEZE PROTECTION NOTE To prevent potential machine damage store machine in a rodent and i...

Страница 63: ...T12XP 8 Drive the machine to circulate the RV antifreeze completely through all the systems and clear out any remaining water 9 Machines with side brush option only Press the side brush switch to tur...

Страница 64: ...ution tank Refer to DRAINING AND CLEANING THE SOLUTION TANK in the OPERATION section for instructions how to clean the solution tank 3 Pour 11 4 L 3 gal of cool clean water into the solution tank 4 St...

Страница 65: ...h the system and clear out the RV antifreeze 10 Machines with side brush option only Press the side brush switch to turn off the side brush 11 Stop the machine 12 Machines with spray nozzle option onl...

Страница 66: ...lution tank with clean cool water See FILLING THE SOLUTION TANK section of this manual 2 Lift the operator seat open and engage the seat support 3 Remove the drain hose from the ec H2O compartment 4 D...

Страница 67: ...rain water into the container for 2 minutes 10 Press the ec H2O module flush switch to shut off the system 11 Disconnect the drain hose from the ec H2O manifold hose 12 Reconnect the outlet hose to th...

Страница 68: ...3 44 T12 Service Information 9009917 12 12 MAINTENANCE...

Страница 69: ...ration 4 26 Faults 4 26 Battery Charger Onboard Opt 4 27 Operation 4 27 Configuration 4 27 Faults 4 27 Subsystem Troubleshooting 4 28 Back Up Alarm Light 4 28 Battery Charging 4 30 Onboard 4 30 Off Bo...

Страница 70: ...tton when CONFIG MODE appears on the LCD CONFIG MODE STP002 1 Turn Key Off SELFTEST CONFIG MODE SELFTEST MANUAL MODE INPUT DISPLAY CAN DIAG MODE PROPEL DIAG MODE FIRMWARE UPDATE 3 Press and release th...

Страница 71: ...ide Pump J5 5 Open S5 S23 S5 Rear Right Br J5 4 5 Short S23 Side Pump J5 5 Short S6 S24 S6 Main Act J6 7 8 Open S24 Side Valve J5 4 Open S7 S25 S7 Main Act J6 7 8 Short S25 Side Valve J5 4 Short S8 S3...

Страница 72: ...an onboard diagnostic utility that configures controller software to operate optional equip ment and to electronically adjust certain output func tions C1 Disk Cyl T12 STANDARD T12 XP 3 Press and rel...

Страница 73: ...rd protected C14 Reset Restore factory default values C15 Battery Type Configure battery type for acid or AGM C16 Dwn Pres Tst Initiate brush pattern testing Disable Enable C5 Main Press 1 XX Amps T12...

Страница 74: ...ses no current to the vacuum fan circuit when the output is turned ON CLEAR Correct open circuit condition Vacuum Fan Motor No Current W9 W9 Open R R Brush SET Controller senses no current to the Righ...

Страница 75: ...Current Exceeds 30A for 30 Seconds Fault 2 Current Exceeds 40A for 5 Seconds Fault 3 Over Current for 10 Seconds CLEAR Cycle key switch SET Solution tank empty for 60 seconds CLEAR Cycle key switch SE...

Страница 76: ...0 Seconds Fault 2 Current Exceeds 40A for 5 Seconds Fault 3 Over Current for 10 Seconds CLEAR Cycle key switch SET Unable to achieve target brush motor current after 60 seconds of actuator adjustments...

Страница 77: ...PROPELDIAGMODE CONFIG MODE SELFTEST MANUAL MODE INPUT DISPLAY CAN DIAG MODE PROPEL DIAG MODE FIRMWARE UPDATE 3 Press and release the configuration mode button to scroll through a list of utilities un...

Страница 78: ...ease the configuration mode button to scroll through a list of Curtis 1232 controller inputs 6 The table below describes how each input operates PDM004 T12 Propel Diagnostic Mode Curtis T12 controller...

Страница 79: ...lly Yellow LED on solid Controller is in Flash program mode Red LED on solid Watchdog failure Cycle KSI to restart Red LED and yellow LED flashing alternately The red LED flashes once to indicate that...

Страница 80: ...ture 2 Controller is operating in an extreme environment 3 Excessive load on vehicle 4 Improper mounting of controller Controller Severe Overtemp ShutdownMotor ShutdownMainContactor ShutdownEMBrake Sh...

Страница 81: ...ue the batteries need recharging Controller is performance limited at this voltage 2 Battery parameters are misadjusted 3 Non controller system drain on battery 4 Battery resistance too high 5 Battery...

Страница 82: ...ail 0 or 10V Clear Bring the motor thermistor input voltage within range MaxSpeed reduced LOS properly Limited Operating Strategy 2 If the application doesnotuse a and motor temperature thermistor Tem...

Страница 83: ...nk B connection terminal 39 Main Contactor Did Not Close 1 Main contactor did not close Set With the main contactor commanded closed the capacitor bank voltage B connection terminal did not charge to...

Страница 84: ...correct sequence ShutdownThrottle 51 Throttle SRO Fault 1 Both throttle and brake inputs are active at the same time 2 Faulty throttle and or brake inputs Set Throttle and brake inputs applied at the...

Страница 85: ...rent 2 Fault Checking Menu parameters Ext Supply Max and Ext Supply Min are mis tuned 3 See Monitor menu Outputs Ext Supply Current 71 OS General 1 Internal controller fault Set Internal controller fa...

Страница 86: ...ault is issued when they do not Clear Download the correct VCL and OS software into the controller does not match the OS software in the controller 92 EM Brake Failed to Set 1 Vehicle movement sensed...

Страница 87: ...ause the EMR ShutdownThrottle Timeout timer has expired 2 The emergency reverse input is stuck On 98 Illegal Model Number 1 Model_Number variable contains Set Illegal Model_Number variable when KSI cy...

Страница 88: ...rs on the LCD CONFIG MODE STP002 1 Turn Key Off INPUTDISPLAY CONFIG MODE SELFTEST MANUAL MODE INPUT DISPLAY CAN DIAG MODE PROPEL DIAG MODE FIRMWARE UPDATE 3 Press and release the configuration mode bu...

Страница 89: ...Vac Button Pressed I9 Inc Solution Button Pressed I10 Dec Solution Button Pressed I11 LeftWater Off Button Pressed I12 RightWater Off Button Pressed I13 One Step Button Pressed I14 Down Pres Button Pr...

Страница 90: ...e LCD CONFIG MODE STP002 1 Turn Key Off MANUALMODE CONFIG MODE SELFTEST MANUAL MODE INPUT DISPLAY CAN DIAG MODE PROPEL DIAG MODE FIRMWARE UPDATE 3 Press and release the configuration mode button to sc...

Страница 91: ...Standard models have a single water button used for momentary downward actuator control UseWater Flow button to raise scrub head Scrub Head Lift Actuator When M12 is displayed on LCD Water Flow Butto...

Страница 92: ...configuration mode button when CONFIG MODE appears on the LCD CONFIG MODE STP002 1 Turn Key Off CAN DIAG MODE CONFIG MODE SELFTEST MANUAL MODE INPUT DISPLAY CAN DIAG MODE PROPEL DIAG MODE FIRMWARE UP...

Страница 93: ...n CD1 Scrub T12 STANDARD T12 XP CD1 Scrub CD2 Pickup CD3 Propel CD4 Side CD5 Ec CD1 Scrub Online CD1 Scrub Online CD1 Scrub Scrub XX XX XX CD1 Scrub Production Boot CD1 Scrub Revision X XX 5 Press and...

Страница 94: ...AGM 300 Ah Discover EVL16A EVGC6A When battery is not conn Number display Amber Flashing Reduced Power Mode L High internal charger tem Red Flashing Charger error Reset ch refer to Troubleshooting Gre...

Страница 95: ...e charging cycle The yellow control indicator illumi nates when the final phase of the charging cycle begins and the green control indicator illuminates when the charging cycle is complete oPERATION F...

Страница 96: ...UR 17 PUR 90 TAN 85 GRN WHT 13 BLK 13 BLK 15 GRN J1 16 J1 35 J1 23 J1 22 J1 9 J1 1 B J1 29 J1 28 J1 25 1 Curtis 1232 Controller PROG TX RX B KSI INTERLOCK FWD FWD REV Switch REV B CAN TERM L CAN TERM...

Страница 97: ...omponent locator Connect an Ohmmeter between relay terminals 30 and 87 should test open or O L Apply battery voltage to relay terminals 86 and 85 using fuse protected jumper leads Does the relay click...

Страница 98: ...ection Note Battery charger interlock harness connects to main harness S 3 interlock connection ST M1B M1A Battery Positive Battery Negative D 3 D 1 CB3 2 5A 6 Volt 6 Volt 6 Volt 6 Volt 6 Volt CB2 2 5...

Страница 99: ...ables for damage cor rosion contamination or terminal problems Do any of the above conditions exist Repair or Re place Battery and or Char ger Cables Go to Step 5 5 Skip this step for sealed AGM or ge...

Страница 100: ...50 Start S 2 E Stop Switch S 3 Charger Interlock Switch N C ST M1B M1A Battery Positive Battery Negative D 3 D 1 Charger Connector 6 Volt 6 Volt 6 Volt 6 Volt 6 Volt CB2 2 5A CB3 2 5A 1 RED RED BLACK...

Страница 101: ...ms Do any of the above conditions exist Repair or Re place Battery and or Char ger Cables Go to Step 4 4 Skip this step for sealed AGM or gel batteries Key Off Disconnect batteries Check water level o...

Страница 102: ...BLK6 YEL T2 B1 B2 T1 YEL J1 16 J1 35 J1 23 P1 C BLU YEL P1 B P1 D BLK P1 A RED J1 22 J1 9 J1 1 B J1 29 J1 28 J1 25 1 MTR Curtis 1232 Controller PROG TX RX B KSI INTERLOCK FWD FWD REV Switch Throttle S...

Страница 103: ...wd Rev rocker switch position Does P5 Speed input from drive assembly encoder speed direction position sensor read 0000 0 Mph Does P8 Propel motor current read 0000 0 Amps Is the answer Yes to all of...

Страница 104: ...ght Switch Position Lights OFF Down 2 1 6 5 Headlight ON Center 2 3 6 7 Headlight and Flashing ON Up 3 4 7 8 1 3 5 7 2 4 6 8 76 BLU 93 ORA 92 BRN 68 GRY 67 PUR 13 BLK 13 BLK 13 BLK 13 BLK 22 BRN FU1 8...

Страница 105: ...Go to Step 3 3 Key On Light switch On Firmly press circuit breaker 14 Option to reset Is circuit breaker 14 tripped Reset and Test Lighting Operation Go to Step 4 4 Key On Light switch On Firmly press...

Страница 106: ...r P1 1 B B P2 1 CAN J3 2 CAN J3 3 Battery Positive Battery Negative D 3 D 1 D 2 CB3 2 5A CB 1 60A 6 Volt 6 Volt 6 Volt 6 Volt 6 Volt CB2 2 5A 1 RED 13 BLK 6 BLU 7 PUR 33 ORA 2 BRN 13 BLK 26 BLU 27 PUR...

Страница 107: ...gs and bearings for excessive wear damage seizure etc Check main brush drive belts for excessive wear damage etc Do any of the above conditions exist Repair or Re place Neces sary Cylindri cal Scrub H...

Страница 108: ...6 J3 1 J3 2 J6 15 73 ORA YEL GRN 75 BLK WHT CAN CAN GROUND D 3 D 1 D 2 CB3 2 5A CB 1 60A 6 Volt 6 Volt 6 Volt 6 Volt 6 Volt CB2 2 5A 1 RED 13 BLK 6 BLU 7 PUR 8 GRY 33 ORA 2 BRN Shield Instrument Panel...

Страница 109: ...Operation Go to Step 3 3 Key Off Firmly press circuit breaker 3 to reset Is circuit breaker 3 tripped Reset and Test Power Up Cir cuit Operation Go to Step 4 4 Key Off Firmly press circuit breaker 1...

Страница 110: ...UR 15 GRN Temp Sender Brake Solenoid 59 WHT 58GRY RED1 WHT5 BLK6 YEL T2 B1 B2 T1 YEL J1 16 J1 35 J1 23 P1 C BLU YEL P1 B P1 D BLK P1 A RED J1 22 J1 9 J1 1 B J1 29 J1 28 J1 25 1 MTR Curtis 1232 Control...

Страница 111: ...ction input correspond with Fwd Rev rocker switch position Does P5 Speed input from drive assembly encoder speed direction position sensor read 0000 0 Mph Does P8 Propel motor current read 0000 0 Amps...

Страница 112: ...egee Actuator Battery Positive Battery Negative D 3 D 1 D 2 CB3 2 5A CB5 25A 6 Volt 6 Volt 6 Volt 6 Volt 6 Volt CB2 2 5A 1 RED 13 BLK 6 BLU 7 PUR 8 GRY 31 PNK 2 BRN 13 BLK 29 WHT Extend Limit Sw Retra...

Страница 113: ...ort Cir cuit Condition Go to Step 4 4 Key Off See TESTING REAR SQUEEGEE LIFT ACTUATOR in the SERVICE section of this manual Does the rear squeegee lift actuator pass the testing See TESTING REAR SQUEE...

Страница 114: ...tive J6 8 Scrub Act 2 D 3 D 1 D 2 CB3 2 5A CB1 60A 6 Volt 6 Volt 6 Volt 6 Volt 6 Volt CB2 2 5A 1 RED 13 BLK 6 BLU 7 PUR 8 GRY 56 BLU 33 ORA 2 BRN 13 BLK 23 ORA 3 ORA 4 YEL Cable to Ground Stand Off 5...

Страница 115: ...orted Correct Open or Short Cir cuit Condition Go to Step 4 4 Key Off See TESTING MAIN BRUSH LIFT ACTUATOR in the SERVICE section of this manual Does the scrub head lift actuator pass the testing See...

Страница 116: ...itive Battery Negative J3 3 Side Br CAN J2 1 CAN J2 2 Enable J5 6 B J3 4 D 3 D 1 D 2 CB3 2 5A CB9 20A 6 Volt 6 Volt 6 Volt 6 Volt 6 Volt CB2 2 5A 1 RED 13 BLK 6 BLU 7 PUR 8 GRY 43 ORA 37 PUR 22 BRN 13...

Страница 117: ...Off See Input Display Mode Does I7 Side Br On Off input correspond with side brush rocker switch position Go to Step 5 Correct Faulty Input Condi tion 5 Key Off See TESTING SIDE BRUSH MOTOR in the SE...

Страница 118: ...CB9 20A 6 Volt 6 Volt 6 Volt 6 Volt 6 Volt CB2 2 5A 1 RED 13 BLK 6 BLU 7 PUR 8 GRY 37 PUR 22 BRN 13 BLK Side Brush 45 GRN 3 ORA 4 YEL Cable to Ground Stand Off 5 GRN 10 TAN 2 BRN Cable SBC002 ON OFF...

Страница 119: ...Does I7 Side Br On Off input correspond with side brush rocker switch position Go to Step 5 Correct Faulty Input Condi tion 5 Key Off See TESTING SIDE BRUSH LIFT ACTUATOR in the SER VICE section of th...

Страница 120: ...CB9 20A 6 Volt 6 Volt 6 Volt 6 Volt 6 Volt CB2 2 5A 1 RED 13 BLK 6 BLU 7 PUR 8 GRY 37 PUR 22 BRN 13 BLK Side Brush 45 GRN 3 ORA 4 YEL Cable to Ground Stand Off 5 GRN 10 TAN 2 BRN Cable SBC003 ON OFF...

Страница 121: ...with side brush rocker switch position Go to Step 4 Correct Faulty Input Condi tion 4 Key Off See TESTING SIDE BRUSH LIFT ACTUATOR in the SER VICE section of this manual Does the side brush lift actu...

Страница 122: ...LK 6 BLU 7 PUR 8 GRY 33 ORA 2 BRN 13 BLK 3 ORA 4 YEL Cable to Ground Stand Off 5 GRN 10 TAN 2 BRN Cable CSC002 SV2 J6 2 H2OValveVoltages Range Low 1 LED 2 LEDs 3 LEDs 1 LED 2 LEDs 3 LEDs 1 LED 2 LEDs...

Страница 123: ...Condition Go to Step 4 4 Key Off Firmly press circuit breaker 4 to reset Is circuit breaker 4 tripped Reset and Test Solution Con trol Operation Go to Step 5 5 Key Off Disconnect SV2 from main wire ha...

Страница 124: ...YEL Cable to Ground Stand Off 5 GRN 10 TAN 2 BRN Cable SBC004 ON OFF 6 2 8 5 4 1 J5 4 Side H2O Valve J5 5 Side H2O Pump CB10 2 5A 40 TAN 39 WHT 38 GRY 22 BRN SV3 Side Br H2O Valve Side Br Water Pump M...

Страница 125: ...Go to Step 5 5 Key Off Firmly press circuit breaker 10 to reset Is circuit breaker 10 tripped Reset and Test Solution Con trol Operation Go to Step 6 6 Key Off Disconnect SV3 and side brush water pum...

Страница 126: ...gative SV4 ec H2O Side Br Valve CB6 2 5A 46 BLU 51 PNK 52 BRN 50 TAN CB7 2 5A 13 BLK CAN GRN CAN YEL 60 TAN 9EA WHT Flush Switch 13EA BLK 2 BRN 50 TAN ECC001 MTR Solution Control ec H2O Enabled 1 STEP...

Страница 127: ...2 J5 3 or J5 4 as open or shorted See Self Test Mode Correct Open or Short Cir cuit Condition Go to Step 7 7 Key Off Disconnect ec H2O water pump from wire harness Apply battery voltage to ec H2O wate...

Страница 128: ...NG Spray Nozzle ON Option B From Standoff Battery Positive Battery Negative MTR D 4 13 BLK 13 BLK 63 ORA Switched B From Buss Bar SNC001 6 10 2 8 9 5 4 1 13 BLK Spray Nozzle Pump Spray Nozzle Switch 6...

Страница 129: ...p 3 3 Key Off Disconnect spray nozzle water pump from wire har ness Apply battery voltage to spray nozzle water pump using fuse protected jumper leads Does the spray nozzle water pump dispense water G...

Страница 130: ...Positive Battery Negative D 3 D 1 D 2 CB3 2 5A CB5 25A 6 Volt 6 Volt 6 Volt 6 Volt 6 Volt CB2 2 5A 1 RED 13 BLK 6 BLU 7 PUR 8 GRY 31 PNK 2 BRN 13 BLK 3 ORA 4 YEL Cable to Ground Stand Off 5 GRN 10 TAN...

Страница 131: ...or Short Cir cuit Condition Go to Step 4 4 Key Off See TESTING VACUUM FAN SCRUBBING in the SER VICE section of this manual Do the vacuum fan motor pass the testing See TESTING VACUUM FAN SCRUBBING Go...

Страница 132: ...4 64 T12 Service Information 9009917 12 12 TROUBLESHOOTING...

Страница 133: ...Brushes 5 12 instrument panel 5 13 Removal 5 13 Installation 5 13 logic board replacement 5 14 removal 5 14 installation 5 15 Steering Wheel Timing 5 16 Wheel Drive Assembly 5 17 Removal 5 17 Install...

Страница 134: ...debris tray from rear of scrub head to allow for additional clearance Remove rear squeegee and set aside Chock front drive tire and place rear wheels on blocks Proceed to next step if actuator failed...

Страница 135: ...turn key Off Remainder of installation is reverse of removal NOTE Use a pry bar to stretch the coil spring while inserting the clevis pin through the lift mechanism Allow lift mechanism to pivot down...

Страница 136: ...move actuator pivot bracket mounting bolt 1 Remove actuator mounting clevis 2 and cotter 2 pins Cut zip tie securing actuator connector to wire har ness and disconnect actuator from wire harness Remov...

Страница 137: ...key off Key On Allow the side brush to lift retract completely and then turn the key off Inspect the adjustment gap between the side brush cover and the inside mounting bolt as shown below The gap sh...

Страница 138: ...ing bolt 1 and hub and set aside Remove motor mounting hardware 4 and set aside Key On 1 STEP Scrub On side brush On and allow side brush motor to lower completely Turn Key Off Remove side brush cover...

Страница 139: ...7 SERVICE installing side brush motor Replacing carbon brushes 1 1 2 Installation is the reverse of removal NOTE Apply anti seize to side brush motor shaft and mo tor hub mounting hardware Remove carb...

Страница 140: ...turn off machine and remove key 2 3 4 5 6 7 8 9 1 1 2 Jack front of machine and support using jack stands or support blocks Remove scrub brushes Support scrub head using support blocks Remove actuato...

Страница 141: ...blocks Enter Manual Mode and lower scrub head completely See Manual Mode in the Troubleshooting section of this manual Turn key Off immediately when head touches the floor Remove lift actuator cotter...

Страница 142: ...move upper lift actuator cotter and clevis pins Disconnect lift actuator from wire harness Remove lift actuator and set aside Installation is the reverse of removal Disconnect water hoses from scrub h...

Страница 143: ...2 1 Enter Manual Mode and lower scrub head completely See Manual Mode in the Troubleshooting section of this manual Turn key Off immediately when head touches the floor Remove belt cover bolts 2 and s...

Страница 144: ...7 1 1 2 3 4 5 Disconnect motor from wire harness and remove motor Installation is reverse of removal Release the motor band clamp and set aside Remove carbon brush mounting screws 4 and set aside Rel...

Страница 145: ...e 1 2 3 4 5 6 1 2 Key Off Disconnect battery Remove front access panel Cut zip tie securing instrument panel wire harness connections Disconnect instrument panel connector Loosen set screws 2 securing...

Страница 146: ...it board will occur Also make sure the power supply terminals are secured on the new board before installation The torque specification is 52 in lbs 6 Nm 1 2 3 4 5 6 7 8 Key Off Disconnect batteries L...

Страница 147: ...n securing the power supply terminals or damage to the circuit board will occur Also make sure the power supply terminals are secured on the new board before installation The torque specification 52 i...

Страница 148: ...ont drive tire with the centerline of the machine Orientate the steering wheel as shown below Carefully reinstall the steering u joint onto the splined steering shaft without changing the orienta tion...

Страница 149: ...rking on machine 1 2 3 4 5 6 Key Off Disconnect batteries Jack front of machine and support using jack stands or support blocks and chock rear tires Remove steering plate mounting hardware 4 Jack fron...

Страница 150: ...nly Block machine up with jack stands FOR SAFETY When servicing machine disconnect bat tery connection before working on machine 7 8 9 1 2 Carefully jack front of machine until the drive wheel assembl...

Страница 151: ...s off the tire Tighten the bolts evenly in a diagonal pattern Remove the bolts after this step is complete 3 Remove 6 socket head screws 4 Remove aluminum hub and plastic cover 5 Replace the drive tir...

Страница 152: ...stop on level surface turn off machine and remove key Key Off Disconnect hose from rear squeegee and move spray nozzle away from the vacuum fan access cover Remove hardware 1 and vacuum fan access co...

Страница 153: ...reverse of removal 7 Carefully pry on the vacuum fan mounting flange to break the silicone seal Remove the vacuum fan as sembly and set aside 8 Remove any residual silicone from the tank mounting surf...

Страница 154: ...hould test as O L or open Battery Volta RLT001 A B Terminals 1 Power 2 Ground 3 Voltage Output Specifications Thread Size 1 8 27NPT Input 8 30 Vdc Output 1 5 Vdc VDC RLT002 A B 2 Test the resistance o...

Страница 155: ...3 SERVICE 3 The solution and recovery tank full sensor conditions are also viewable in Input Display Mode See Input Display Mode in the TROUBLESHOOTING section of this manual RLT003 I1 Solution Tank F...

Страница 156: ...plies when the key switch is turned off Attempt to manually rotate the brake as sembly on the splined shaft as shown below The brake assembly SHOULD NOT rotate freely on the splined shaft when the whe...

Страница 157: ...110 120 130 140 150 160 170 180 190 200 BET006 New 6 3mm 0 25in Minimum 4 4mm 0 17in 6 Measure the thickness of the brake rotor using a vernier caliper Replace the rotor if it is less than 4 4mm 0 17...

Страница 158: ...BET007 Brake Coil Resistance 50 60 Ohms 11 Apply battery voltage to the brake assembly using fuse protected jumper leads as shown below The brake energizes to release Attempt to manually rotate the br...

Страница 159: ...3 Test the resistance of all three motor windings using an ohmmeter as shown below The resistances of each winding should be within 5 of each other An open or shorted winding indicates a faulty motor...

Страница 160: ...o an internal roller bearing assembly See Curtis 1232 LED Faults in the TROUBLESHOOTING section for encoder related faults The temperature sender senses the propel motor temperature Test the resistanc...

Страница 161: ...U V and W cables from Curtis 1232 controller as shown below 4 Reconnect battery connection and test each cable using an Ohmmeter for a short to battery as shown below Each cable should test as O L or...

Страница 162: ...ch cable should test as O L or open to chassis Replace shorted cable s PMT009 W U V W U V W U V 1 2 3 3 U V CHASSIS W 6 Volt 6 Volt 6 Volt 6 Volt 6 Volt 6 Volt 7 Test each cable using an ohmmeter for...

Страница 163: ...ly to the throttle brake sensor terminals A and D using a voltmeter as shown below The voltmeter should display battery voltage A B C D A B C D TBS002 VDC VDC FOR SAFETY Before leaving or servicing ma...

Страница 164: ...MODE P1 Curtis Online Error P2 Throttle XXXX X V P2 Throttle XXXX X V P3 Brake Pedal On Off P4 Direction Fwd Rev P5 Speed XXXX X Mph P6 Curtis Temp XXXX XC XXXX XF P7 Motor Temp XXXX XC XXXX XF P8 Pro...

Страница 165: ...mp Fuse PIN ASSIGNMENT 2 BLACK 1 BLACK 3 Reverse polarity and apply battery voltage to the lift actuator using fuse protected jumper leads as shown below Connect battery to terminal 1 and battery to t...

Страница 166: ...MSLA002 PIN ASSIGNMENT 2 RED 1 BLACK 3 Reverse polarity and apply battery voltage to the lift actuator using fuse protected jumper leads as shown below Connect battery to terminal 1 and battery to te...

Страница 167: ...10 Amp Fuse PIN ASSIGNMENT 2 BLUE 1 BROWN 3 Reverse polarity and apply battery voltage to the lift actuator using fuse protected jumper leads as shown below Connect battery to terminal 1 and battery t...

Страница 168: ...n Replace the vacuum fan if it fails to turn On VFM003 6 Volt 6 Volt 6 Volt 6 Volt 6 Volt 6 Volt 25 Amp Fuse 1 2 4 Reconnect vacuum fan s to wire harness See Manual Mode in the TROUBLESHOOTING section...

Страница 169: ...olt 6 Volt 6 Volt 6 Volt 25 Amp Fuse Replacement Carbon Brush Length 10mm 0 375 in 1 2 Disk 11mm 0 43 in Cyl 10mm 0 39 in 2 Carbon Brush Wear Limit 3 Apply battery voltage to the main brush motor s us...

Страница 170: ...Key Off Inspect carbon brushes Replace carbon brushes if they are shorter than 10mm 0 375 in PIN ASSIGNMENT 2 BLACK 1 RED SBM003 6 Volt 6 Volt 6 Volt 6 Volt 6 Volt 6 Volt 10 Amp Fuse Replacement Carb...

Страница 171: ...atch to time how long it takes to fill a 5 gallon bucket The open flow specification for the ec H2O pump is 1 35 GPM The pump should fill the 5 gallon bucket in approximately 3 5 4 0 minutes Replace t...

Страница 172: ...an ohmmeter between the common and normally open terminals The switch should test as O L or open Replace the switch if the N O contacts are shorted ECP004 1 2 3 U V W 6 Volt 6 Volt 6 Volt 6 Volt 6 Vol...

Страница 173: ...ve regarding our machine manuals If you find an error or have a suggestion please complete this postage paid form and mail it to us Thank you for helping us make zero defects a way of life at Tennant...

Страница 174: ...E NECESSARY IF MAILED IN THE UNITED SATES BUSINESS REPLY MAIL FIRST CLASS MAIL PERMIT NO 94 MINNEAPOLIS MN POSTAGE WILL BE PAID BY ADDRESSEE Technical Publications 15 701 North Lilac Drive P O Box 145...

Страница 175: ...ve regarding our machine manuals If you find an error or have a suggestion please complete this postage paid form and mail it to us Thank you for helping us make zero defects a way of life at Tennant...

Страница 176: ...E NECESSARY IF MAILED IN THE UNITED SATES BUSINESS REPLY MAIL FIRST CLASS MAIL PERMIT NO 94 MINNEAPOLIS MN POSTAGE WILL BE PAID BY ADDRESSEE Technical Publications 15 701 North Lilac Drive P O Box 145...

Страница 177: ......

Страница 178: ......

Отзывы: