2310/2330
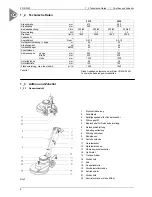
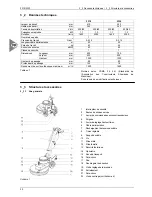
2 _3 Structure and accessories
15
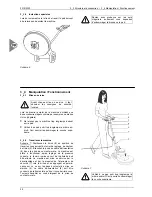
2 _3.2 Machine assembly
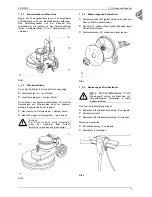
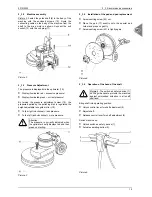
Picture 2: Fasten the guide shaft (8) to the body of the
machine with the enclosed screws (10). Route the
connecting cable on the body of the machine from the
shaft to the drive motor as shown. Connect the unit
socket (12) with the unit plug (11).
Picture 2
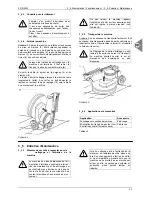
2 _3.3 Pressure Adjustment
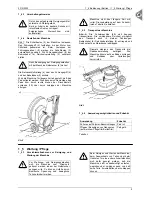
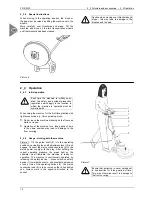
The pressure is displayed via the optimeter (14):
•
Display illuminated red = excessive pressure!
•
Display illuminated green = correct pressure!
By turning the pressure adjustment screw (19), the
pressure applied by the polishing disk is regulated the
height-adjustable twin guide roller (18).
•
To the right (clockwise) = less pressure.
•
To the left (anti-clockwise) = more pressure.
Attention:
The pressure is correctly adjusted when
the optimeter briefly displays red and then
green on starting.
Picture 3
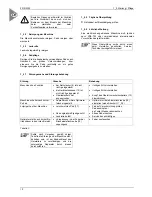
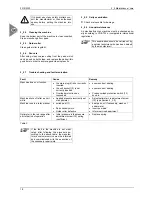
2 _3.4 Installation of the pad and pad replacement
•
Screw centring screw (22) out.
•
Place the pad (17) exactly onto the special pad
holder and press on gently.
•
Screw centring screw (22) in tightly again.
Picture 4
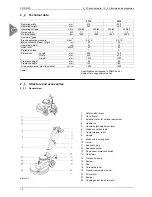
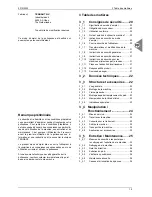
2 _3.5 Operation of the head of the shaft
Picture 5: The switch-on safety device (1)
on the guide handle protects the machine
against unintended actuation in all shaft
positions!
Bring shaft into operating position:
•
Unlock control lever for shaft adjustment (5),
•
Adjust shaft,
•
Release control lever for shaft adjustment (5).
Switch machine on:
•
Unlock switch-on safety device (1),
•
Actuate operating button (2).
Picture 5

