6
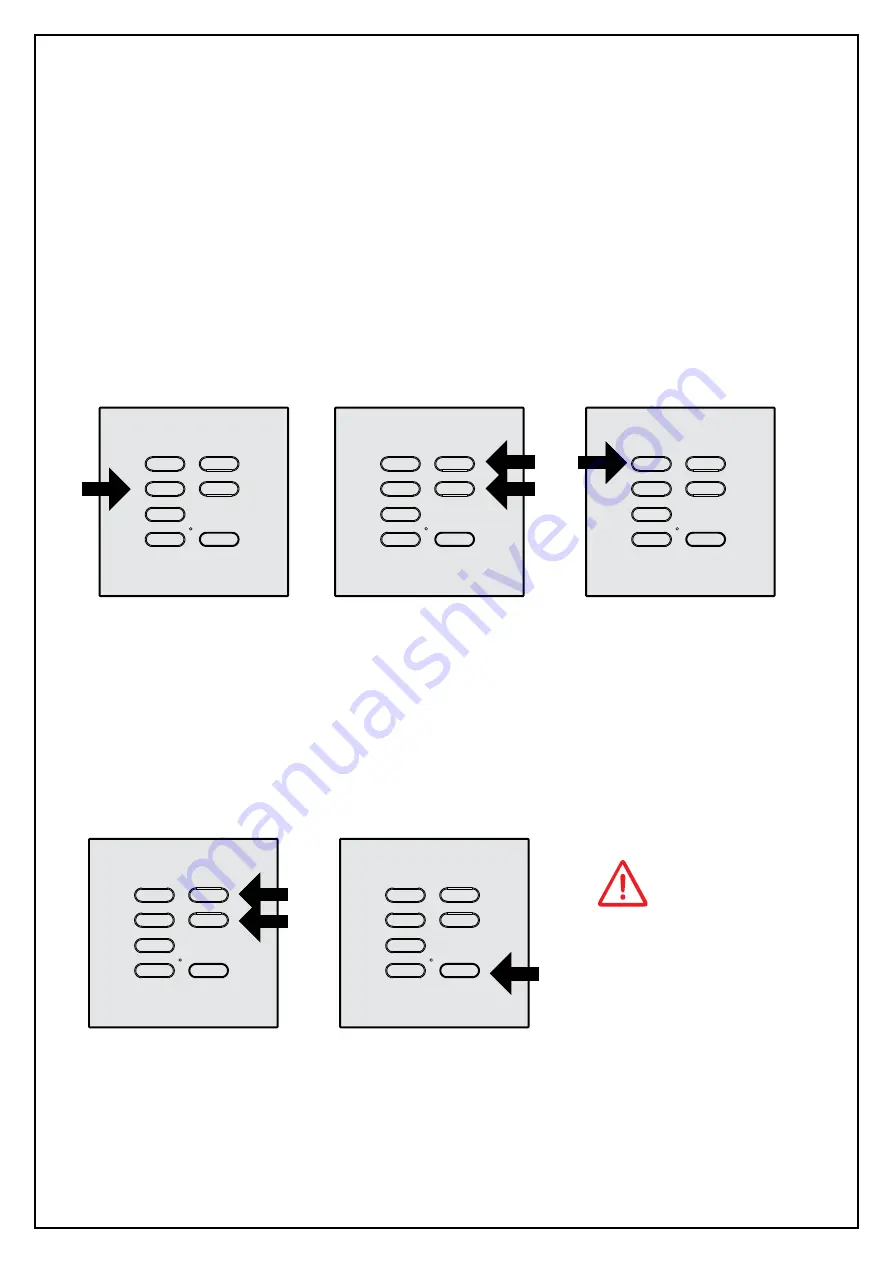
2- Press the push button Ch5 or Ch6
of the transmitter in order to select a
dimmer.
The selected dimmer will be the one
with the turned-off light;
If the light intensity of the selected
select the receiver
1- Press and hold one of the first
4 channels of the transmitter
concerned for 5 seconds down. The
light turning-off and turning-on.
press and hold down for 5s
3- Press the push button of the
scene which has to be modified.
The dimmer turns on at the
maximum value, while the others
remain turned-on and blocked.
press the push button to modified
CH1
CH2
CH3
CH4
CH1
CH2
CH3
CH4
5- Press the push button Ch7 OFF to exit and
memorise the new scene. The memorisation is
signalised by the turning-off and turning-on of
the charge at the memorised value.
With this operation all the other dimmers will
be unblocked and will return to the state in
point 2.
adjust new light value
press the push button
CH5
CH6
CH7
In order to modify the scene
of another dimmer, repeat the
points 2-6.
6. Press the push button Ch7
OFF to exit the procedure; all
lights will turn off.
transmitter
transmitter
transmitter
transmitter
transmitter
CH5
CH6
4- Set with the push buttons Ch5 and
Ch6 the new light value, or pushing
push button to be modify (ex. CH1)
it is possible to select the ON,
OFF(wait 3 sec for the turning off)
or Unaffected value (not working).
The passage from the OFF to the
Unaffected function is signalised by
one flash.
dimmer is above 50%, the light will turn off, otherwise if the light is lower than 50% the
light turns on and then turns off. In each dimmer is set an identification number which
corresponds to the number of pressings of the push button Ch5 (see “set the identification
number of a receiver”).
Case 2: (more receivers have memorised the same 7-channel transmitter)
In the case that several receivers have the same 7-channel transmitter memorised, and each receiver must have a
different value of light intensity, proceed with the programming of the identification number of the receiver. Once the
identification number is programmed it is possible to select the desired receiver by means of the push buttons.
To set an identification number of a receiver:
The identification number associated to the dimmer is displayed by means of the red led and green led: the flashings of
the green led represents the tens and the flashings of the red led represents the ones.
1. Press the push button P2 three times and hold it down the led flashes and the buzzer makes a beep each time you
press. Release the button.
2. After approximately one second the green led and the red led start flashing in order to indicate the identification
number associated to the receiver. For example: if the associated number is 13, the green led flashes once and the red
led flashes 3 times.
3. With a 7-channel transmitter (already memorized in the receiver) press push-button CH5 to increase the value if the
identification number or push-button CH6 to decrease it, to reach the number you want to associate to the dimmer. A
maximum of 20 identification numbers are allowed.
4. Memorize the set identification number and exit the procedure by pressing for more than 2 seconds push-button CH7,
or make a short push to exit without saving. The led will flash once.
This operation has to be done in every receiver that has the 7 channel transmitter in common.
If the procedure of
scenario changing does
not arrive to point 6, after
60 minutes the receiver
will return to normal
operation mode.


