Customizing The Board 5-7
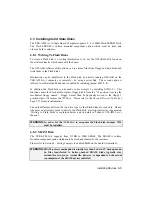
Follow these steps to setup VT100 mode:
•
Install SW1(5-6) to enable VT100 mode.
•
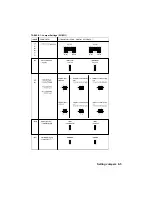
Setup the communications cable as follows:
Full cable configuration with all control lines can
be used to connect a VT100 terminal to COM1
or COM2.
If a full cable is not required, a partial cable using
only the TXD and RXD lines can be used. The
control lines are ignored by looping as shown
above.
• Boot up your terminal and set it up with the following parameters:
19200 Baud / 8 Bits / No Parity / Echo off (or full duplex)
F
Use CTRL-R to configure your system in VT100 mode.
Running Without a Terminal
To disconnect the VT100 terminal or to run without a terminal, ensure the control lines
are in an active state. Failing this, the system may "hang" while waiting for the control
lines to become active. Refer to partial cabling to remain the lines active.
Disabling VT100 mode allows the board to run without any console, then video card is not
necessary.
5.8.4
SW1(7-8) Enabling Serial Download Mode
Installing this jumper, enables Serial Download Mode; removing it disables Serial
Download Mode (default).
Содержание TEK-AT4L Plus
Страница 7: ...PRODUCT DESCRIPTION 1 PRODUCT OVERVIEW 2 ONBOARD SUBSYSTEMS...
Страница 9: ...Product Overview 1 2 TEK AT4LPLUS Block Diagram...
Страница 26: ...Installing Devices 6 3 CONNECTOR LOCATION...
Страница 35: ...Setting Jumpers 8 3 JUMPER LOCATIONS...
Страница 36: ...Setting Jumpers 8 5 TABLE 8 1 Jumper Settings W1 W11...
Страница 37: ...Setting Jumpers 8 6 TABLE 8 2 Jumper Settings W12 W19 W26...
Страница 38: ...Setting Jumpers 8 7 TABLE 8 3 Jumper Settings W20 W25 SW1 SW2...
Страница 41: ...APPENDICES A PRODUCT SPECIFICATIONS B BOARD DIAGRAMS C CONNECTOR PINOUTS...
Страница 43: ...Board Diagrams B 1 B 1 TEK AT4LPLUS Assembly Diagram Top View...
Страница 44: ...Board Diagrams B 3 B 2 TEK AT4LPLUS Mounting Holes...
Страница 45: ...Board Diagrams B 5 B 3 TEK AT4LPLUS Mechanical Specifications...


