74
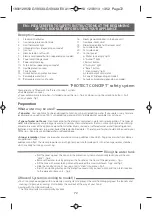
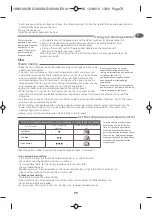
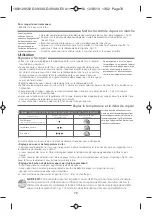
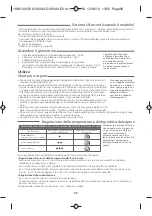
Recommendations: for
fabrics other than linen or
cotton, hold the iron a
few centimetres from the
garment to avoid burning
the fabric.
MODE ECO:
Your steam generator iron has an ECO mode function which uses less power whilst still guaranteeing a
sufficient steam flow for you to iron your garments properly. In order to use this function, once the
thermostat of your iron has been correctly set (see table above), position the steam flow setting on the
ECO segment
-
fig.17
.
Using the Eco mode will allow you to press fabrics at minimum temperature ••.
However, for very thick or wrinkled fabrics, we recommend using the maximum temperature in order to
guarantee best results.
Dry ironing
- Do not press the steam control button under the iron handle.
Vertical steam ironing
• Set the iron temperature control slide and the steam output control dial (located on the
control panel) to the MAX position.
• Hang the garment on a coat hanger and hold the fabric slightly taut with one hand.
As steam is very hot : never attempt to remove creases from a garment while it is being
worn, always hang garments on a coat hanger.
• Holding the iron in a vertical position, tilted slightly forwards, press repeatedly on the steam
control button (underneath the iron handle) moving the iron from top to bottom – fig.9.
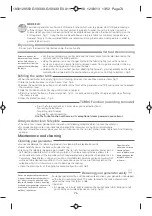
Refilling the water tank
• When the red "water tank empty" light starts flashing, it means that you have no more steam.fig.11.
1.Close the protection cover until you hear a “click”. fig.2.
2.Remove the water tank by pulling on the handle (at the front of the generator) and fill it, taking care not to exceed
the maximum level.
3. Slide the tank back into its housing until its clicks into place.
4. Press the “restart” button on the control panel – fig.12. to continue ironing. When the green light stops flashing,
the steam is ready.
5. Open the protection cover – fig.3.
TURBO Function (according to model)
• Press the Turbo control 2 or 3 times when you need extra steam:
- for ironing thicker fabrics,
- for getting rid of creases,
- for powerful vertical steaming.
Use the Turbo function with care as its exceptional steam power can cause burns.
Catalysis Autoclean Soleplate
• The iron of your steam generator comes with a self-cleaning soleplate which functions by catalysis.
• Its unique coating makes it possible to eliminate all the impurities arising from normal usage.
• We recommend you always place your iron on its base or on the iron rest plate in order to protect its self-cleaning
coating.
Maintenance and cleaning
Cleaning your generator
• Do not use detergent or descaling products for cleaning the soleplate base-unit.
• Never hold the iron or the base unit under the tap.
• Cleaning the soleplate (depending on model): The iron of your steam generator comes with a
self-cleaning soleplate which functions by catalysis. Its unique coating actively allows it to
continually eliminate all the impurities which are generated every day when the appliance is in
normal use. Nevertheless, using your iron at an unsuitable temperature can leave marks which
will need to be cleaned manually. In this case we advise you to use a soft damp cloth on the
soleplate whilst it is still warm so as not to damage the coating.
• Clean the plastic parts of the appliance occasionally with a soft cloth.
Descaling your generator easily
:
For longer generator life, and to avoid scale emissions, your generator is equipped
with a built-in anti-scale valve. This valve, located in the tank, automatically
removes the scale that forms inside.
Operation:
• An orange “anti-scale” light located on the control panel starts blinking to tell
you that the anti-scale valve needs rinsing - fig.14
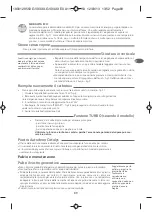
Cleaning tip: For
easier, non-corrosive
cleaning of your
iron’s soleplate, use a
damp sponge on the
soleplate while it is
still warm.
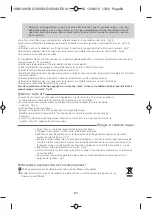
Do not use any descaling substances
(vinegar, industrial descaling products,
etc.) when rinsing the anti-scale valve :
they could damage it. Before descaling
or cleaning your generator, you must let
it cool down for at least 2 hours to
avoid any risk of burns.
1800129550 GV93XX-GV94XX E0 A11_110x154 12/03/13 13:52 Page74
Содержание ANTI-CALC AUTOCLEAN
Страница 1: ...1800129550 09 13 GTH GV93XX GV94XX 1800129550 GV93XX GV94XX E0 A11_110x154 12 03 13 13 51 Page1...
Страница 6: ...1800129550 GV93XX GV94XX E0 A11_110x154 12 03 13 13 51 Page6...
Страница 37: ...31 EL 1800129550 GV93XX GV94XX E0 A11_110x154 12 03 13 13 51 Page31...
Страница 38: ...32 8 8 8 1 2 1800129550 GV93XX GV94XX E0 A11_110x154 12 03 13 13 51 Page32...
Страница 39: ...33 2 220 240 V 16A 1800129550 GV93XX GV94XX E0 A11_110x154 12 03 13 13 51 Page33...
Страница 52: ...46 RU 1800129550 GV93XX GV94XX E0 A11_110x154 12 03 13 13 51 Page46...
Страница 53: ...47 8 8 8 1 1800129550 GV93XX GV94XX E0 A11_110x154 12 03 13 13 51 Page47...
Страница 54: ...48 2 2 1800129550 GV93XX GV94XX E0 A11_110x154 12 03 13 13 51 Page48...
Страница 55: ...49 220 240 V 16 1800129550 GV93XX GV94XX E0 A11_110x154 12 03 13 13 51 Page49...
Страница 56: ...50 UK 1800129550 GV93XX GV94XX E0 A11_110x154 12 03 13 13 51 Page50...
Страница 57: ...51 8 8 8 1800129550 GV93XX GV94XX E0 A11_110x154 12 03 13 13 51 Page51...
Страница 58: ...52 1 2 1800129550 GV93XX GV94XX E0 A11_110x154 12 03 13 13 51 Page52...
Страница 59: ...53 2 220 240 16 1800129550 GV93XX GV94XX E0 A11_110x154 12 03 13 13 51 Page53...
Страница 152: ...146 auto off Restart 8 Restart Restart 1800129550 GV93XX GV94XX E0 A11_110x154 12 03 13 13 52 Page146...
Страница 158: ...152 auto off Restart a Restart Restart i i i i i 1800129550 GV93XX GV94XX E0 A11_110x154 12 03 13 13 52 Page152...
Страница 174: ...168 1800129550 GV93XX GV94XX E0 A11_110x154 12 03 13 13 52 Page168...
Страница 175: ...169 1800129550 GV93XX GV94XX E0 A11_110x154 12 03 13 13 52 Page169...
Страница 176: ...170 1800129550 GV93XX GV94XX E0 A11_110x154 12 03 13 13 52 Page170...
Страница 178: ...172 03 21012 1800129550 GV93XX GV94XX E0 A11_110x154 12 03 13 13 52 Page172...

