background image

BS80FE7 / BS80IE7 


Pag.

25


WARNINGS AND HINTS FOR USER 


This manual contains all the instructions required for a proper and safe use of our appliances. 


Keep the manual in a safe place for future consultation! 

-


This appliance is for catering use, hence they must be used only by trained kitchen staff. 

-


The appliance must always be kept under control during use. 

-


Tilting cookers are ideal for preparing cream and custards, delicate dishes and sauces as it ensures a specific temperature regulation (from 50 
to 200 °C) and the operator can follow the cooking cycle without difficulties.  


-


The manufacturer shall not be held responsible for injuries or damage due to the non-compliance with safety rules or an 

improper use of the appliance by the operator.  

-


Some improper operating conditions may even be caused by an improper use of the appliance, therefore it is important to train personnel 
properly. 

-


All the installation and maintenance operations must be performed by fitters who are members of an official register. 

-


Respect the periods required for maintenance. With this is mind, customers are recommended to sign a service agreement. 

-


In case of failures concerning the appliance, all outputs (electrical power supply and water) must be cut off instantly. 

-


In case of recurrent failures contact a service technician. 

INSTRUCTIONS FOR USE 

-


Before cooking with the appliance for the first time wash the interior of the cooking vat thoroughly. 


-


Fill the cooking vat up to a maximum of 40 mm under the overflow border, according to the maximum level mark, including 

the food to be cooked. 

SWITCH ON 

Activate the main switch, placed before the appliance.  
Starting from position “

0

” turn the thermostat knob to desired temperature between 

45°

 and 

295°C

: the signal lamps will light , the green one 

indicates that the appliance is on and the orange one indicates that heating elements are on; when the desired temperature is reached this signal 
lamp will go out.


Emptying the cooking vat: 

The tilting of the pan is made by means of an handwheel placed on the RH side of the front panel. Turning the handwheel anti-clockwise the pan 
goes up, turning it clockwise the pan goes down.


CLEANING AND CARE OF THE APPLIANCE 

-


Do not use aggressive substances or abrasive detergents when cleaning the stainless steel components. 

-


Avoid using metal pads of the steel parts as they may cause rust. For the same reason avoid contact with materials containing iron. 

-


Do not use sandpaper or abrasive paper for cleaning; in special cases use a powder pumice stone. 

-


In case of particularly resistant dirt, it is advisable to use abrasive sponges (e.g. Scotch-Brite). 

-


It is advisable to clean the appliance only once it has cooled down. 

DAILY CLEANING 


-


When cleaning the appliance never use direct jets of water to prevent infiltration of the liquid and damage to components.   

-


Clean the cooking vat with water and a detergent, rinse thoroughly and dry well with a soft cloth. 

-


External surfaces should be washed down using a sponge, and hot water with a suitable proprietary cleaner addend. 

-


Rinse always thoroughly and dry with a soft cloth. 

SPECIAL PROCEDURES IN CASE OF PROLONGED INACTIVITY 

-


If the appliance is to stand idle for any length of time (e.g. holidays or seasonal closing) it must be cleaned thoroughly, leaving not traces of food 
or dirt.  

-


Leave the lid open so that air can circulate inside the vat. 

-


For added care after cleaning, the external surfaces can be protected by applying a proprietary metal polish. 

-


Be absolutely certain to shut off all utilities (electrical power supply and water). 

-


Air the room appropriately. 


Содержание BS80FE7

Страница 1: ...hs und Wartungsanleitung Notice d emploi et de maintenance Manual de instrucciones para el uso y mantenimiento Mod BS80FE7 BS80IE7 IT BRASIERE ELETTRICHE GB IE ELECTRIC TILTIMG COOKER DE AT CH ELEKTRISCHE KIPPBRATPFANNEN РУ ОПРОКИДЫВАЮЩИЕСЯ ЭЛЕКТРИЧЕСКИЕ СКОВОРОДЫ FR BRAISIERES ELECTRIQUES ES CACEROLAS ELECTRICAS VOLCABLE ...

Страница 2: ...tamente come friggitrice DATI TECNICI TABELLA 1 PARTE ELETTRICA Modello Dimensioni esterne cm Tensione di alimentazione Cavo alimentazione mm2 Potenza totale kW BS80FE7 BS80IE7 80 70 90 3 N PE AC 400 V 5 2 5 8 7 Trasformabile in 3 PE AC 230V con cavo di alimentazione sez 4 4mm2 TABELLA 2 CARATTERISTICHE DELLA VASCA DI COTTURA Modello Dimensioni cm Capacità utile della vasca livello max litri Super...

Страница 3: ...solamento termico adeguato L apparecchio deve essere messo a bolla Piccoli dislivelli possono essere eliminati agendo sui piedini regolabili avvitare o svitare Dislivelli di una certa importanza possono influire negativamente sul funzionamento dell apparecchio INSTALLAZIONE Solo personale qualificato è abilitato ad eseguire l installazione la manutenzione e la messa in funzione dell apparecchio Pr...

Страница 4: ... in tutte le sue parti e sottoporre lo stesso alla firma del cliente per accettazione questa avvia il periodo di garanzia dell apparecchio MANUTENZIONE DELL APPARECCHIO Tutti i lavori di manutenzione devono essere eseguiti esclusivamente da un servizio di assistenza tecnica qualificato Per mantenere l apparecchio efficiente si deve effettuare una volta all anno una manutenzione che comprende il co...

Страница 5: ... tra 45 e 295 C le lampade spia si accendono quella verde indica che l apparecchio è in tensione quella arancione indica che le resistenze sono inserite non appena si raggiunge la temperatura questa lampada spia si spegne Svuotamento della vasca di cottura Il dispositivo di ribaltamento serve a facilitare lo svuotamento della vasca Questo dispositivo viene azionato dal volantino posizionato sul la...

Страница 6: ...asca Per agevolare la sostituzione ruotare la vasca nella max apertura Togliere la protezione isolamento in lamiera svitando le viti di fissaggio alla vasca Togliere il pannello di protezione delle resistenze Togliere la piastra di supporto resistenza dalla resistenza guasta Montare la nuova resistenza nella sequenza inversa SOSTITUZIONE DELLE SPIE LUMINOSE Scollegare i cavi di alimentazione Sfila...

Страница 7: ...fritieren verwenden TECHNISCHE DATEN TABELLE 1 ELEKTRISCHE AUSRÜSTUNG Modell Außen abmessungen In cm Nennspannung Speisekabel in mm2 Gesamt Wärme Belastung in kW BS80FE7 BS80IE7 80 70 90 3 N PE AC 400 V 5 2 5 8 7 Umstellbar in 3 PE AC 230V mit Speisekabel sekt 4 4mm2 TABELLE 2 EIGENSCHAFTEN DES BRATBECKENS Modell Abmessungen cm Innenfassungs Vermögen der Wanne Höchst niveau Liter Superficie dm2 Ro...

Страница 8: ...muß waagerecht aufgestellt werden kleinere Unebenheiten des Aufstellbodens können durch die höhenverstellbare Füßen ein bzw ausschrauben ausgeglichen werden Neigungen und größere Unebenheiten können sich nachteilig auf die Funktion des Gerätes auswirken INSTALLATION Installations und Anschlußarbeiten Inbetriebnahme und Wartung dürfen nur von qualifiziertem Fachpersonal durchgeführt werden Bevor je...

Страница 9: ...hrift vorgelegt werden Die Garantiezeit beginnt mit Unterzeichnung WARTUNG DES GERÄTS Alle Wartungsarbeiten dürfen nur durch einen qualifizierten Kundenservice durchgeführt werden Zur Aufrechthaltung muß das Gerät mindestens einmal im Jahr einer Wartung unterzogen werden Die Wartung umfasst die Kontrolle des Zustands von Einzelteilen die Verschleissungen unterstehen Zufuhrleitungen elektrische Ein...

Страница 10: ...t am Stromnetz verbunden ist das orange Licht weist darauf hin daß die Heizelemente eingeschalten sind Dieses Licht löscht aus sobald die gewünschte Temperatur erreicht wird KIPPVORRICHTUNG Die Kippvorrichtung erleichtert das Entleeren des Beckens Diese Vorrichtung wird durch das Handrad betätigt das rechts an der Frontseite angebracht ist Wenn Sie es gegen den Uhrzeigersinn drehen geht das Becken...

Страница 11: ... Befestigungsschrauben am Becken öffnen Entfernen Sie die Heizelementschutztafel Entfernen Sie die Heizelementstützplatte des ausgefallenen Heizelements Setzen Sie das neue Heizelement ein indem Sie die Arbeitschritte in umgekehrter Reihenfolge wiederholen AUSTAUSCH DER SIGNALLAMPEN Ziehen Sie die Speisekabel ab Nehmen Sie die Lampe heraus indem Sie die Plastikbefestigungsmutter aufschrauben Monti...

Страница 12: ... фритюрницы ТЕХНИЧЕСКИЕ ДАННЫЕ ТАБЛИЦА 1 ЭЛЕКТРИЧЕСКАЯ ЧАСТЬ Moдель Внешние размеры cм Напряжение Провод питания мм2 Общая мощность kW BS80FE7 BS80IE7 80 70 90 3 N PE AC 400 V 5 2 5 8 7 Трансформируется в 3 PE AC 230V с проводом питания разрезом 4 4мм2 ТАБЛИЦА 2 ХАРАКТЕРИСТИКИ ЕМКОСТИ ГОТОВКИ Moдель Размеры cм Полезная вместимость емкости макс уровень литры Поверхность дм2 Угол поворота емкости Ми...

Страница 13: ...изоляционным материалом Оборудование должно быть установлено на одном уровне Небольшая разница по высоте может быть устранена с помощью регулирования ножек закручивание или раскручивание Большая разница в высоте между модулями может негативно отразится на работе оборудования УСТАНОВКА Только квалифицированный персонал должен заниматься установкой обслуживанием и подключением оборудования Прежде че...

Страница 14: ...ных испытаний по всем пунктам и представить его на подпись клиенту для запуска гарантийных обязательств ОБСЛУЖИВАНИЕ ОБОРУДОВАНИЯ Все работы по обслуживанию должны проводиться квалифицированным техническим персоналом Для поддерживания эффективности оборудования необходимо один раз в год проводить работы по обслуживанию оборудования состоящие в контроле наиболее используемых компонентов проводных т...

Страница 15: ...указывает наличие напряжения в оборудовании оранжевая лампочка указывает работу тасположенных внизу ТЭНов как только оборудование достигает установленной температуры оранжевая лампочка гаснет Слив емкости приготовления Команда опрокидывания необходима для облегчения слива емкости Эта команда активизируется с помощью колеса расположенного в правой части фронтальной панели При повороте колеса против...

Страница 16: ...ирующий рычаг поднятия емкости стержень Для удобства замены привести емкость в состояние максимального открытия Снять защитную панель развинчивая фиксирующие болты емкости Снять защитную панель ТЭНов Снять поддерживающую панель со сломанного ТЭНа Установить новый ТЭН в обратном порядке ЗАМЕНА ЛАМПОЧЕК Отсоединить провода питания Снять лампочку развинчивая пластмассовый болт блокирующий поддерживаю...

Страница 17: ...ERISTIQUES TECHNIQUES TABLEAU 1 CÔTÉ ÉLECTRIQUE Modèle Dimensions externe cm Tension d alimentation Câble d alimentation mm2 Puissance totale kW BS80FE7 BS80IE7 80 70 90 3 N PE AC 400 V 5 2 5 8 7 Transformable en 3 PE AC 230V avec câble d alimentation sez 4 4 mm2 TABLEAU 2 CARACTERISTIQUE DE LA CUVE DE CUISSON Modèle Dimensions cm Capacité utile de la cuve niveau max Litres Superficie dm2 Angle de...

Страница 18: ...ans le cas d installation à contact direct avec des parois inflamables on conseille l application d un isolement adequat L appareil doit être mis de niveau les petits dénivelés sont compensables par les pieds réglables visser ou dévisser Les dénivelés plus importants peuvent porter préjudice au fonctionnement de l appareil INSTALLATION Avant de commencer l installation vérifier si l appareil est p...

Страница 19: ...édiatement la garantie de appareil ENTRETIEN DE L APPAREIL Les opérations d entretien sont réservées esclusivement à un service d assistance technique qualifié Afin de conserver longtemps les performances de l appareil il est recommandé d effectuer une intervention de manutention une fois par an Cette opération consiste à vérifier l état des composants soumis à usure les tuyauteries d alimentation...

Страница 20: ...entre 45 et 295 C le temoin lumineux s allument la verte indique que l appareil est sous tension celle orange indique que les resistances sont inserees des que la temperature desiree est atteinte ce temoin lumineux s eteind Vidange de la cuve de cuisson Le dispositif de renversement sert à faciliter la vidange de la cuve Ce dispositif est actionné par un petit volant situé sur le côté droit dans l...

Страница 21: ...de bord antérieur fixe que le pivot de bloccage du soulèvement de la cuve Pour faciliter le remplacement tourner la cuve en position maximum de l ouverture Enlever la protection isolante en lamière dévissant les vis de fixage à la cuve Enlever le panneau de protection des résistances Enlever la plaque de support résistances de la résistance en panne Monter la nouvelle résistance REMPLACEMENT DES T...

Страница 22: ...intenance operations Not used absolutly as frying mode Follow the fire prevention regulations very carefully TECNICAL DATA TABLA 1 ELECTRIC PARTS Model External dimension cm Electrics Electric cable mm2 Total power kW BS80FE7 BS80IE7 80 70 90 3 N PE AC 400 V 5 2 5 8 7 Convertible to 3 PE AC 230V with electric cable sez 4 4mm2 TABLA 2 COOKING PANS CHARACTERISTICS Model Dimensions cm Pan capacity li...

Страница 23: ...lammable walls it is advisable to fit a suitable heat insulation The appliance must stand level Small differences in level can be eliminated by screwing or unscrewing the adjustable feet A significantly uneven or sloping stance can affect the operation of the appliance adversely INSTALLATION Before connecting any parts of the appliance to supplies make sure that the latter is equivalent the requir...

Страница 24: ...mpleted in full and submitted to the customer who should then sign in acceptance With effect from this moment the appliance is covered by the manufacturer s warranty MAINTENANCE OF THE APPLIANCE All maintenance operations shall only be performed by a technically qualified service centre To ensure correct and safe operation the appliance must be inspected and serviced at least once a year only Main...

Страница 25: ...to desired temperature between 45 and 295 C the signal lamps will light the green one indicates that the appliance is on and the orange one indicates that heating elements are on when the desired temperature is reached this signal lamp will go out Emptying the cooking vat The tilting of the pan is made by means of an handwheel placed on the RH side of the front panel Turning the handwheel anti clo...

Страница 26: ...he insulation protection unloosing the fixing screws to the pan Remove the protection panel of heating elements Remove the heating element support plate from damaged heating element Fit the new heating element operating in the opposite order REPLACEMENT OF SIGNAL LAMP Disconnect the power cables Remove the signal lamp unscrewing the fixed to the control pane Fit the new signal lamp in the reverse ...

Страница 27: ... pueden freir en aceite CARACTERÍSTICAS TÉCNICAS TABLA 1 PARTE ELETTRICA Modelo Dimensiones externas cm Tensiòn de alimentaciòn Cablevo alimentaciòn mm2 Potencia total kW BS80FE7 BS80IE7 80 70 90 3 N PE AC 400 V 5 2 5 8 7 Trasformabile in 3 PE AC 230V con cable de alimentaciòn sez 4 4 mm2 TABLA 2 CARATERISTICAS DE LA CUBA DE COCCION Modelo Dimensiones cm Capacidad de la cuba nivel màx litri Superf...

Страница 28: ...plicar un aislam iento térmico adecuado Para poder funcionar correctamente el apparato debe estar bien nivelado Corregir los desniveles pequeños enroscando o desenroscando las patas regulables Los deniveles y la pendiente pueden afectar el funcionamiento del aparato INSTALACIÓN Antes de emprender cualquier operación de conexión averigüe la correspondencia entre los valores de red y las indicacione...

Страница 29: ... evita que se tenga que volver a llamar el servicio posventa por averías imprevistas del aparato Se aconseja suscribir un contrato de mantenimiento con el cliente AVERIAS POSIBLES Y ELIMINACION DE LAS MISMAS Solamente un servicio posventa cualificado puede actuar como se indica a continuación Antes de rearmar el termostato de seguridad eliminar siempre la causa que ha provocado su actuación Alguno...

Страница 30: ...rmostato en 0 a la temperatura que se desee comprendida entre 45 y 295 las bombillas de aviso se encienden la verde indica que el aparato està bajo tensiòn la anaranjada indica que las resistencias estàn conectadas en cuanto se alcance la temperatura esta bombilla de aviso se apaga Vaciado de la cuba de cocciòn El dispositivo de inclinaciòn sirve para hacer màs fàcil el vaciado de la cuba Este dis...

Страница 31: ...cil el reemplazo girar la cuba a la abertura màxima Quitar la protecciòn de aislamiento de chapa tras aflojar los tornillos de fijaciòn de la cuba Quitar el panel de protecciòn de las resistencias Quitar la placa de soporte de las resistencia averiada Montar la resistencia nueva siguiendo los mismos pasos al revés SUBSTOTUCION DE LAS BOMBILLAS DE AVISO Desconectar los cables de alimentaciòn A floj...

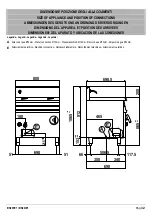
Страница 32: ...MENSIONES1 DEL APARATO Y UBICACION DE LAS CONEXIONES Legenda Legend Legende Legende Leyenda A Attacco acqua Ø12mm Water connection Ø12mm Wasseranschluß Ø12mm Raccord eau Ø12mm Empalme agua Ø12mm E Allacciamento elettrico Electrical connection Netzanschlußklemme Raccordement électrique Allacciamento elettrico 912 865 1065 698 51 51 153 340 350 690 506 5 117 5 66 200 800 698 5 E 180 215 E 465 40 20 ...

Страница 33: ...corsa Microinterrupteur Heizelement Microinterrupteur Microinterruptor C1 Teleruttore Elektromagnetic switch Fernschalter Télérupteur Telerruptor R1 Resistenza Heating element Endschalter Résistance Resistencia L1 Lampada spia verde Green signal lamp Grüne Signallampe Témoin lumineux vert Luz testigo verde F3 Fusibile 3 15A Fuse 3 15A Schmelzsicherung 3 15A Fusible 3 15A Fusible 3 15A L2 Lampada s...

Страница 34: ...upteur Microinterruptor C1 Teleruttore Elektromagnetic switch Fernschalter Télérupteur Telerruptor R1 Resistenza Heating element Endschalter Résistance Resistencia L1 Lampada spia verde Green signal lamp Grüne Signallampe Témoin lumineux vert Luz testigo verde F3 Fusibile 3 15A Fuse 3 15A Schmelzsicherung 3 15A Fusible 3 15A Fusible 3 15A L2 Lampada spia arancione Orange signal lamp Orange Signall...

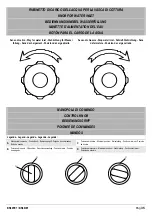
Страница 35: ...carga cerrado MANOPOLA DI COMANDO CONTROL KNOB BEDIENUNGSGRIFF POIGNEE DE COMMANDES MANDOS Legenda Legend Legende Legende Leyenda A Manopola di comando Control knob Bedienungsgriff Poignée de commandes Botón de mando C Posizione di minimo Minimum position Kleinstellung Position minimum Posición de mínimo B Posizione di spento Off position Geschlossenstellung Position éteinte Posición de apagado D ...

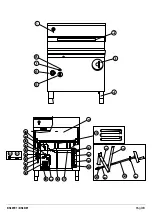
Страница 36: ...BS80FE7 BS80IE7 Pag 36 350 3 4 1 2 8 6 5 7 23 20 21 27 26 10 19 25 21 23 15 13 16 12 14 11 18 11 12 13 14 15 16 28 22 17 9 24 ...

Страница 37: ...ances presented in this publication without notice Der Hersteller behält sich das Recht vor die in dieser Broschüre vorgelegten Geräten ohne Voranzeige zuändern Le Fabricant se réserve le droit de modifier sans préavis les caractéristiques des appareils présentés dans cette publication El Fabricante se reserva el derecho de modificar sin previo aviso las características de los aparatos presentados...

Отзывы: