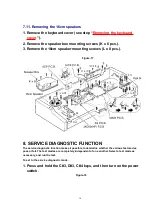
7.4. Removing the keyboard assembly
1. Remove the control panel (see step “
Removing the control panel
).
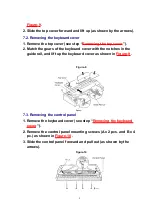
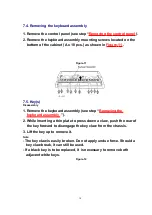
2. Remove the keyboard assembly mounting screws located on the
bottom of the cabinet (A x 10 pcs.) as shown in
Figure-11
.
Figure-11
7.5. Key(s)
Disassembly
1. Remove the keyboard assembly (see step “
Removing the
keyboard assembly
”).
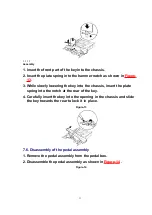
2. While inserting a thin plate to press down a claw, push the rear of
the key forward to disengage the key claw from the chassis.
3. Lift the key up to remove it.
Note:
- The key claw is easily broken. Do not apply undue force. Should a
key claw break, it can still be used.
- If a black key is to be replaced, it is necessary to remove both
adjacent white keys.
Figure-12
10
Содержание SX-PR603/M
Страница 33: ...C15 ECCR1H100D5 10PF 1 AS 33...
Страница 38: ...D12 MA165 DIODE 1 MKB1 38...
Страница 47: ...L8 QLQGT1D600MA COIL 1 AS 47...
Страница 50: ...50...
Страница 59: ...59...
Страница 60: ...60...
Страница 61: ...18 PACKAGING 61...
Страница 62: ...Printed in Japan S000600000 HM AM 62...


