8-1
8. REPLACING THE HEAD UNIT/ INK CARTRIDGE
EO1-13013
CART-
RIDGE
POWER
FEED
RESET
SLIP
INKOUT
POWER
ERROR
8. REPLACING THE HEAD UNIT/ INK CARTRIDGE
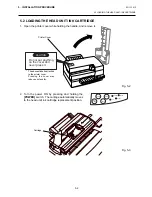
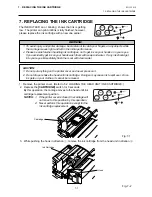
1. Turn the power ON by pressing and holding the [POWER]
switch.
Fig. 8-1
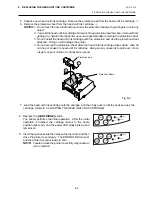
Head Unit/ Ink Cartridge
Hook
Carriage
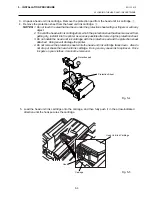
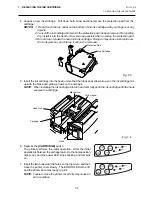
2. Remove the printer cover. (Refer to 5.2 LOADING THE HEAD UNIT/ INK CARTRIDGE.)
3. Depress the [CARTRIDGE] switch for 3 seconds. By this operation, the carriage moves to the head
unit/ ink cartridge replacement position. (Refer to 7. REPLACING THE INK CARTRIDGE)
NOTES: 1. If the printer cover is closed, the carriage will not move to this position by this operation.
2. Never perform this operation except for the head unit/ ink cartridge replacement.
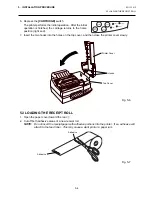
4. Remove the head unit/ ink cartridge from the carriage while pulling up the hook in the arrow-indicated
direction.
8. REPLACING THE HEAD UNIT/ INK CARTRIDGE
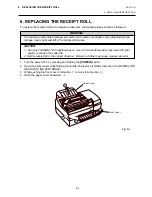
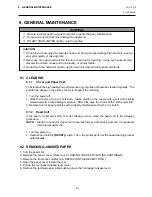
If the head unit gets dirty or a dot missing occurs, clean the head unit. (Refer to 9.1 CLEANING)
If these phenomena still remain, replace the head unit/ ink cartridge with a new one by the following
procedure.
WARNING!
1. To avoid injury and printer damage, be careful not to catch your fingers or any objects while the
carriage moves right and left in the initial performance.
2. Please be careful when handling ink cartridges, not to get ink on your hands or in your eyes. If
you accidently get ink on your hands wash them with soap and water. If any ink should get into
your eyes immediately flush them out with clear water.
3. Never touch the metal portion of the head unit/ ink cartridge. Doing so will injure your fingers.
CAUTION:
1. Do not put anything on the printer cover and never press on it.
2. Do not drop or shake the head unit/ ink cartridge. Doing so may cause ink to spill over. Once
ink gets on your clothes, it cannot be removed.
Содержание BRST-10 SERIES
Страница 1: ...TEC Ink Jet Printer BRST 10 SERIES Owner s Manual ...
Страница 27: ......
Страница 28: ...TEC ...


